EMAIL SUPPORT
dclessons@dclessons.comLOCATION
USSetting UCS Emulator
UCS platform Emulator can be freely downloaded from Cisco Website. In order to download it, you must have valid CCO account and login. UCS emulator is also available on Cisco Communities website (https://communities.cisco.com) and from there it can be downloaded and can be installed under various virtualization platform.
System Requirement
Below is the Minimum System requirement for installing UCS Emulator:
- 8 GHZ single core CPU
- 2 GB free RAM
- 20 GB free disk space
- Mozilla-compatible browser (Firefox or Chrome)
- Java Runtime Environment 1.6
Hypervisor Prerequisites
UCSPE can be installed on following Type 1 and Type 2 hypervisor Platforms.
- VMware Player 4.0 and higher (Windows and Linux Versions)
- VMWare Fusion 4.0 and higher for Apple macOS
- VMWare Workstation 7 and higher (Windows and Linux Versions)
- VMWare vSphere ESXi 4.0 and higher
- Microsoft Hyper-V Server
Installing UCSPE on VMWare Workstation player using OVA file
UCSPE can be installed via OVA file on VMWare Workstation player with the below steps:
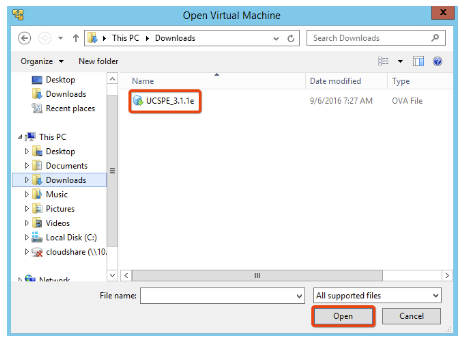
- Download the OVA file.
- In VMware Workstation Player, click on Open a Virtual File, and select the OVA file:
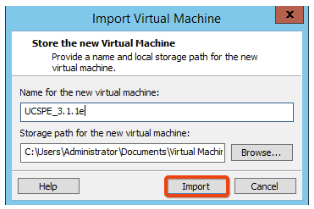
VMware Workstation Player will detect the OVA file and will ask where the UCSPE VM should be extracted to. Select an appropriate folder on the local system and click on Import
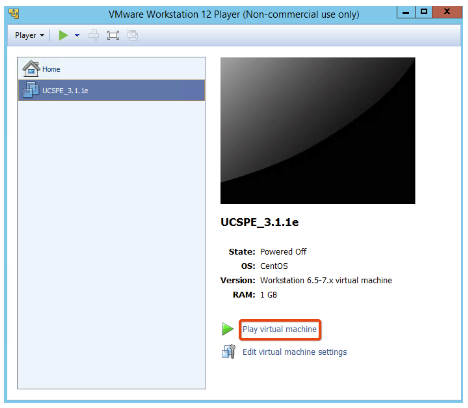
VMware Workstation Player will show the OVA import progress, which may take few minutes. Once the import is complete, the VM can be played from VMware Player by clicking on Play virtual machine
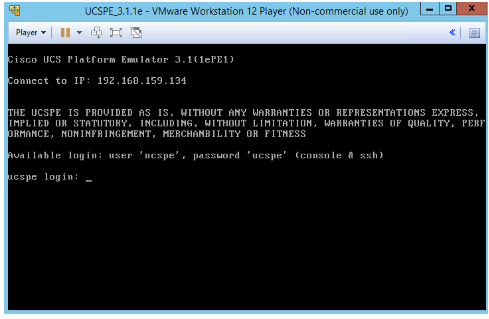
The console will display the automatic configuration of UCSPE and will assign an IP address. Use the default login credentials, username ucspe and password ucspe:
About Cisco UCSPE
UCSPE is packaged on CentOS Linux-based VM. Once UCSPE is operational, it can be managed via web browser or through a VM console CLI session. UCSM 3.1 now has added support for an HTML5 interface in addition to previous java-based interface.
In order to access Web Based Interface, Access the management cluster IP of UCSM on web browser, as shown below.
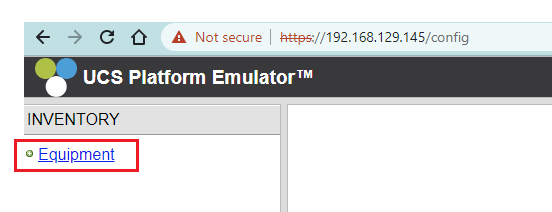
Web interface is divided in to two main panes. Left hand side is navigation pane and right hand side is main work pane. Navigation pane has the Equipment tab and is used to manage UCSPE features, hardware inventory, System reboots and launch UCS Manager.
Work pane has two options: to launch UCSM Manager or KVM Manager using Java-based interface or HTML5 interface.
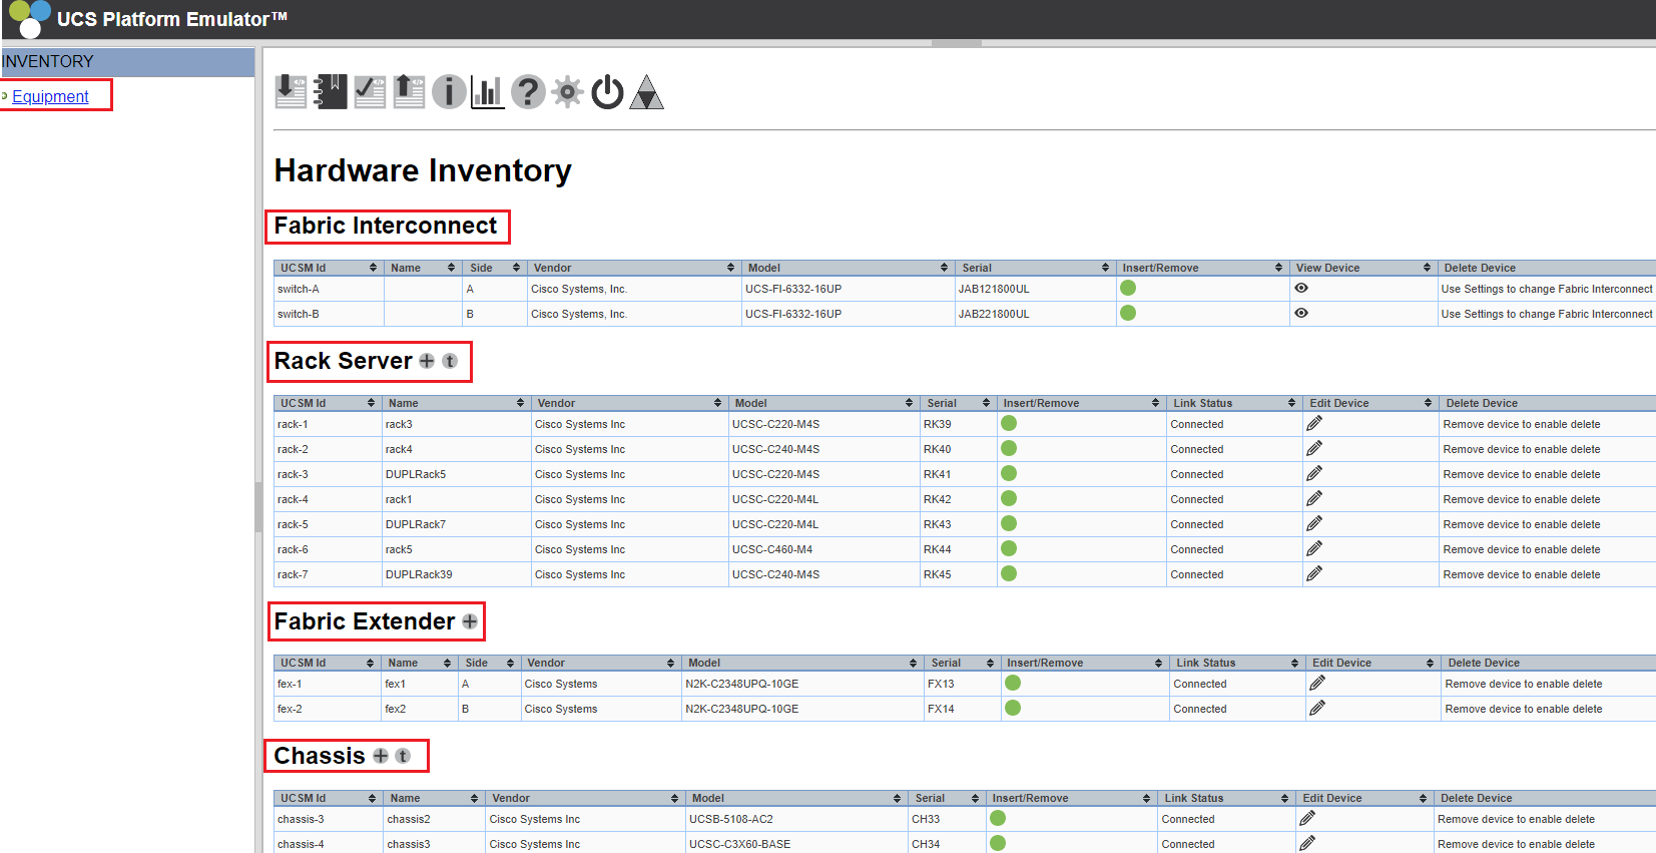
In order to see the Equipment or system hardware, select the Equipment option to add, remove and modify all chassis, blade server and rack mount servers.
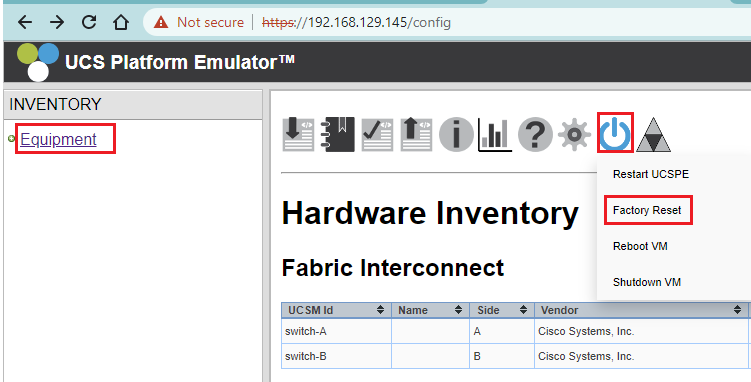
Factory Reset Configuration
In order to do the factory, reset configuration below are three steps required:
Click on Equipment | Navigation pane | Select Power in Work pane | Select factory reset option | Click on Yes Button to factory reset UCSPE.
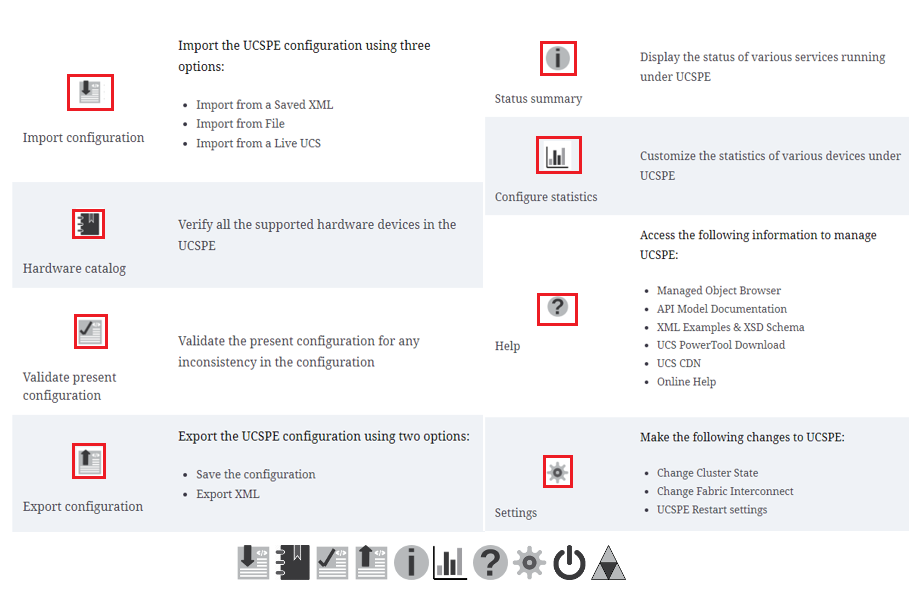
UCSPE provides following icon options to manage infrastructure and switch between inventory Management and UCS manager. Below table describes purpose of each icon.
Configuring UCSPE Network Setting
The UCSPE VM supports DHCP and static IP address assignment. The default IP setting is DHCP, which can be changed to static using CLI access to the server interface after the first boot.

Comment
TABLE OF CONTENTS
- UCS LAN Connectivity
- LAB Ethernet Switching Mode, End Host Mode, and Uplink Configuration
- LAB Configuration VLAN
- LAB Configure Uplink Port-Channel
- LAB Configure LAN Pin Group
- LAB Configure Disjoint L2 Network
- LAB Configure LAN QOS Policies
- LAB Configure LAN QOS Policies for FCOE
- LAB Configure MAC Pools
- LAB Network Control LAN Policies
- LAB Configure vNIC Template
RECENT POSTS
- Installing Context-Aware Network Access Control using Cisco ISE Policies
- Designing Network Access Control that is Scalable using Cisco ISE Architecture
- Enterprise Network Access Control and Policy Enforcement using Cisco ISE
- Secure Device Administration and Network Access Using AAA Architecture
- Designing Enterprise-Class Hybrid Cloud Connectivity Using AWS Networking Services
- Exploring Core AWS Networking and Messaging Concepts for Modern Cloud Architectures
- Understanding Key AWS Services for Modern Cloud Architectures
- Building a Strong AWS Foundation with Amazon S3, EC2, and Virtual Private Cloud
- Understanding the ENSDWI Course: Advanced Cisco SD-WAN (Viptela) Concepts
- A Complete Guide to the DCACI-A Course: Mastering Advanced Cisco ACI Concepts


LEAVE A COMMENT
Please login here to comment.