EMAIL SUPPORT
dclessons@dclessons.comLOCATION
USConfigure vManage & Generate Certificate
After you deployed the VM instance, it will come up with factory default setting. But for minimum configuration, you should configure IP address of vBond orchestrator, vManage system IP address, tunnel Interface VPN 0 for exchanging control traffic among vBond, vManage, and vSmart devices.
vManage must be configured with following so that it can participate in overly network.
- Configure a tunnel interface (one interface) in VPN 0. This interface is one over which any WAN transport is connected and all Viptela devices must be able to access this interface. VPN 0 is the tunnel interface that carries all the control traffic among Viptela devices
- Enable OMP protocol if it is not enabled. This protocol is responsible for establishing and maintaining Viptela Control plane.
Configure the vManage NMS with a Device Configuration Template
In order to configure the vManage NMS, a device configuration template must be created
- Configure the address of the vBond orchestrator:
- Select the Administration section | Settings screen | Click the Edit button to the right of the vBond bar.
- In the vBond DNS/IP Address: Port field, enter the DNS name which points to the vBond orchestrator or the IP address of the vBond orchestrator and the port number to use to connect to it. | Click Save.

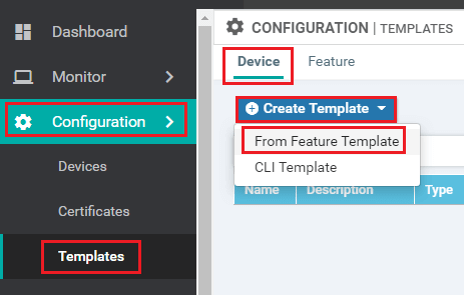
- In vManage NMS, select the Configuration | Templates screen. | In the Device tab, click Create Template | From the Create Template drop-down, select From Feature Template.
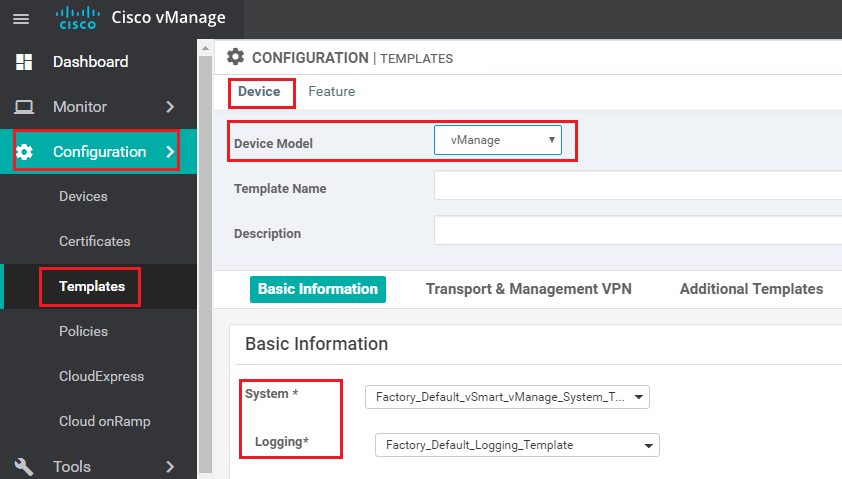
- From the Device Model drop-down, select vManage device and the required feature templates are shown with an asterisk (*), and the remaining templates are shown as optional. The factory-default template for each feature is selected by default
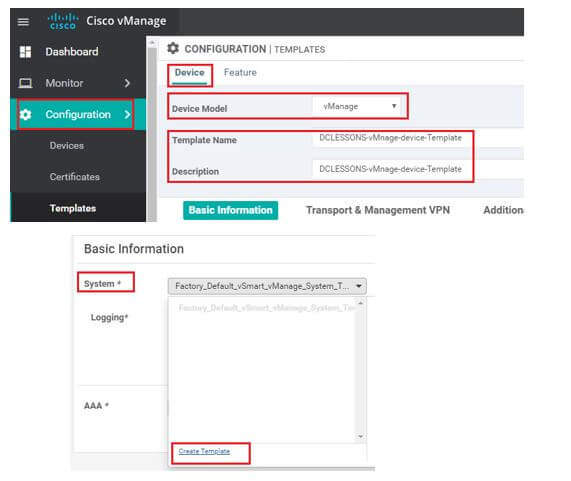
- In the Template Name field | name for the device template. This field is mandatory. In the Description field | enter a description for the device template. This field is mandatory.
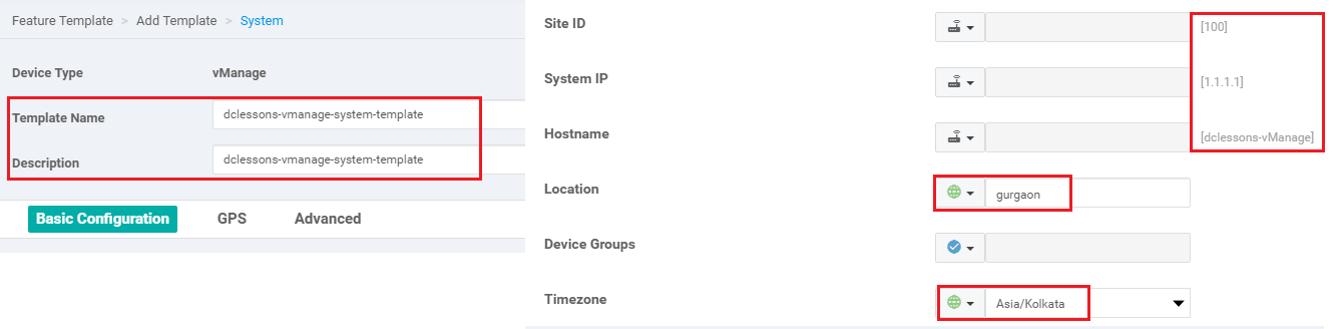
- In the System feature template | Site ID | System IP Address | Host name | Location | Time zone, and GPS Location.
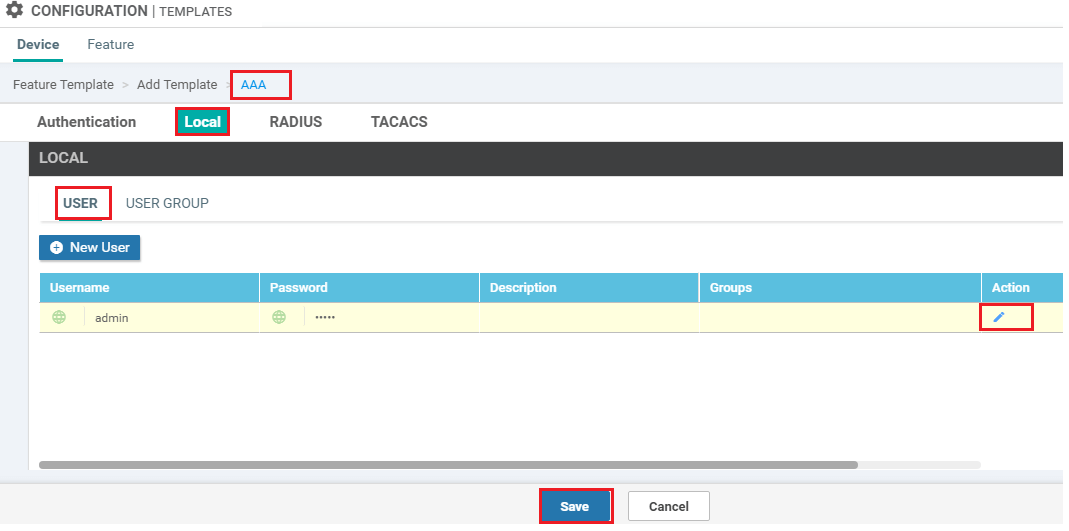
- In the AAA feature template | Local tab | click Users | change the password for the user "admin."
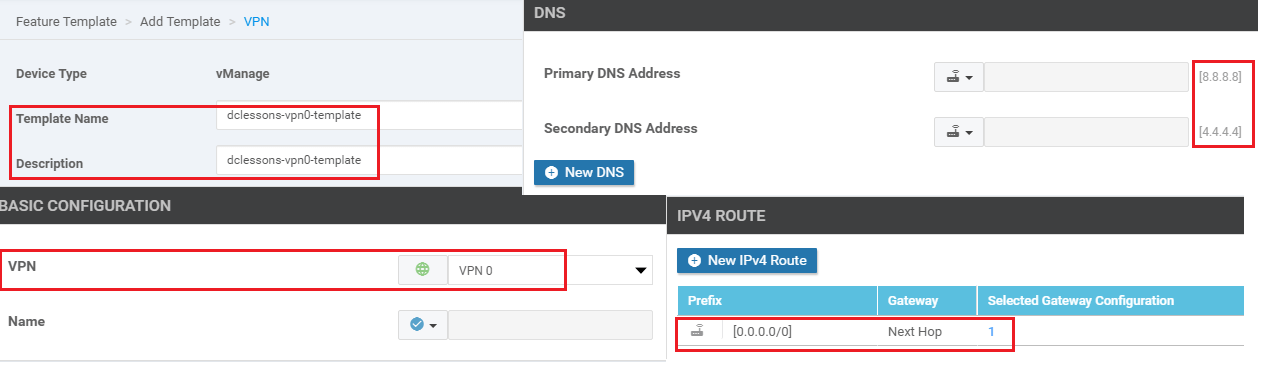
- In the VPN feature template | select VPN 0 | configure the system IP address and the address or host name of a DNS server. If necessary, click the Route tab | add a static route.
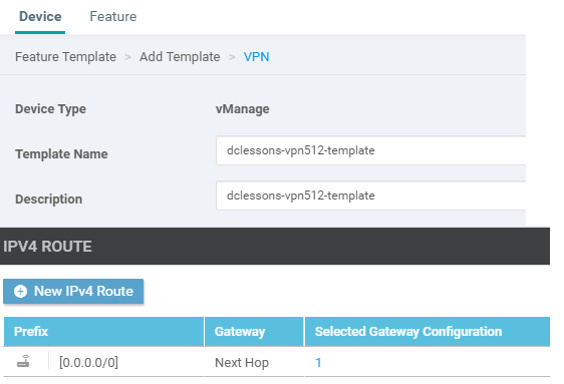
- If you need to add a static route in VPN 512, in a second VPN feature template, select VPN 512, click the Route tab, and add the static route.
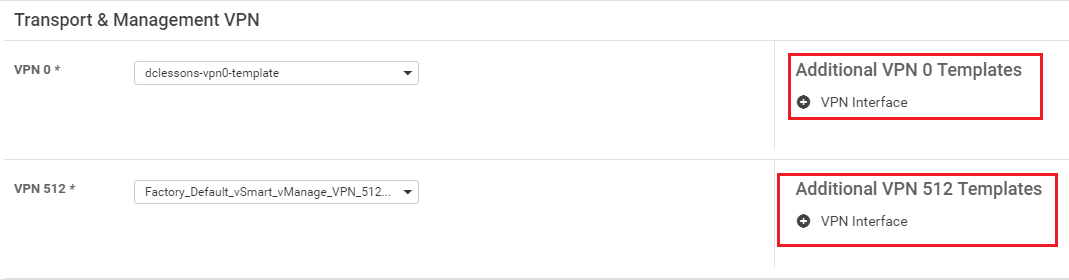
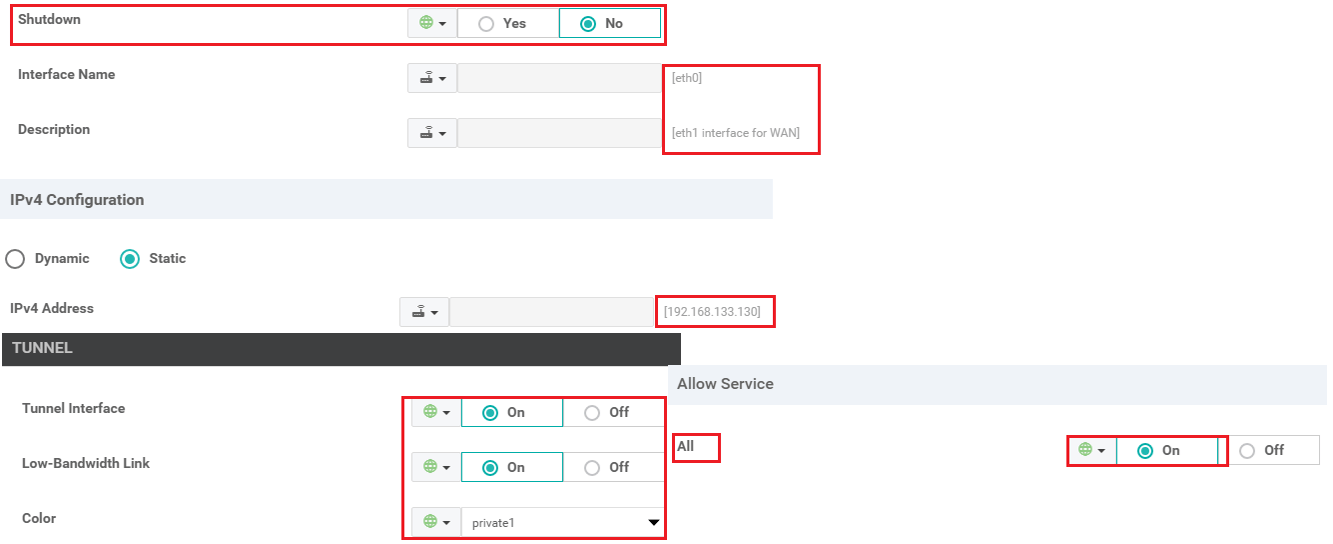
- In the VPN-Interface-Ethernet feature template | configure the interface in VPN 0 to connect to the WAN transport network. In Shutdown | click No enter the Interface Name | Assign the interface either a dynamic or static address. In the Interface Tunnel tab, Tunnel Interface | click On.| assign a color to the Tunnel interface, | select the desired services to allow on the tunnel
- In a second VPN-Interface-Ethernet feature template, configure management interface in VPN 512. In Shutdown | click No | enter the Interface Name | assign the interface either a dynamic or static Address.
- In the Security feature template | configure the control plane protocol
- Optionally, modify the default Archive | Banner | Logging | NTP | SNMP feature templates.
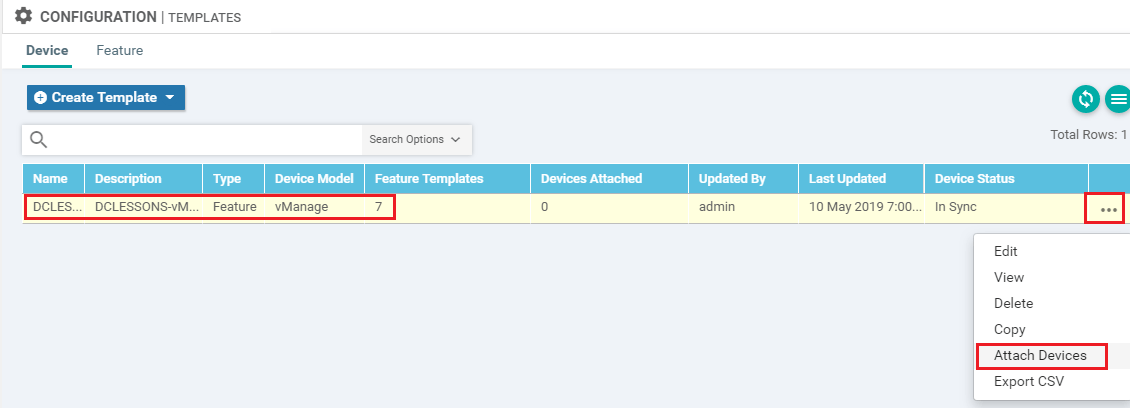
- Click Create. The new configuration template will be displayed in the Device Template table. The Feature Templates column shows the number of feature templates that are included in the device template, and the Type column shows "Feature" to indicate that the device template was created from a collection of feature templates.
- In the Device Template table | locate the desired device template | Click the More Actions icon to the right of the row | select Attach Devices.
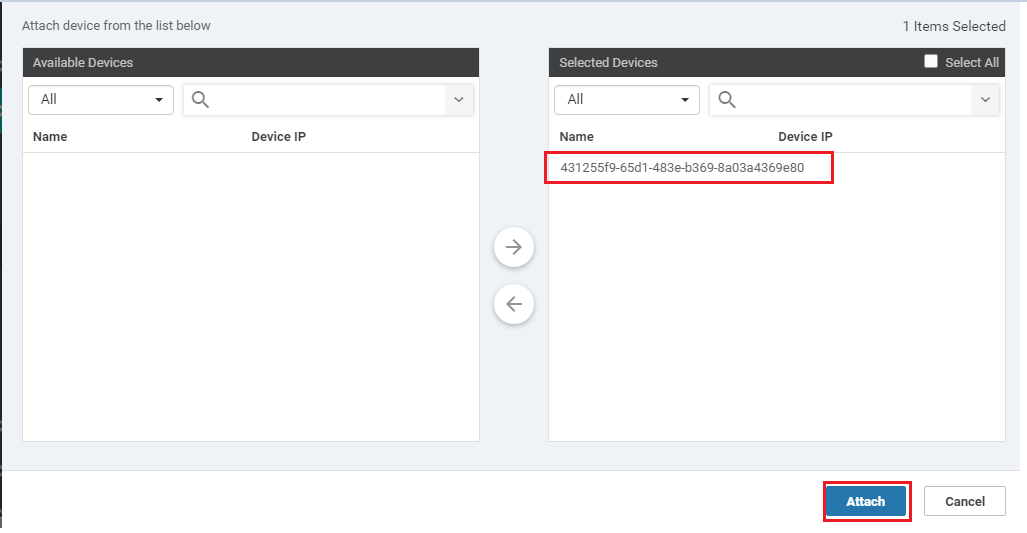
- In the Attach Devices box, select the local vManage NMS from the Available Devices list | click the right-pointing arrow to move it to the Selected Devices box | Click Attach.
Sample CLI Configuration

Comment
You are will be the first.
TABLE OF CONTENTS
- Onboarding & Provisioning Configuring Templates
- Authentication between vSmart & vBond
- Authentication between vSmart Controller
- Authentication between vBond & vEdge Router
- Authentication between vEdge Router & vManage NMS
- Authentication between vSmart Controller & vEdge Router
- Viptela Specific Port Terminology
- Configure vManage & Generate Certificate
- Configure vBond & Generate Certificate
- Configure vSmart & Generate Certificate
- Configure vEdge & Generate Certificate
- Secure DataPlane Bringup
- Control Plane & Data Plane Operation - Unicast Routing Overview
- Configuring OMP & Its attributes
- Configure Unicast Overlay Routing
- Routing Configuration Example
- Segmentation Overview
- Configuring Segmentation
- Segmentation Configuration Example
- Data Traffic across Private WANs
- NAT in SDWAN & Data Encryption
- SD-WAN Viptela Policy Overview
- SD-WAN Centralized & Localized Control Policy Overview
- SD-WAN Centralized & Localized Data Policy
- Application – Aware Routing Overview
- Service Chaining
- Traffic Flow Monitoring
- vEdge Router as NAT Device
- Zone Based Firewalls
- Configuring Application Aware Routing
- Configure Centralized Control Policy
- Configuring Centralized Data Policy
- Configuring Cflowd Traffic Monitoring
- Configuring Zone based Firewall
- Service Chaining Configuration Example
- Configuring Service Side NAT
- Configuring Transport side NAT
RECENT POSTS
- Which AWS Advanced Networking Labs Course Includes # Real World Traffic Flows and Examine Objectives?
- How Do You Practice Cisco Nexus Configuration with Online Labs No Physical Equipment?
- Why Cisco SD-WAN Viptela Training is Necessary in the Current Cloud-First Networking Age
- 5 Best Reasons to Learn Cisco SD-Access: From Networking Issues to Automation Solutions
- What is Cisco SD-LAN? A Beginner’s Guide to Software-Defined Access
- Why Enroll in Cisco UCS Online Training? Key Benefits for Network Engineers
- Why Python Network Automation Training is a Must-Have for Modern IT Engineers
- What to Expect from the Best Docker Training Courses: Features That Matter
- Why are Advanced Cisco ACI skills essential for Modern Data Center Engineers
- Transform Your Career: The Skills You Gain from AWS Solution Architect Associate Training


LEAVE A COMMENT
Please login here to comment.