EMAIL SUPPORT
dclessons@dclessons.comLOCATION
USBYOD Challenges
When a user wants to use its own device to log in to corporate Wifi network and use for its customer service, it’s become very difficult to on board that device.
To solve this problem MDM (Mobile Device Management) solution came in to picture. Where Mobile device were on boarded somehow. MDM device was ensured that they have security feature enabled such as encryption, Remote wipe capabilities, Screen Lock and many more. MDM would provide certificate down to device and suppliant profile to preconfigure device that need network access. Furthermore , ISE would provide the necessary access levels based on certificate it has.
Onboarding Process
Thera are two types of On Boarding, however we will see and learn about only one type.
- BYOD Onboarding: Registers the device with ISE, Provision its certificate, Configure device suppliant. BYOD uses the OS suppliant and do not need to install any new suppliant.
- MDM Onboarding: Device is registered to MDM, Installs MDM client software, Enforce security policies to that device.
BYOD Onboarding
In this Process, ISE provide the MY Device Portal, where user registers devices and manage those devices. A device can be registered with one-level of access authorization, such as Internet access only or device may go through full Onboarding & Provisioning process, where suppliant configuration is installed on to device along with optional certificate used for EAP-TLS connectivity.
Even though any of the method is used, device should have to choose Single SSID onboarding or Dual SSID approach or wired access approach.
Blew are process flow of Single SSID & Dual SSID Flow.
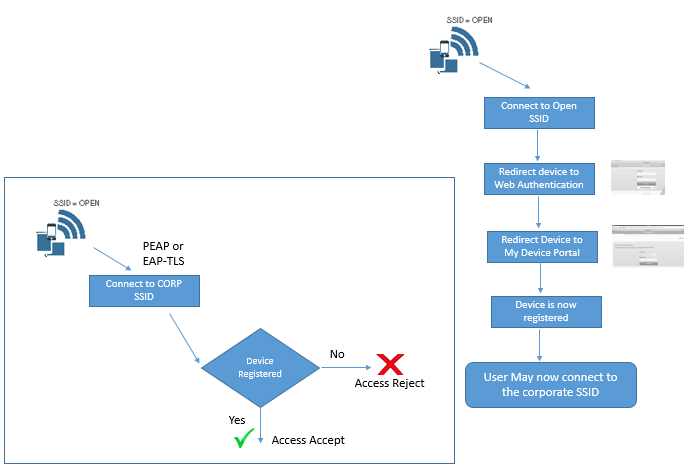
Dual SSID
- Employee does not have to configure suppliant on device
- Employee will be authenticated to Web form
- Employee will connect to open SSID before provisioning process an then connect to Corporate SSID after Process is completed.
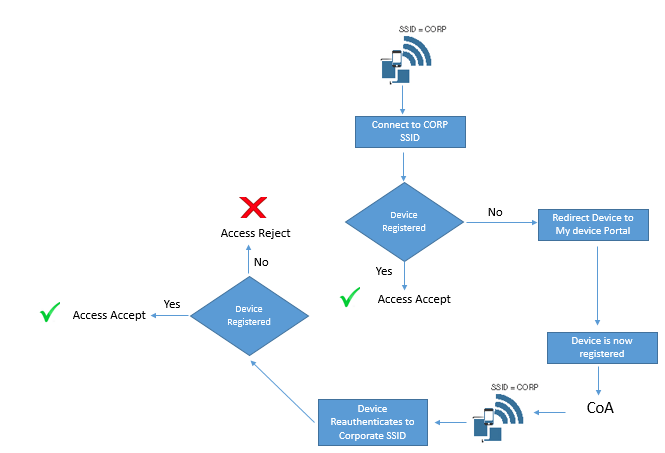
Single SSID
- Employee must have to configure suppliant on device
- Employee will be authenticated to connect to corporate SSID , Single Sign on is used for onboarding and Provisioning Process
- CoA will be used to provide full access after provisioning process without again reconnect to SSID.
Configure NAD for Onboarding
When Dual SSID is used, It require Open WLAN configured for NAC RADIUS, CoA and MAC filtering (Wireless MAC Authentication Bypass)
Here we will preview our WLC configuration step by step.
In General tab | Verify the WLAN SSID and profile name.
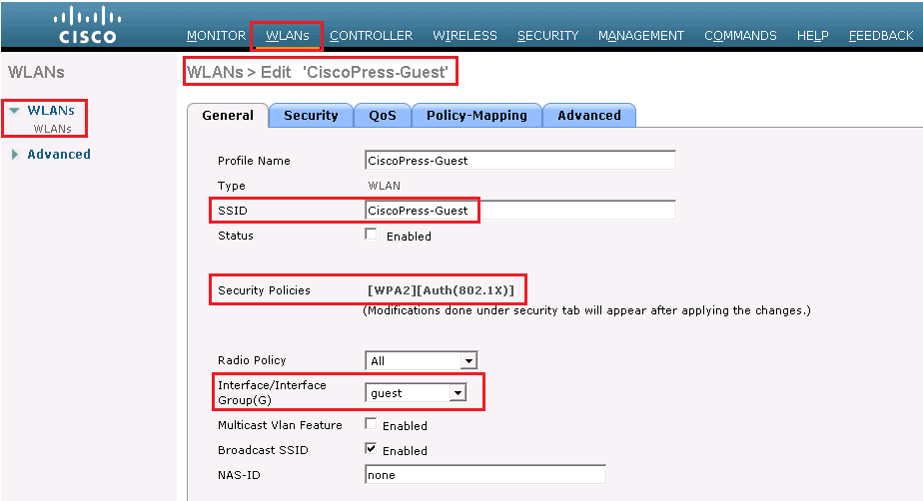
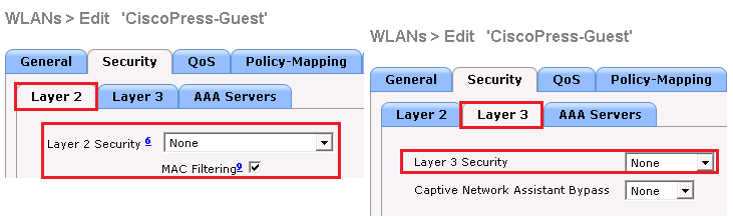
Security | layer 2 | choose none to Layer 2 Security Field and check MAC filtering checkbox.
Security | layer 3 | choose none to Layer 3 Security.
Security | AAA Servers, the ISE Policy Service Node(s) should be selected for authentication and accounting servers
No Advance TAB, Select the items marked Red on below figure.
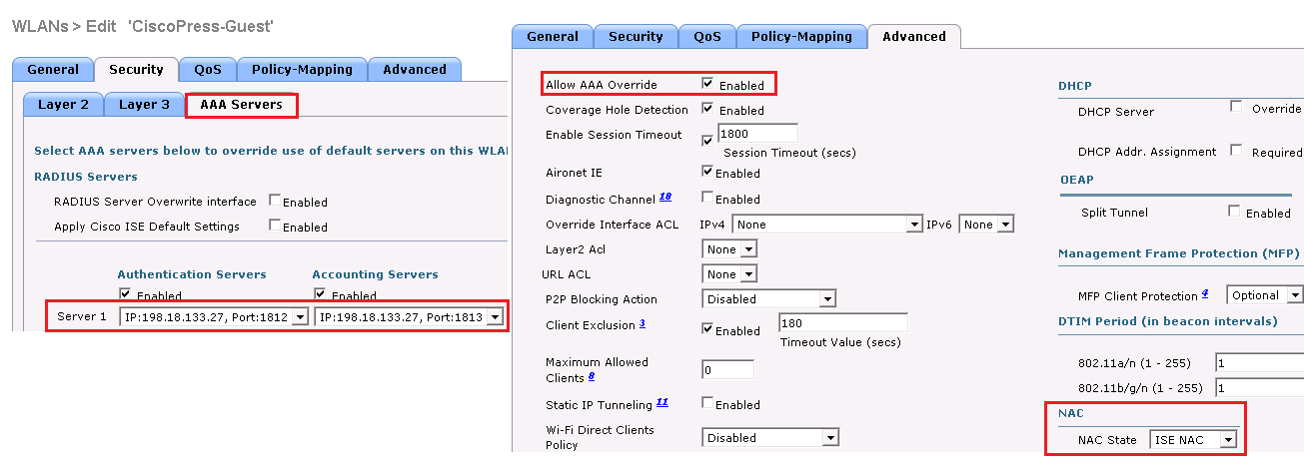
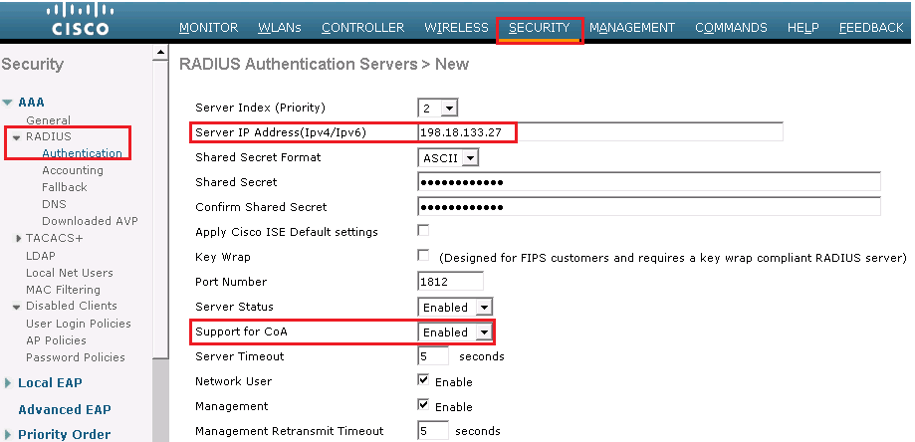
Security | RADIUS | Authentication configure the RADIUS server to allow CoA; the Support for CoA drop-down list box should be set to Enabled
ACL Configuration & Verification
ACL name ACL_WEBAUTH_REDIRECT must be there on switch and WLC to allow DHCP, DNS, traffic to ISE, and to deny all other traffic. This ACL configuration have been already discussed on Guest Life Cycle Management section.
When onboarding with iOS, Windows, and macOS, endpoint only communicates to ISE, Apple iOS uses native Over the Air (OTA) provisioning process , whereas Windows and macOS uses native application which is downloaded from ISE through device browser. ACL_WEBAUTH_REDIRECT ACL is sufficient to be repurposed for onboarding ACL as well.
Android device does not trust app, so ISE is not allowed to host any app by default. To onboard this device, you need to open the ACL to allow access to range of addresses for Google play or use the DNS ACL capabilities of WLC.
Below are some series of address that must be allowed in ACL for Android device for Google lay store access.
- 125.0.0/16
- 194.0.0/16
- 227.0.0/16
- 111.0.0/16
This ACL can be used for Single SSID as well as Dual SSID onboarding.
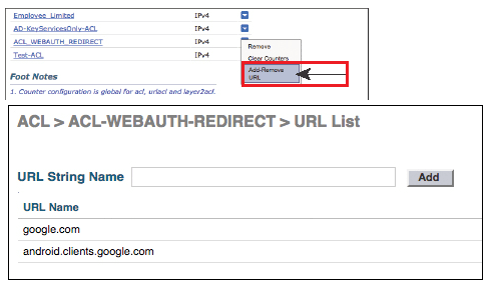
When you are using DNS ACLs on WLC, (called URL list), while adding these URL, a wildcard (*) is added in front of whatever you add. Example: if you use google.com, it will become * google.com.
To add URL to ACL_WEBAUTH_REDIRECT, from the WLC GUI, go to Security | Access Control Lists, hover mouse over the blue and white arrow icon next to ACL_WEBAUTH_REDIRECT, and then click Add-Remove URL
It will take you to URL list, where you can add up to 20 URL per ACL. Use below figure to see this step.
ISE Configuration for Onboarding:
When the ND is prepared for onboarding process, now built the ISE authorization policy for both dual as well as Single SSID.
Single SSID is easy model, as when end user is accepted to network, it must have authenticated with certificate via EAP-TLS. If authentication occurs with username & password then Device must still be on boarded.
Beginning with ISE 2.0, there is preconfigured “smart Default” provisioning policy.
End-User Experience:
In order to understand multiple user experiences, we will see Apple iOS with Single SSID onboarding and Android with Dual SSID onboarding. Each example can be used with any of the supported clients like iOS, Android, Mac OS X, and Windows.
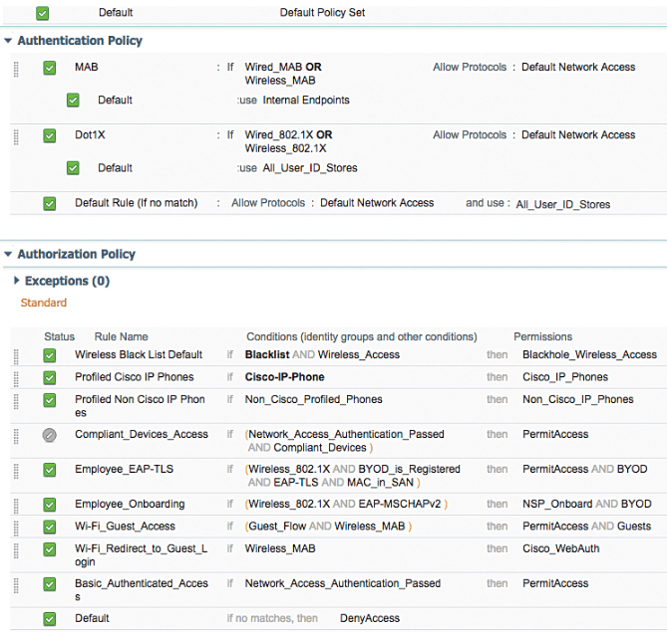
In these example , we will use or leverage default “out-of-box” policy set , and we will change SSID to Cisco press in default profile.
Below is the glimpse of default policy set with enabled BYOD rules.
Apple iOS with Single SSID Onboarding
On iOS device choose setting | Wi-Fi and connect to Corporate Wifi while providing the username and password
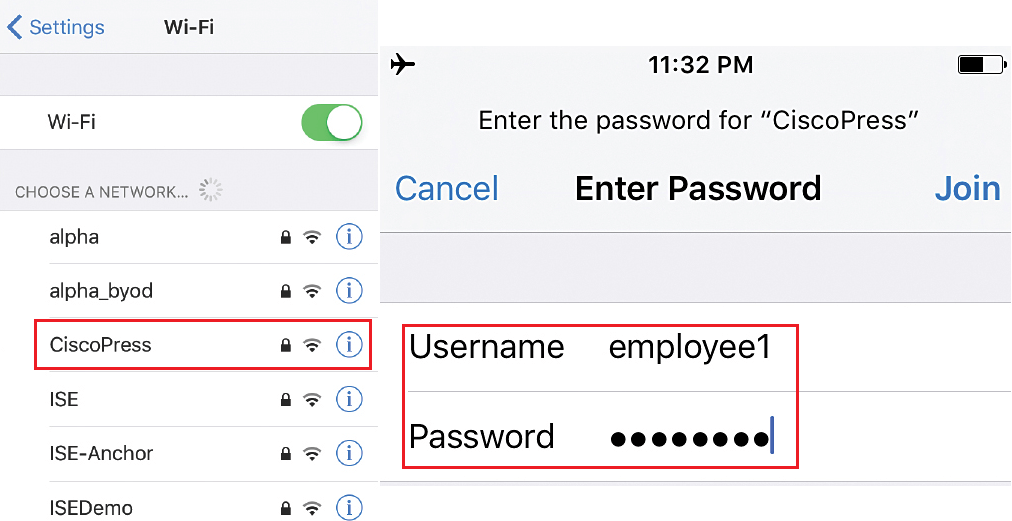
As it is manual Joining on network, you will be prompted to accept trust ISE EAP certificate, as shown in below figure. Once done, it will receive the IP address and Mask once successfully connected to Wifi corporate network.
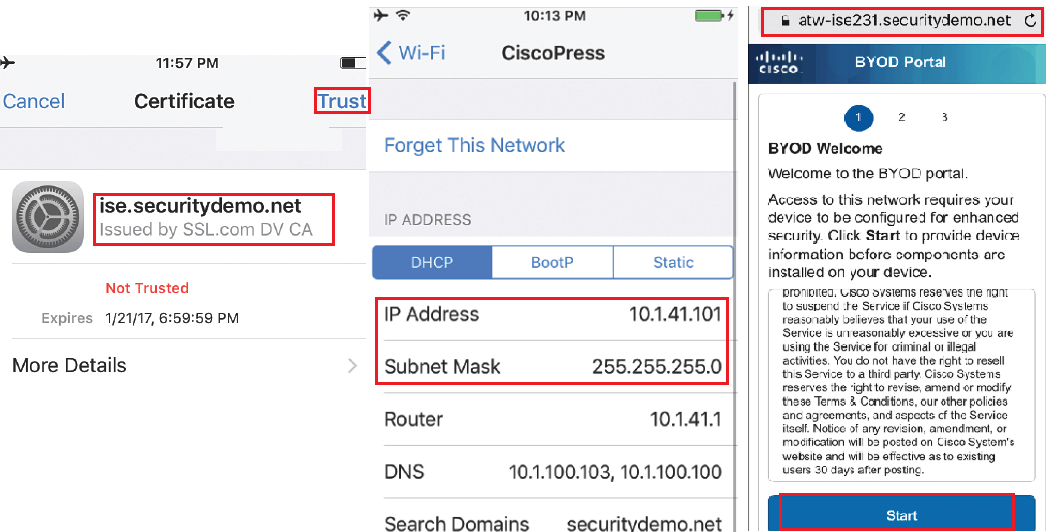
Once you open the browser, you will be redirected to BYOD portal. Where you will be providing some information, and then OTA provisioning will start. Now Click on Start as shown in above picture.
Here you will provide the Device name for end points and its description. And then tap to continue.
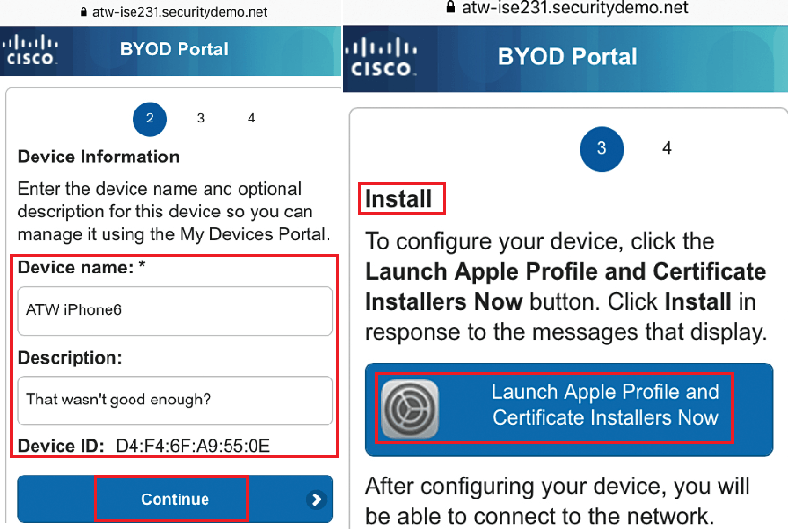
Now click on Launch Apple Profile and Certificate Installer Now, to launch Apple OTA provisioning as shown above
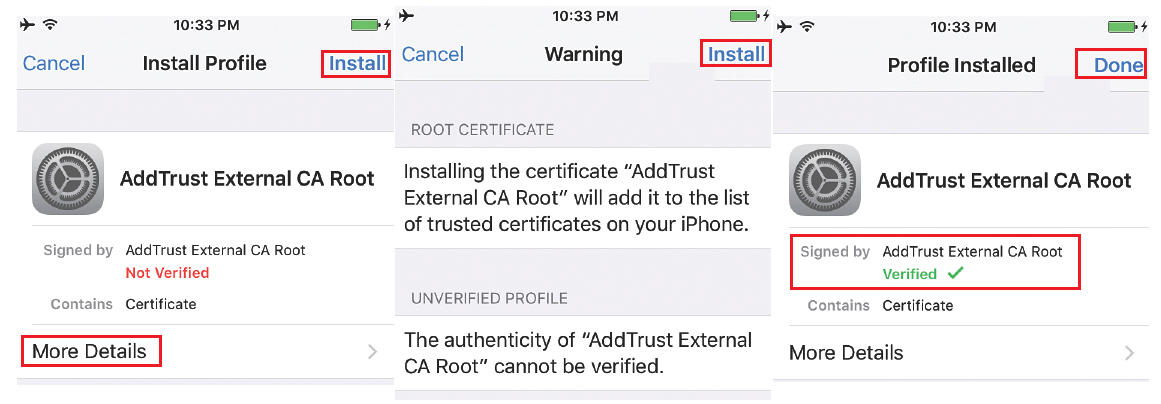
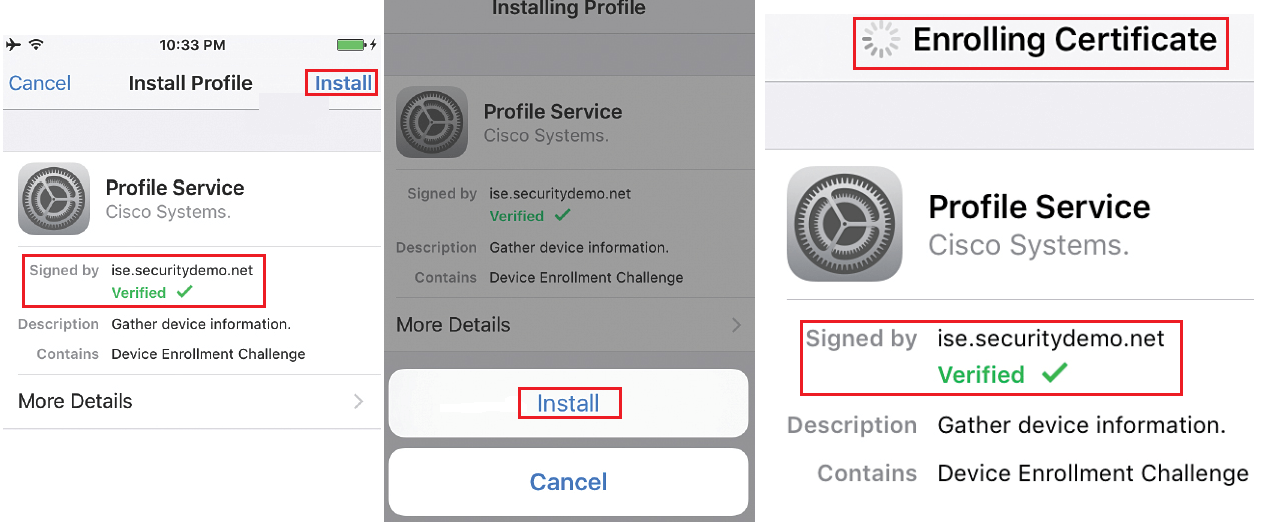
Now OTA profile must be signed by trusted CA, now here you have to trust that CA manually. As a part of OTA Process, ISE will send the Public certificate of CA that signed its admin certificate. Click more to see about usage of certificate that you are installing.
Click on install, you will see that Root CA certificate is marked as verified and then click on Done.
Now you will be asked to install the Profile service, as it is signed by ISE admin certificate and is marked as verified. Click on Install and then on Installing profile page, click Install.
Screen will update several times without any user interaction, and you will be notified by OTA service is enrolling certificates and generating keys.
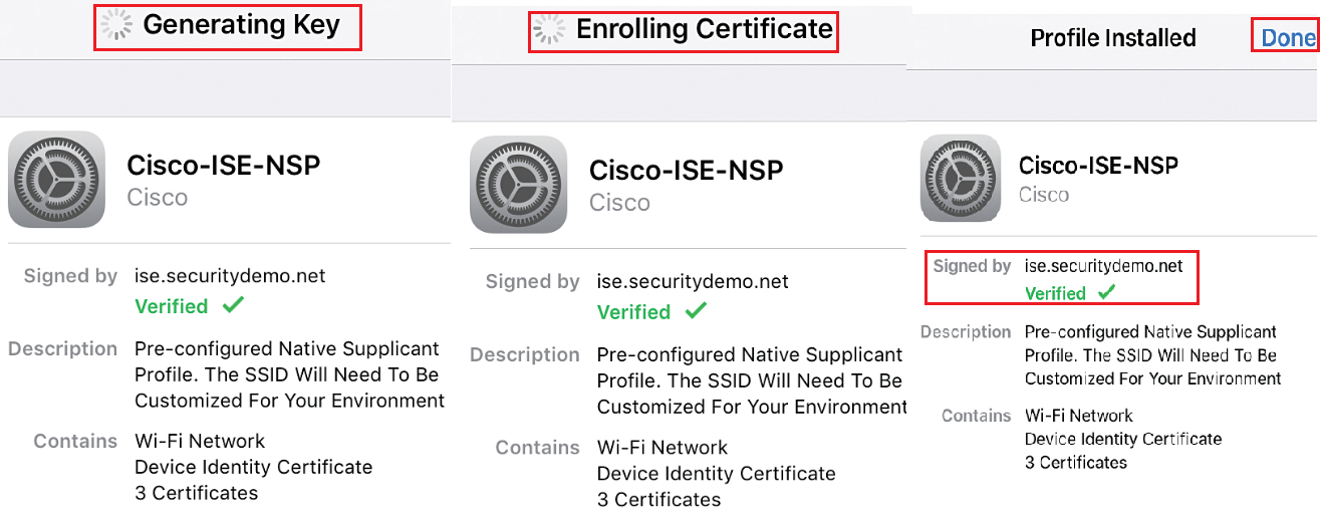
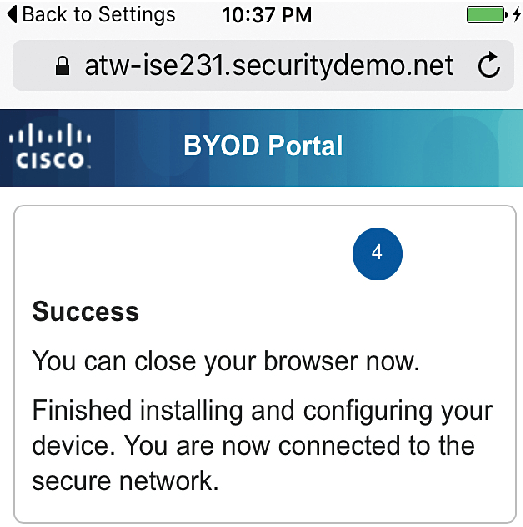
Once ISE profile is completely installed, click on done and refresh your Web browser, to access network resources, iOS device will authenticates using certificates installed and device will join the SSID successfully.
Android Dual SSID onboarding
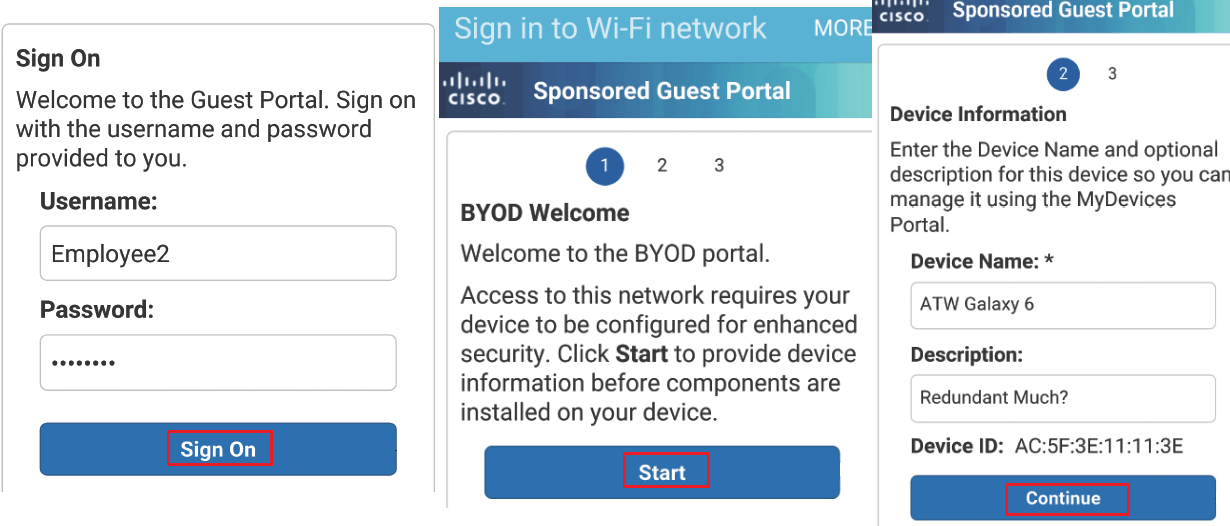
In this type of authentication, User will join to Open SSID or Guest SSID , and after being logged in to web authentication portal as an employee , then begin with onboarding process.
Go to Android device | Setting | Wi-Fi, select guest Wifi to connect, here we will connect to CiscoPress-Guest and click Connect.
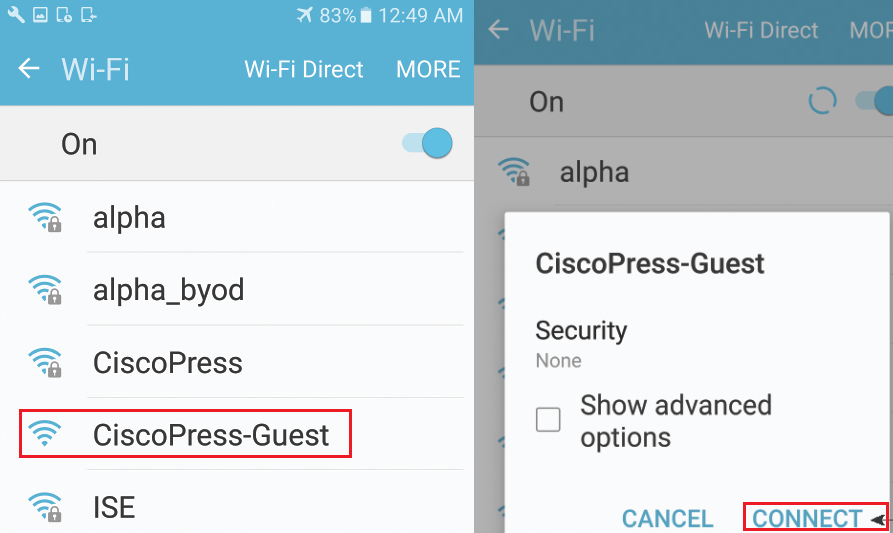
Now here you will be redirected to Web-authentication portal, as shown in below figure, Login with this portal and after login, you will be redirected to BYOD portal. Click on Start, BYOD porta will take you to onboarding process.
Once you click the start, provide your device name and description and click to continue.
Based on your personal device setting, you will be given choice of Internet or Google Play app.
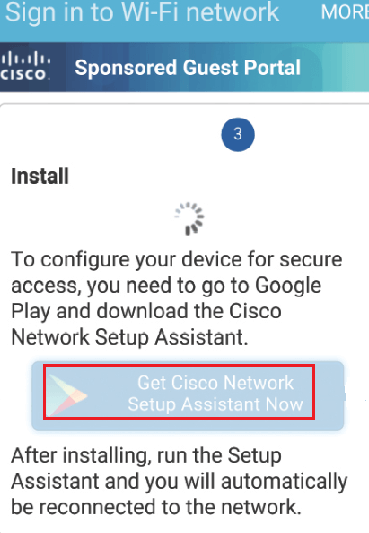
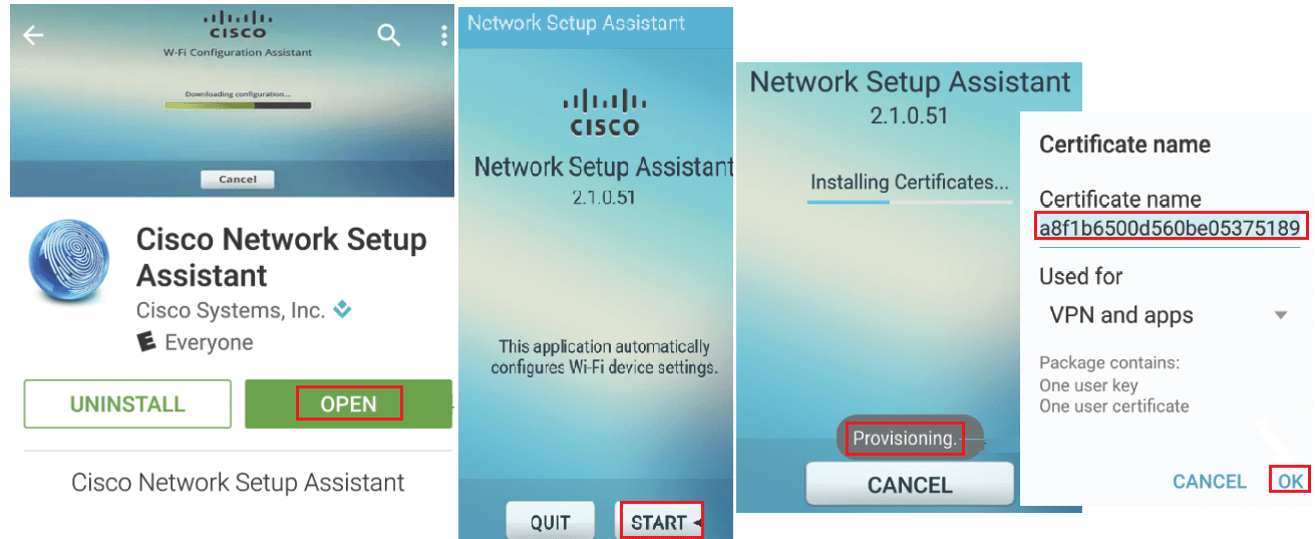
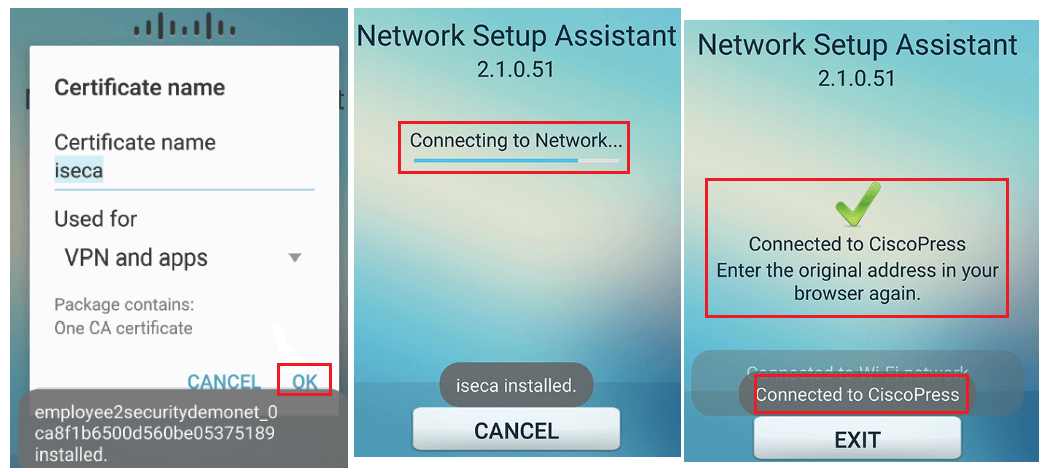
Download or open app from Google Play, and click on start , Now NSA app will start downloading profile from ISE. Now Name and save your certificate.
Now NSA app will automatically change the network connection to corporate SSID and authenticates with new certificate using EAP-TLS , Now upon successful authentication , your device is ready to be used in corporate network .
Comment
TABLE OF CONTENTS
- How to Install ISE 2.4 VM
- Initial ISE Setup
- ISE Certificate Installation
- ISE AD Integration
- Configure ISE Policy Set
- Configure Guest Access
- Guest Access With HotSpot Portal
- Guest Self-Registration for Guest Access
- Enable Self Registration with Sponsor Approval
- Configure ISE Profiling
- Customize ISE Profiling Configuration
- Configure BYOD
- Configuring ISE Compliance Services
- Configure Client Provisioning
- Configure Posture Policies
- Test & Monitor Client Based Access
RECENT POSTS
- Installing Context-Aware Network Access Control using Cisco ISE Policies
- Designing Network Access Control that is Scalable using Cisco ISE Architecture
- Enterprise Network Access Control and Policy Enforcement using Cisco ISE
- Secure Device Administration and Network Access Using AAA Architecture
- Designing Enterprise-Class Hybrid Cloud Connectivity Using AWS Networking Services
- Exploring Core AWS Networking and Messaging Concepts for Modern Cloud Architectures
- Understanding Key AWS Services for Modern Cloud Architectures
- Building a Strong AWS Foundation with Amazon S3, EC2, and Virtual Private Cloud
- Understanding the ENSDWI Course: Advanced Cisco SD-WAN (Viptela) Concepts
- A Complete Guide to the DCACI-A Course: Mastering Advanced Cisco ACI Concepts


LEAVE A COMMENT
Please login here to comment.