EMAIL SUPPORT
dclessons@dclessons.comLOCATION
USLAB Configuring Cloud Front
Task :
In this lab , we will create the Amazon CloudFront distribution , which will distribute image file stored in an Amazon S3 bucket.
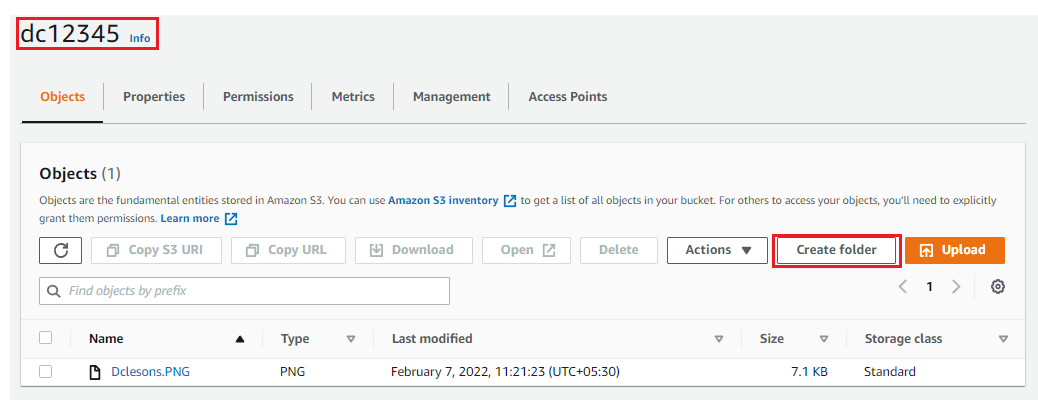
Step1: Create S3 Bucket
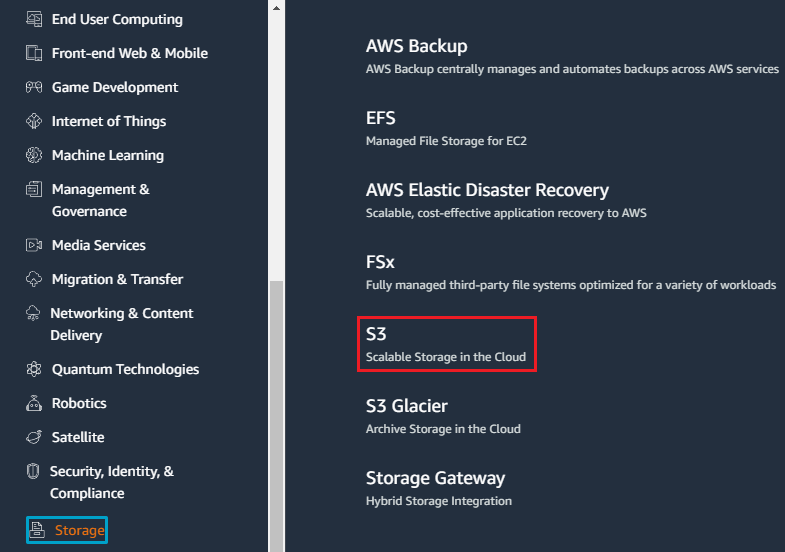
Go to AWS Service | Select S3 Service under Storage Section
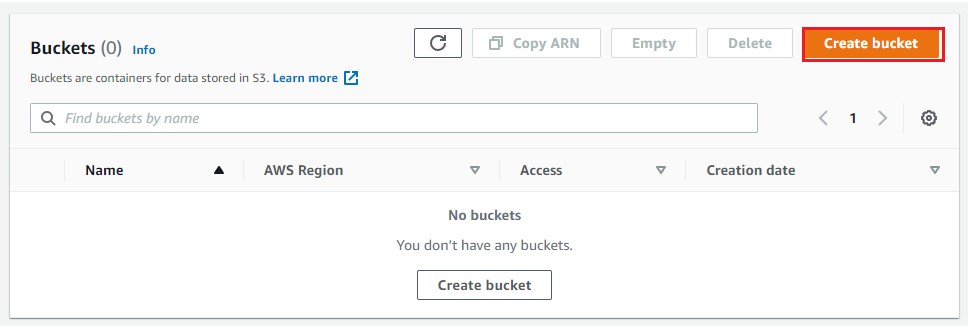
Go to Bucket Section | Click on Create Bucket
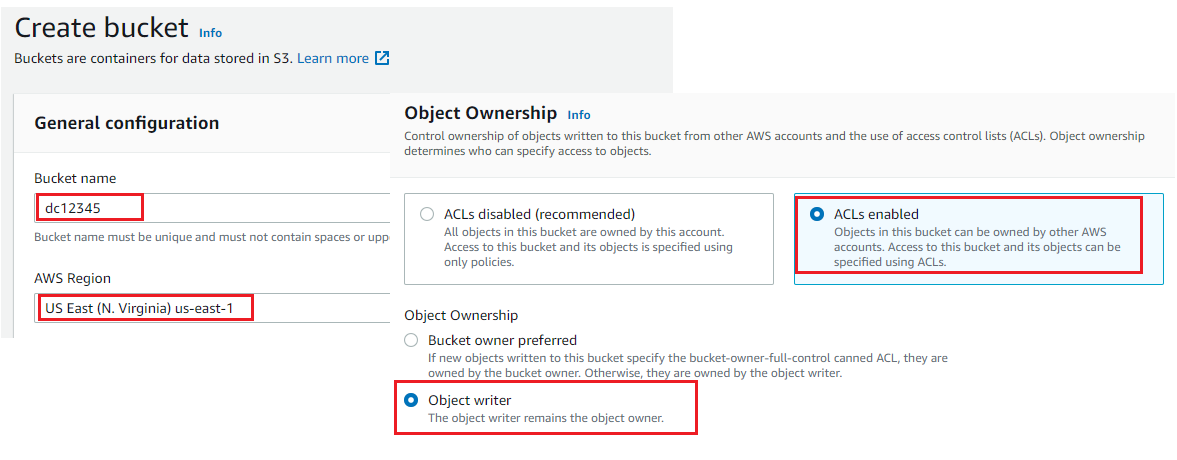
Under Create Bucket | Bucket name: dc12345 , AWS region: Select US-East (Virginia) us-east-1.| Object Ownership : Select ACLs Enabled and Select Object Writer
Under Block Public Access Setting For this bucket : Disable and Select Acknowledge Section

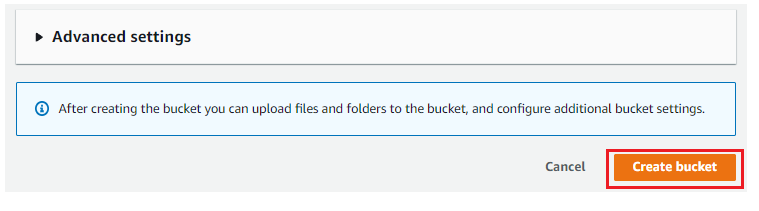
Keep all setting default | Click on create Bucket
Now Upload any image in to that bucket.
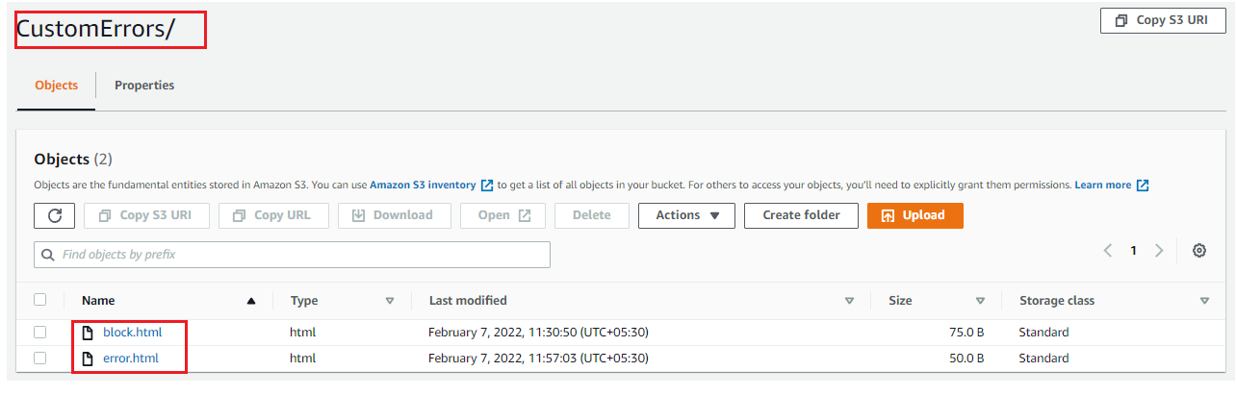
Step2: Create Custom Error pages
In this section , we will create custom error pages for cloud front to return when origin returns HTTP 4xx or 5xx errors.
Select your Bucket | Click on Create Folder
Under Folder Section | Folder name: CustomErrors | Server Side Encryption : Disable

Now Under this folder upload block.html and error.html
For block.html : open text file and put this code, and save it as block.html
<html>
This Dclessons content is blocked in your location!!!
For error.html : Open Text file , put this code and save it as error.html
<html>
This is Dclessons Error Page
Step3: Make Object public
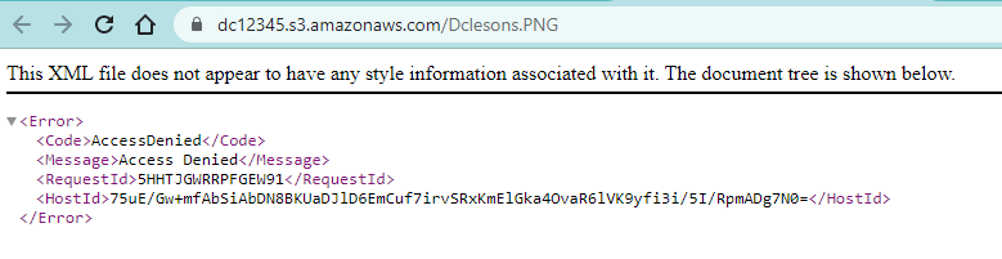
On Click on Image name , you uploaded and take it's URL and open it on browser , here you have see that access Is denied and object is not publicly accessible.
Go to your bucket | Permission | Now Scroll down to Bucket Policy | Click on Edit | and use below code in it. Just change the name of bucket ARN with your own bucket ARN in both resource option in the code.
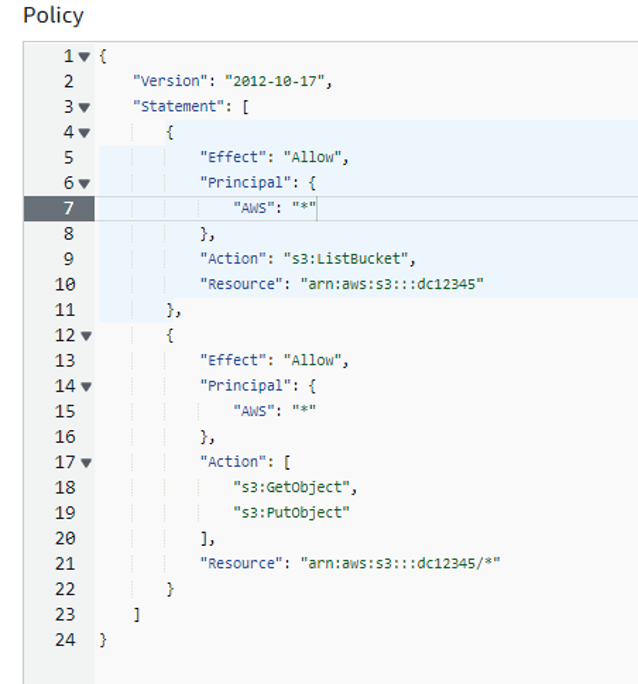
{
"Version": "2012-10-17",
"Statement": [
{
"Effect": "Allow",
"Action": [
"s3:ListBucket"
],
"Principal": {
"AWS": "*"
},
"Resource": ""
},
{
"Effect": "Allow",
"Action": [
"s3:GetObject",
"s3:PutObject"
],
"Principal": {
"AWS": "*"
},
"Resource": ""<Your own bucker ARN>/*"
}
]
}
Now access the image URL again and you see you Image now publicly accessible.
Step4: Create CloudFront Distribution
Go to AWS Services | Under networking & Content Delivery | Select Cloud Front

Comment
TABLE OF CONTENTS
- Amazon S3- Basic Features
- Amazon S3 Advance Feature
- Amazon Glacier
- LAB Amazon Simple Storage Service
- LAB Setting up a Static Website
- LAB Enabling Versioning
- LAB Lifecycle Policy for S3 Bucket
- LAB: Create S3 Bucket & Upload Image & View Over browser
- LAB: Install AWS CLI
- LAB: Configure Lembda to upload an object in S3 Bucket
- Creating Custom VPC
- How to Attach Multiple IP to ENI-Instance
- How to Configure Launch Configuration & Auto Scaling
- How to Configure VPC Peering
- How to Configure VPN for VPC
- How to Configure VPC Tunneling
- How to Configure VPC with Private Subnet & Connect to DC
- How to Create Template for CloudFormation
- How to Configure Cloud Formation
- LAB: Configure Auto-Scaling & validation
RECENT POSTS
- Installing Context-Aware Network Access Control using Cisco ISE Policies
- Designing Network Access Control that is Scalable using Cisco ISE Architecture
- Enterprise Network Access Control and Policy Enforcement using Cisco ISE
- Secure Device Administration and Network Access Using AAA Architecture
- Designing Enterprise-Class Hybrid Cloud Connectivity Using AWS Networking Services
- Exploring Core AWS Networking and Messaging Concepts for Modern Cloud Architectures
- Understanding Key AWS Services for Modern Cloud Architectures
- Building a Strong AWS Foundation with Amazon S3, EC2, and Virtual Private Cloud
- Understanding the ENSDWI Course: Advanced Cisco SD-WAN (Viptela) Concepts
- A Complete Guide to the DCACI-A Course: Mastering Advanced Cisco ACI Concepts


LEAVE A COMMENT
Please login here to comment.