EMAIL SUPPORT
dclessons@dclessons.comLOCATION
USLAB Amazon Simple Storage Service
This guide introduces you to Amazon S3 and how to use the AWS Management Console to complete the tasks.
Task:
- Signup for Amazon S3
- Create a Bucket
- Add Object on Bucket
- View an object
- Move an object
- Delete and object and bucket created.
To sign up for Amazon S3
- Go to https://aws.amazon.com/s3/ and choose Get started with Amazon S3.
- Follow the on-screen instructions.
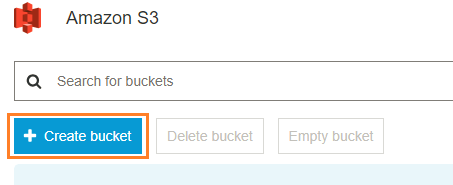
Create a Bucket
As soon as you login to amazon S3, click on create Bucket.
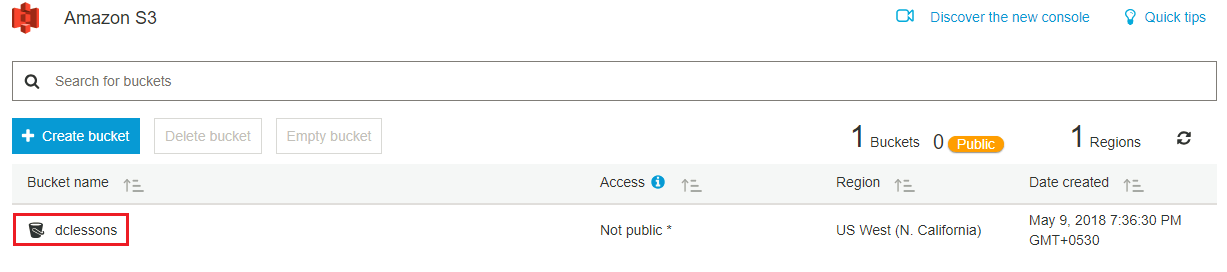
Create your own bucket name using the follow naming guidelines:
- The name must be unique across all existing bucket names in Amazon S3.
- After you create the bucket you cannot change the name, so choose wisely.
- Choose a bucket name that reflects the objects in the bucket because the bucket name is visible in the URL that points to the objects that you're going to put in your bucket.
For Region, choose US West (California) as the region where you want the bucket to reside and Choose Create.

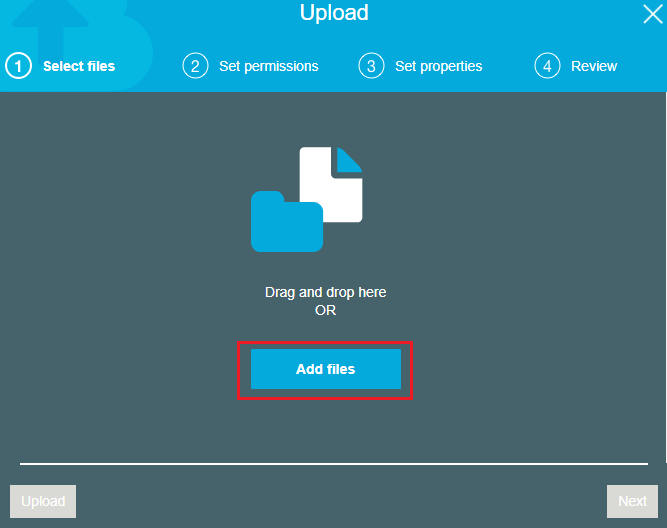
To upload an object to a bucket
Once bucket is created , form the Bucket name list, choose and click the name of the bucket that you want to upload your object to.
Choose Upload.
In the Upload dialog box, choose Add files to choose the file to upload.
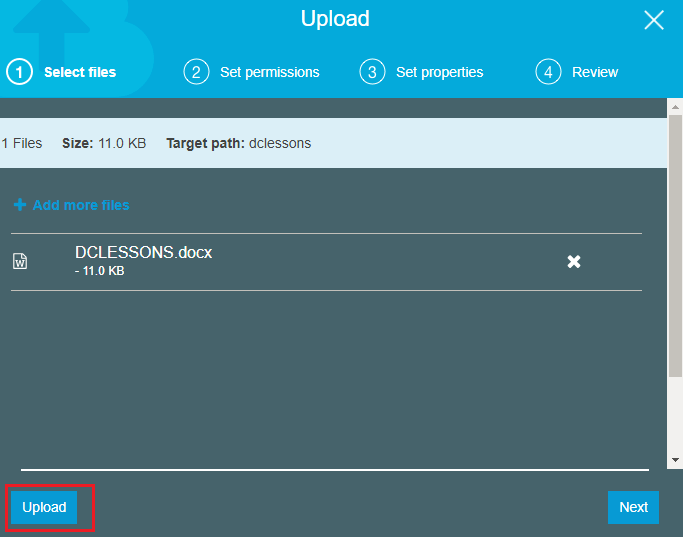
Select the file to upload as shown from your local machine from where you are accessing the AWS console.

Choose upload
To download an object from a bucket

Comment
You are will be the first.
TABLE OF CONTENTS
- Amazon S3- Basic Features
- Amazon S3 Advance Feature
- Amazon Glacier
- LAB Amazon Simple Storage Service
- LAB Setting up a Static Website
- LAB Enabling Versioning
- LAB Lifecycle Policy for S3 Bucket
- LAB: Create S3 Bucket & Upload Image & View Over browser
- LAB: Install AWS CLI
- LAB: Configure Lembda to upload an object in S3 Bucket
- Creating Custom VPC
- How to Attach Multiple IP to ENI-Instance
- How to Configure Launch Configuration & Auto Scaling
- How to Configure VPC Peering
- How to Configure VPN for VPC
- How to Configure VPC Tunneling
- How to Configure VPC with Private Subnet & Connect to DC
- How to Create Template for CloudFormation
- How to Configure Cloud Formation
- LAB: Configure Auto-Scaling & validation
RECENT POSTS
- Installing Context-Aware Network Access Control using Cisco ISE Policies
- Designing Network Access Control that is Scalable using Cisco ISE Architecture
- Enterprise Network Access Control and Policy Enforcement using Cisco ISE
- Secure Device Administration and Network Access Using AAA Architecture
- Designing Enterprise-Class Hybrid Cloud Connectivity Using AWS Networking Services
- Exploring Core AWS Networking and Messaging Concepts for Modern Cloud Architectures
- Understanding Key AWS Services for Modern Cloud Architectures
- Building a Strong AWS Foundation with Amazon S3, EC2, and Virtual Private Cloud
- Understanding the ENSDWI Course: Advanced Cisco SD-WAN (Viptela) Concepts
- A Complete Guide to the DCACI-A Course: Mastering Advanced Cisco ACI Concepts


LEAVE A COMMENT
Please login here to comment.