EMAIL SUPPORT
dclessons@dclessons.comLOCATION
USWorking With The Active Blueprint
Task
In this part of the lab, you will familiarize yourself with how to change an active blueprint from the Apstra UI. You will accomplish this by navigating the Staged , Uncommitted, and Time Voyager tabs of the blueprint UI.
Topology
Solution:
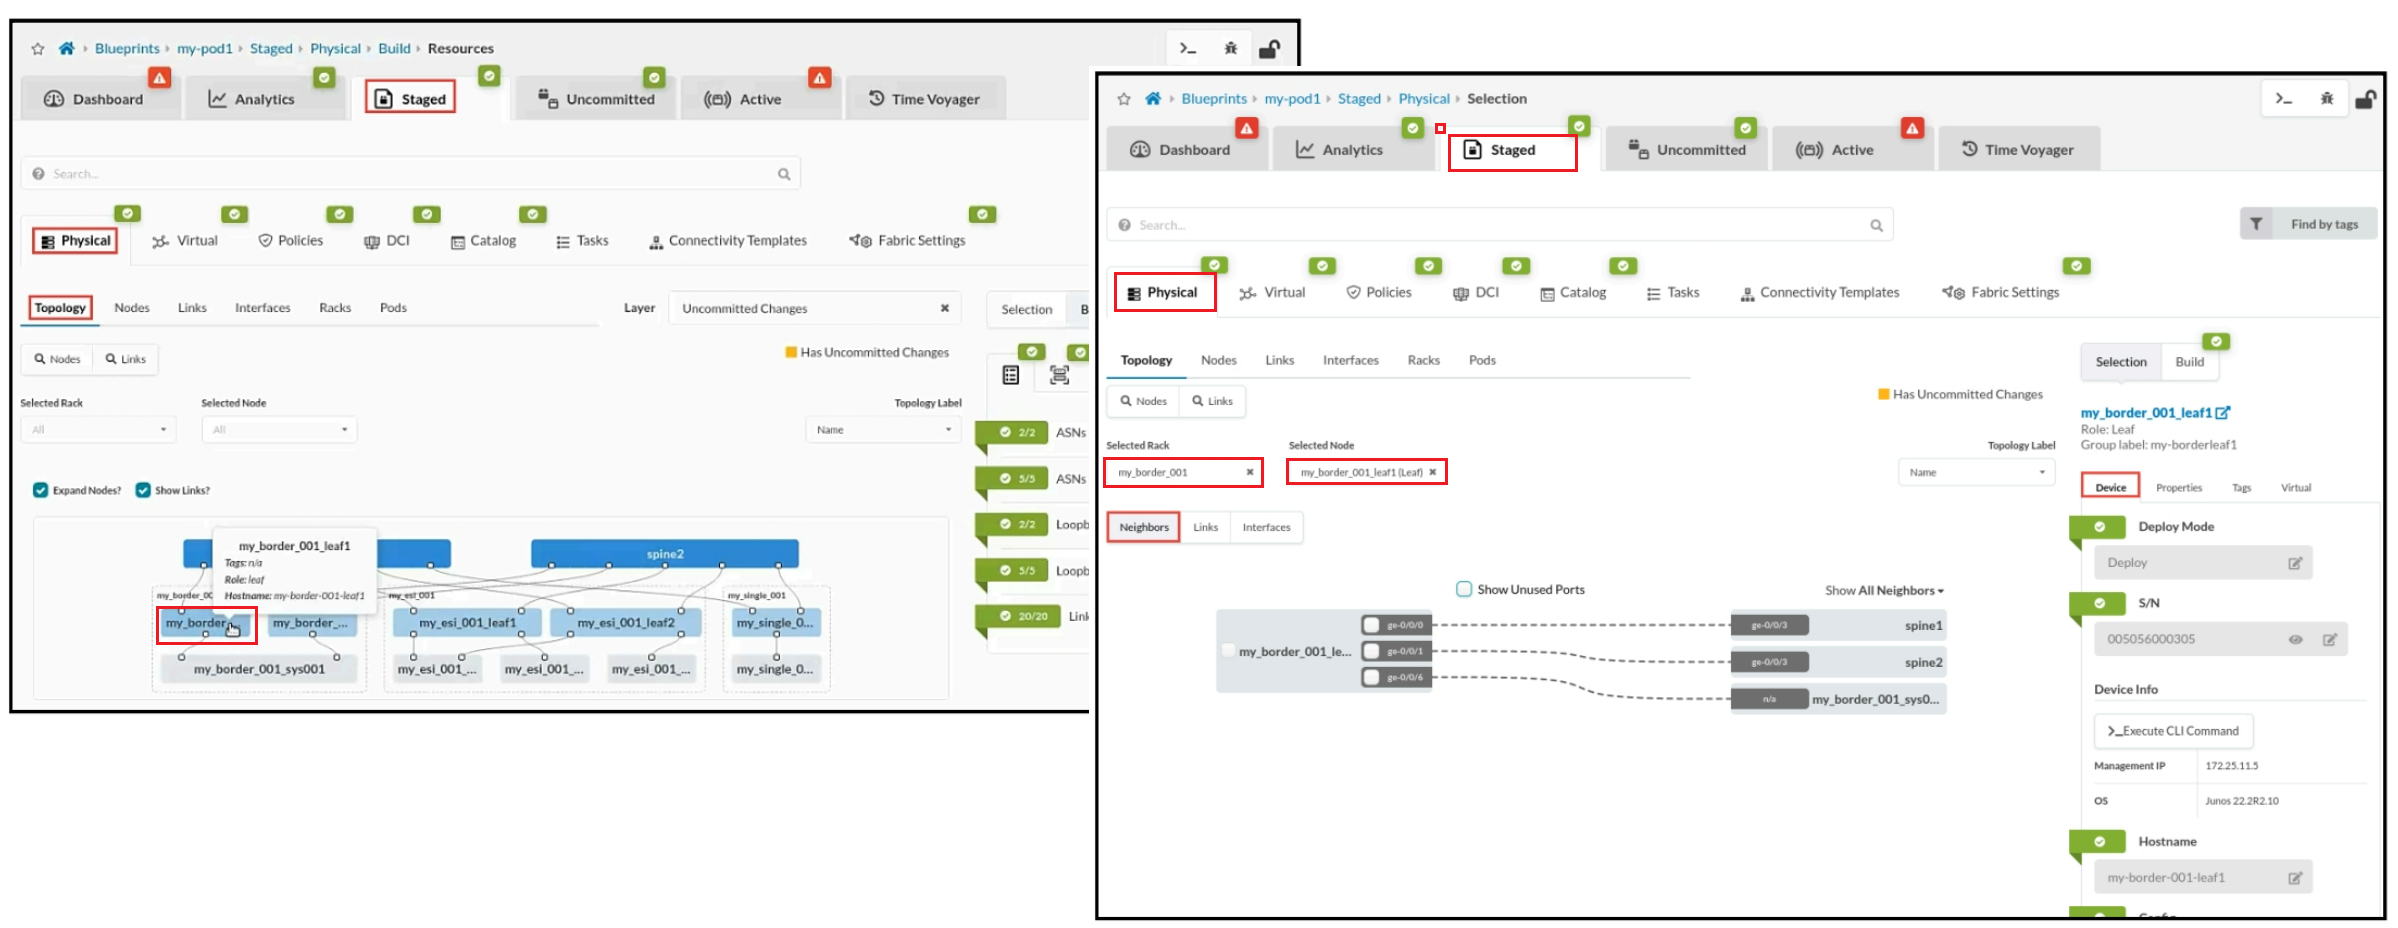
Navigate to Staged > Physical > Topology. Click the my_border001_leaf1 node.
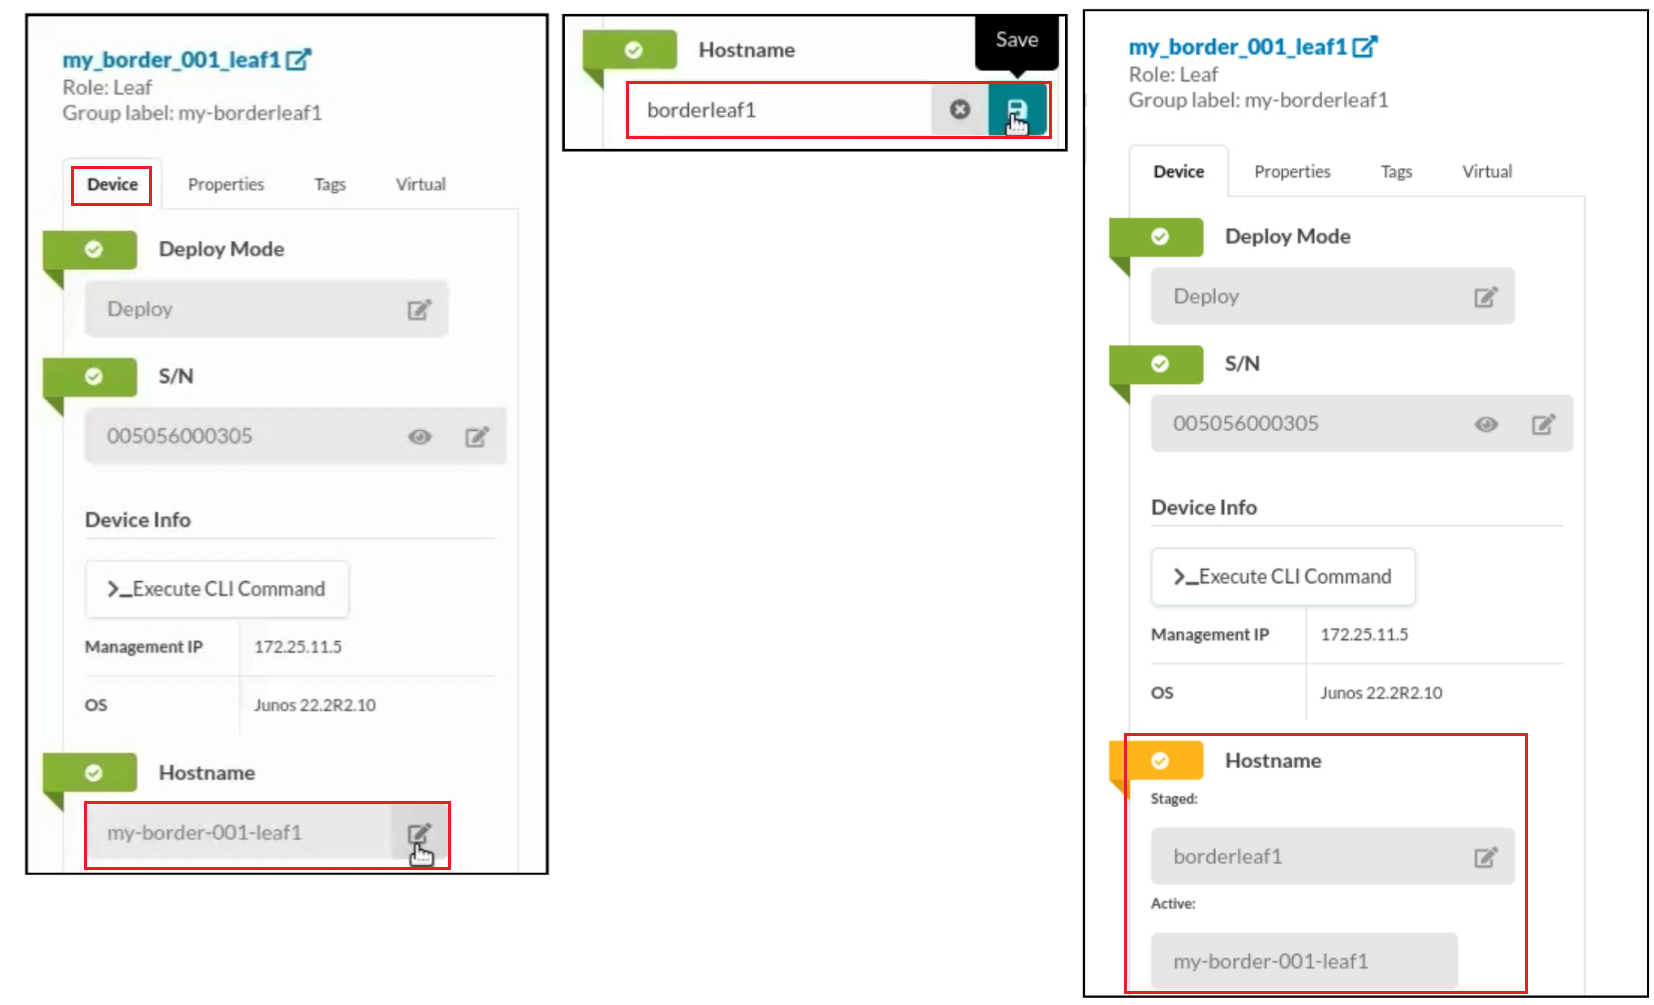
On the Device tab, select the Edit button next to the borderleaf1 node's hostname. Set the hostname to borderleaf1. Click the Save button when finished.
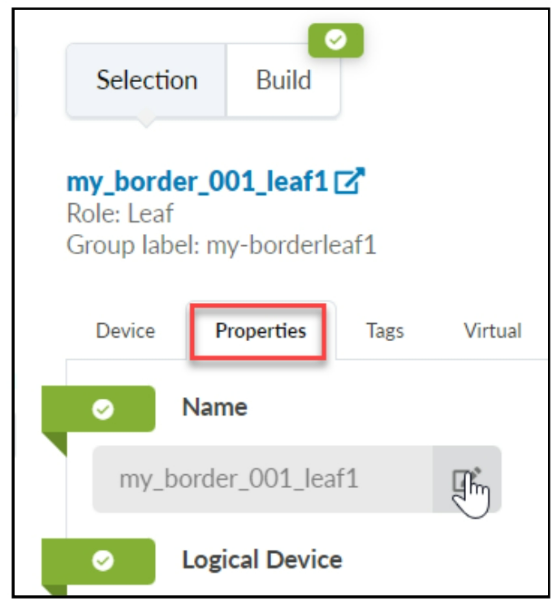
Navigate to the Properties tab for the borderleaf1 node and select the Edit button next to the borderleaf1 node's name. Set the name to borderleaf1. Click the Save button when finished.
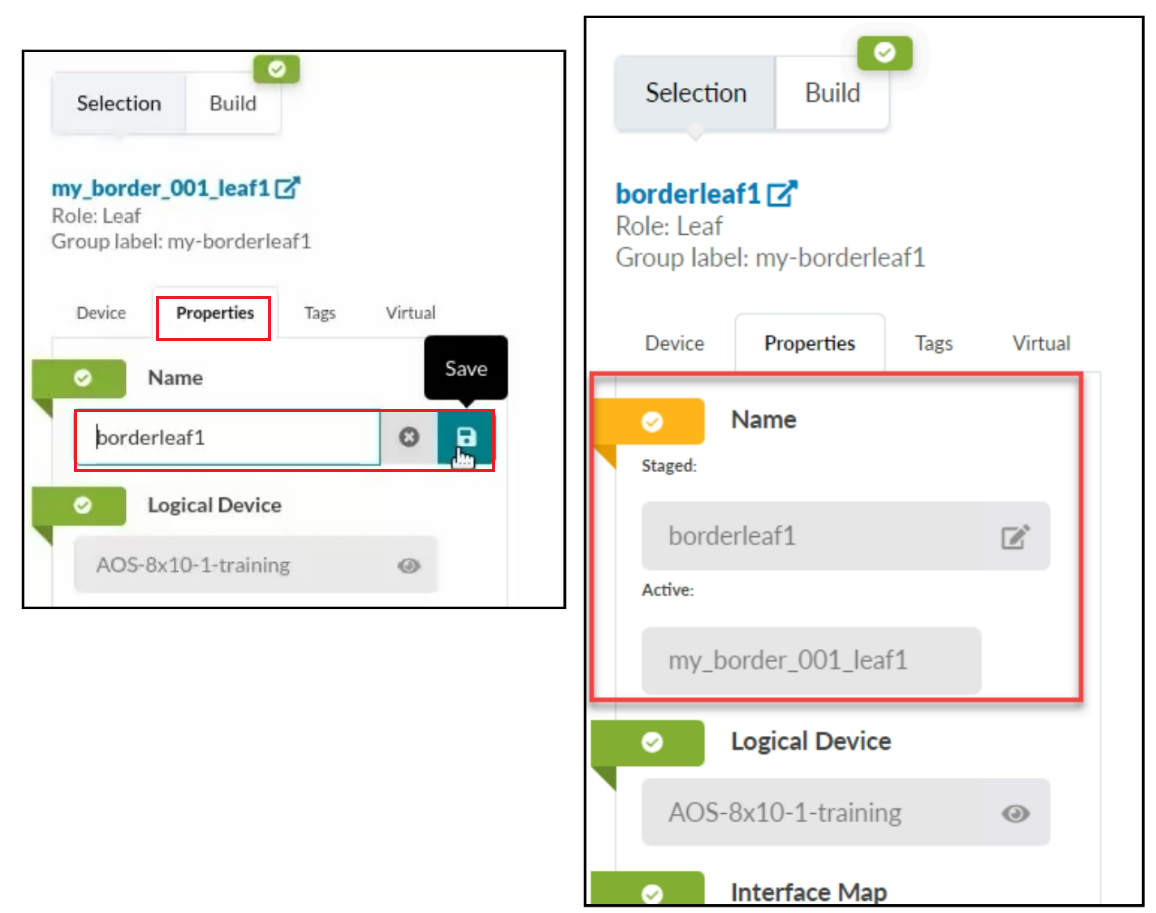
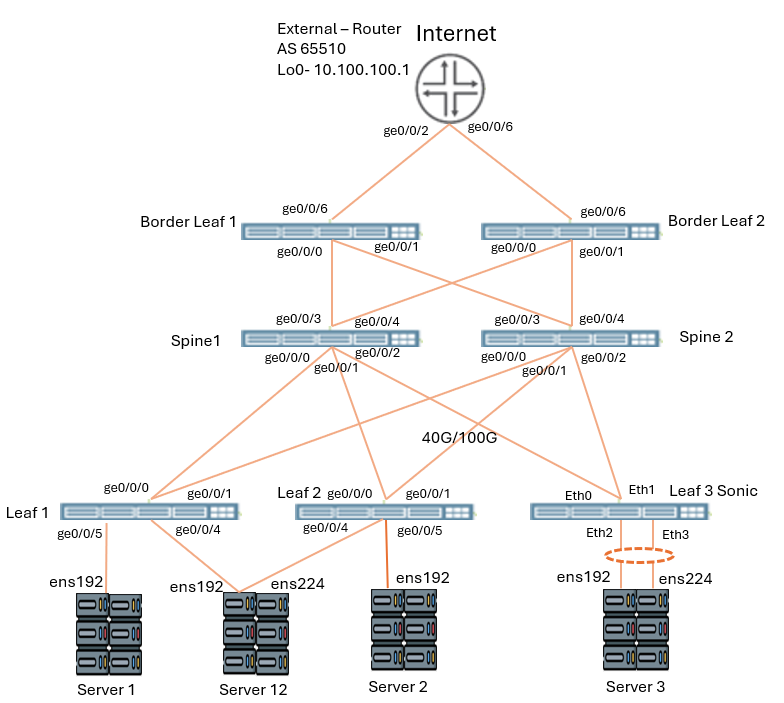
Repeat the previous 2 steps for each of the devices so that their hostnames and names match the lab diagram. Use the following table to help.
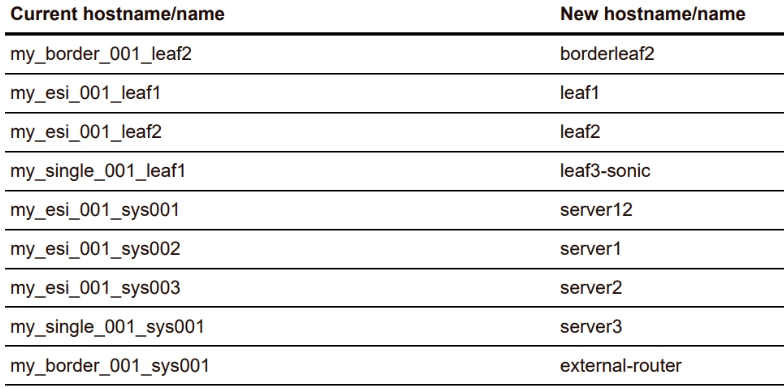
It will look like below figure:
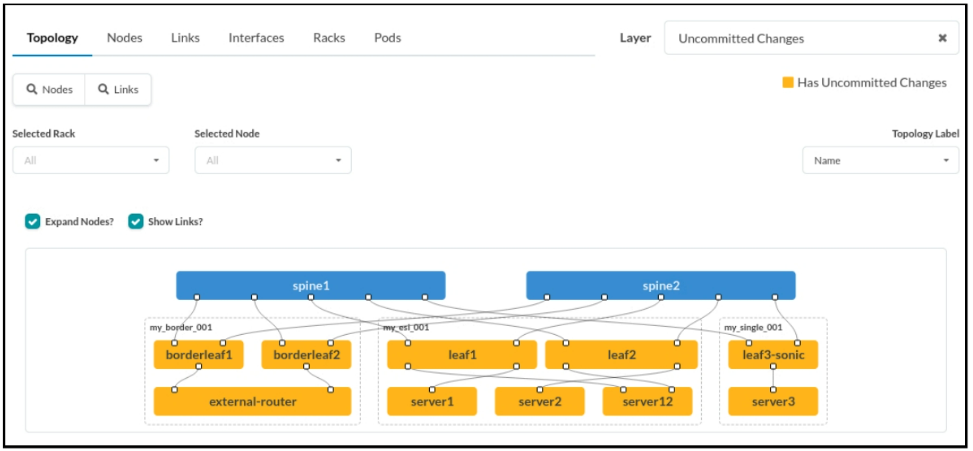
select the Commit Check sub-tab . Click Check all devices to run a commit check on all Junos devices in the blueprint.

Navigate to Blueprints > my-pod1 > Dashboard and watch the network converge. The anomalies on the dashboard should be resolved and all gauges should turn to green within a few minutes.
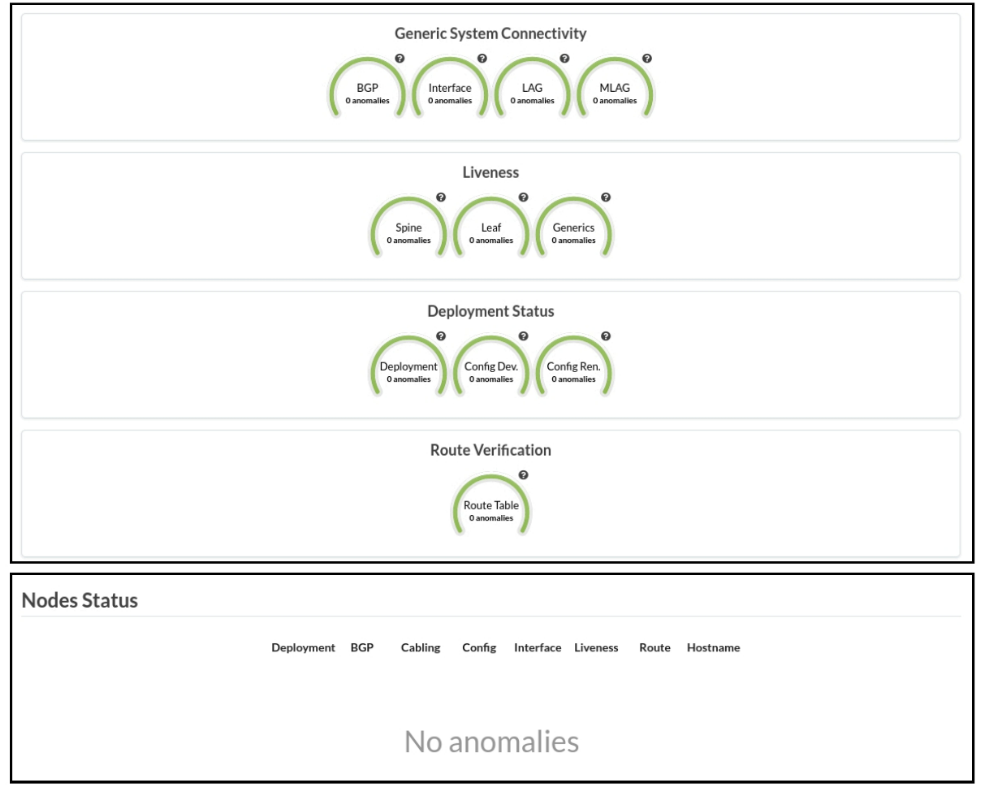
Looking at the lab diagram, notice an extra link that you are about to add between server3 and the leaf3-sonic node. After adding the new link, you will create a LAG between itself and the existing link between the two devices.
Navigate to Blueprints > my-pod1 > Staged > Physical > Topology and click the leaf3-sonic node.
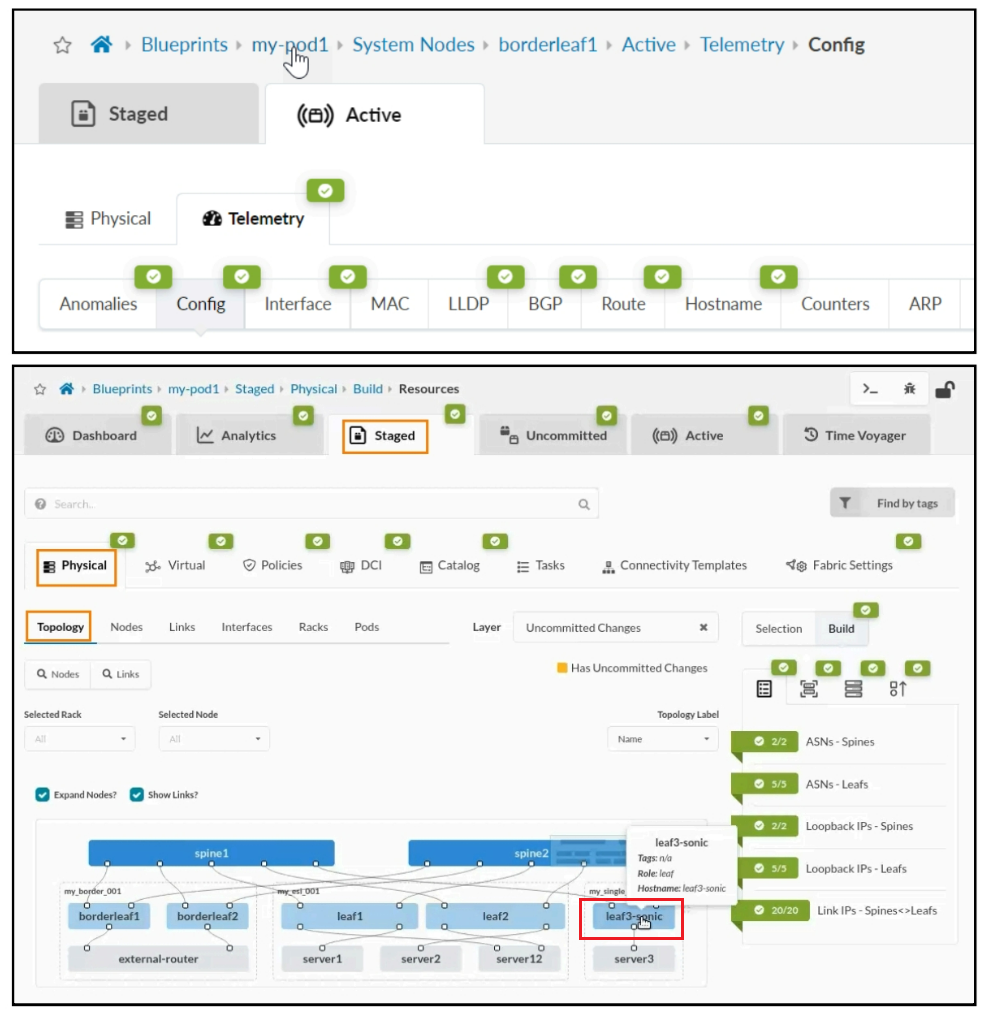
Uncheck the box for Show Unused Ports, then select the checkbox for the leaf3-sonic node.
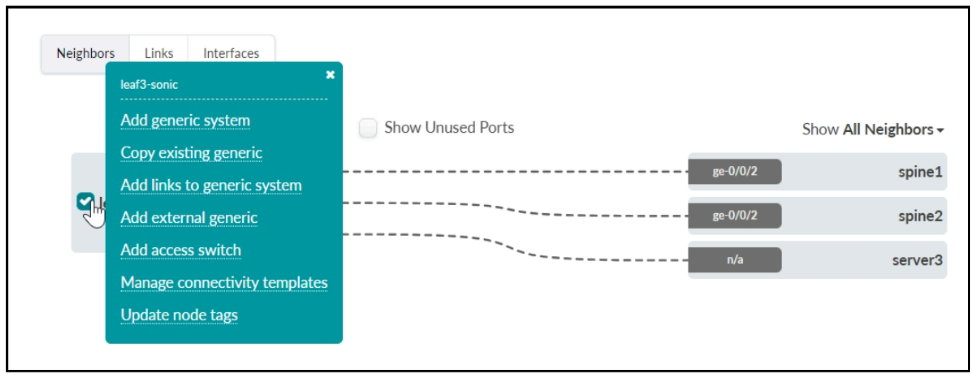
Click Add links to generic system which will cause the Create Links window to pop up. In this window, you will make your link settings on the left side before you finally add the link to the right side by clicking the Add Link button.


LEAVE A COMMENT
Please login here to comment.