EMAIL SUPPORT
dclessons@dclessons.comLOCATION
USBuilding and Deploying a Blueprint From a Template
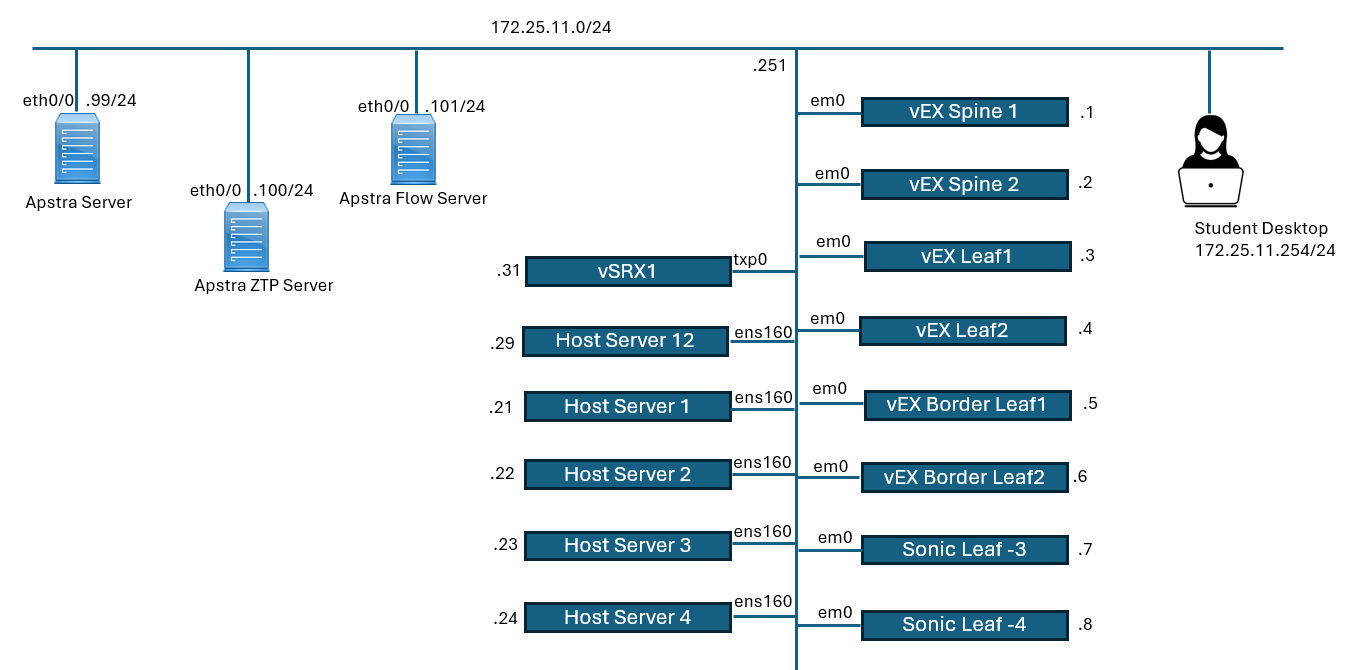
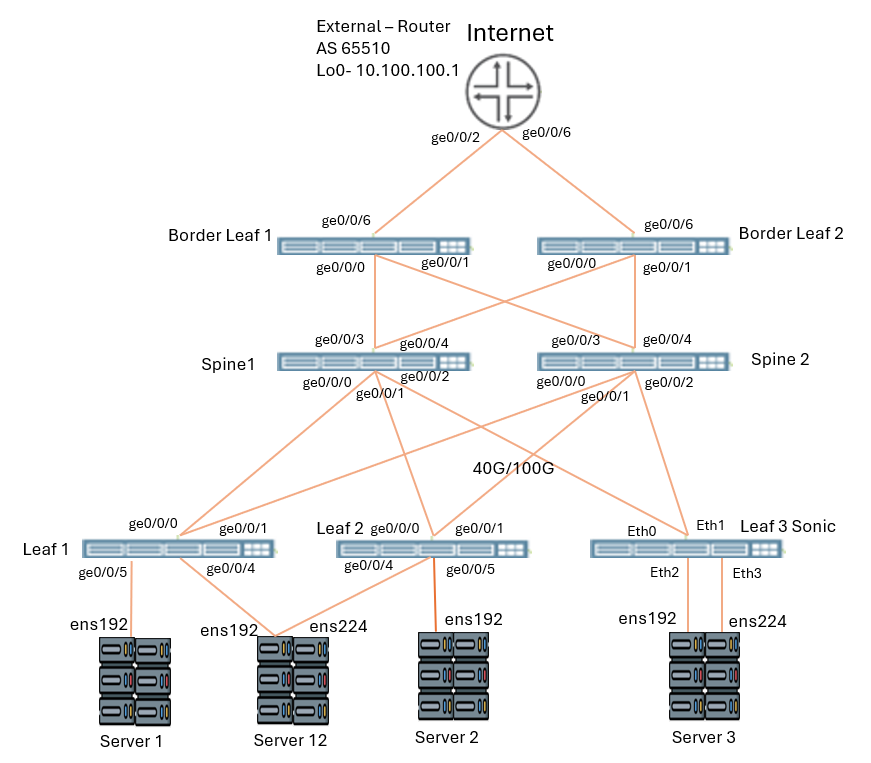
Topology:
Solution:
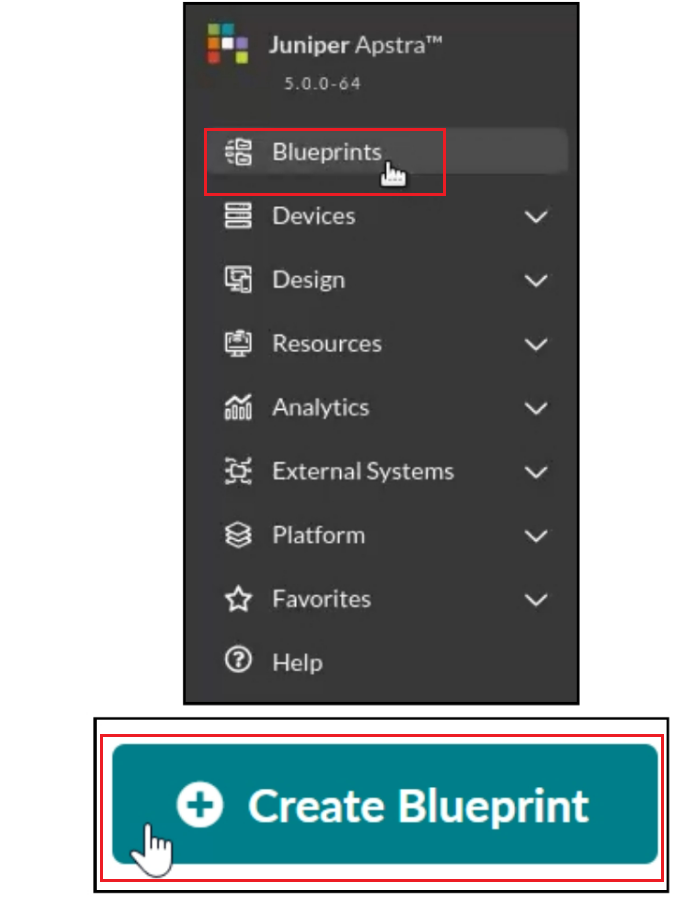
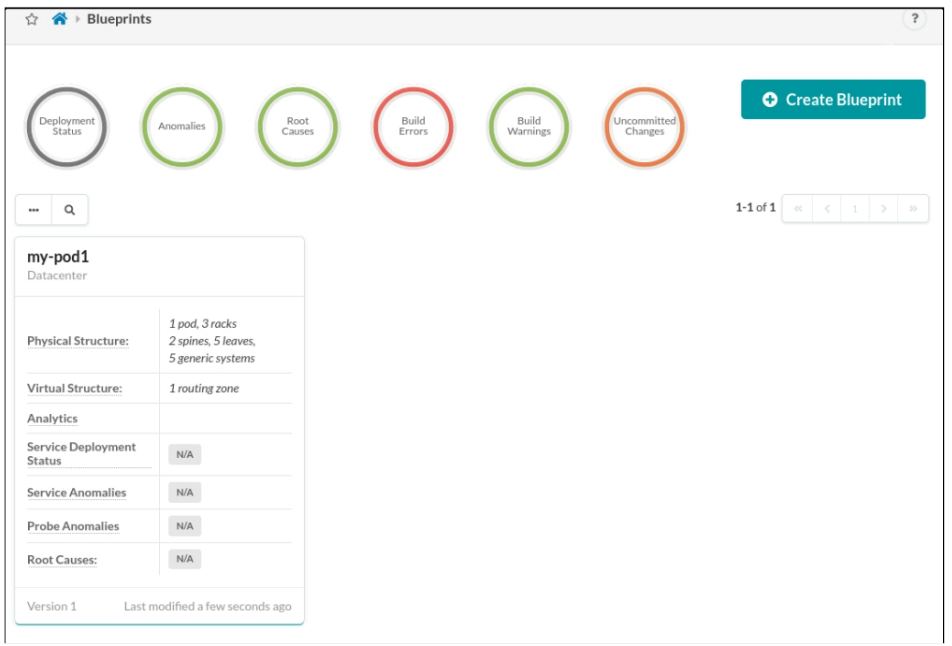
Navigate to Blueprints and click Create Blueprint
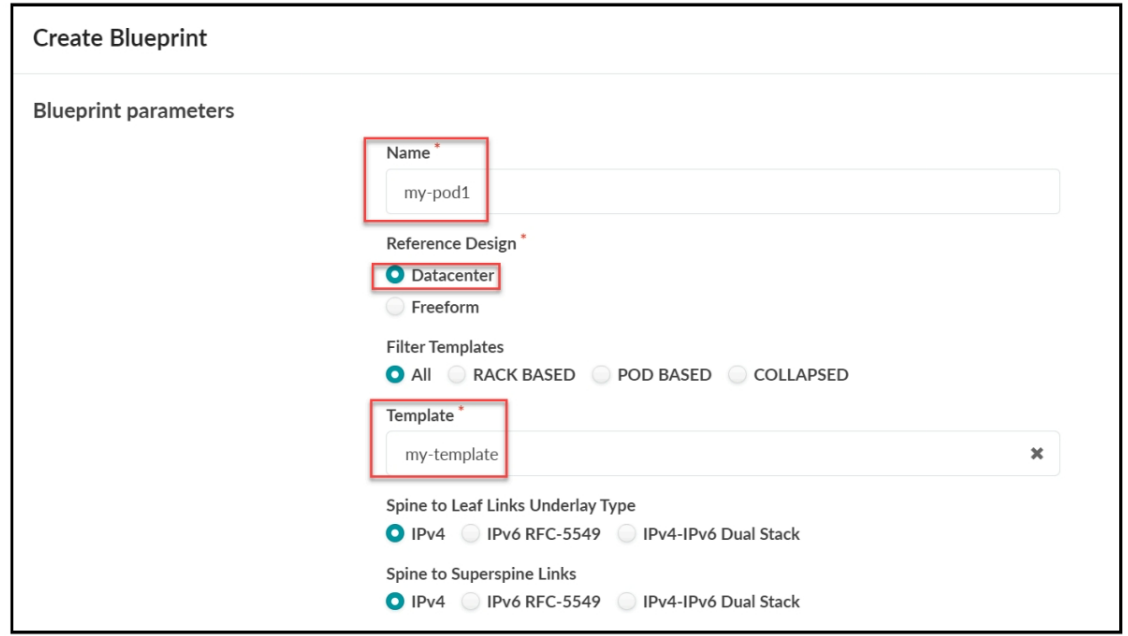
In the Create Blueprint window, set the name of the blueprint to my-pod1, set the reference design to Datacenter, and select the template my-template that you created in an earlier lab.
Click the Create button to create the new blueprint.
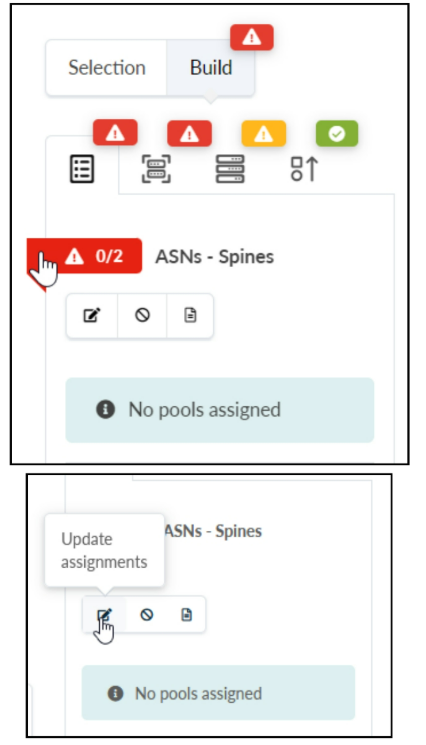
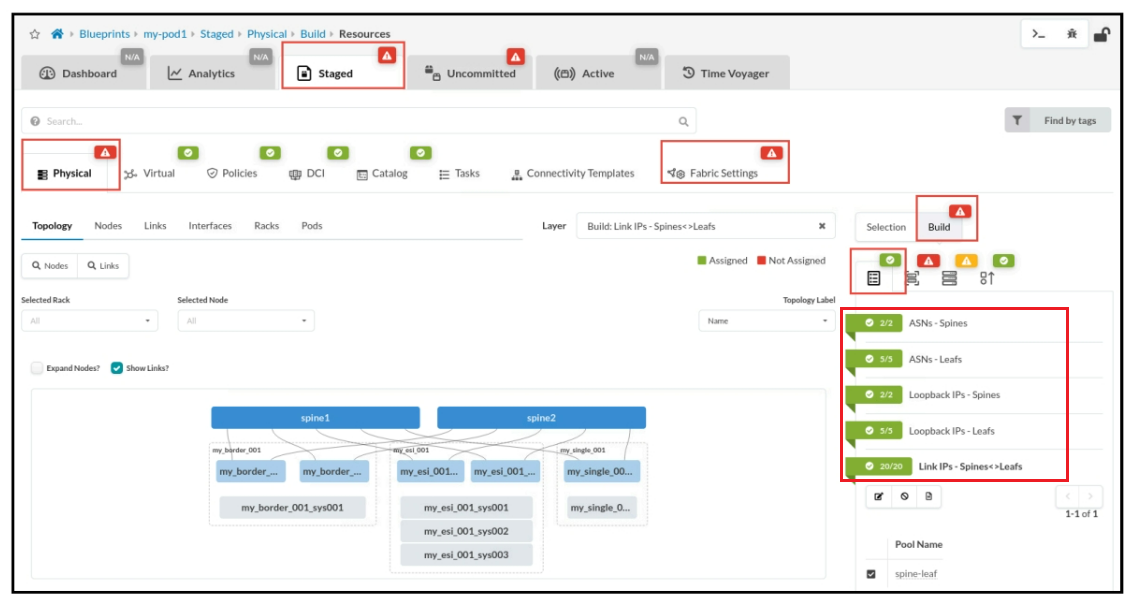
You are about to start the build process for your blueprint. The build process includes assigning resource pools (to enable Apstra to assign IP addresses and ASN numbers), device profiles, interface maps, and managed devices to your blueprint. In the blueprint, navigate to Buleprints>my-pod1>Staged > Physical > Build > Resources.
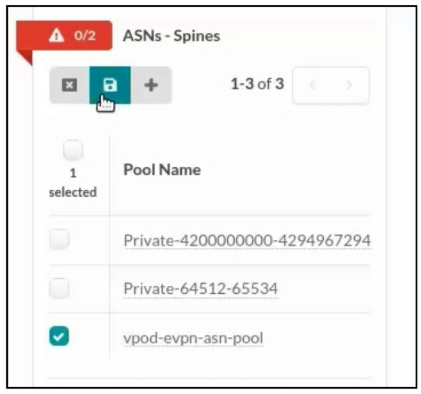
Click the red status indicator next to ASNs-Spines and select Update assignments. Select vpod-evpn-asn-pool from the list of ASN resources. Click the Save button when finished.
Repeat the steps above ASNs-Leafs , Loopback IPs -Spines , Loopback IPs - Leafs, Link IPs - Spines<>Leafs, and Link IPs - To External. Use the following list to assign the resources.
- ASNs - Leafs: vpod-evpn-asn-pool
- Loopback IPs - Spines: spine-loopback
- Loopback IPs - Leafs: leaf-loopback
- Link IPs - Spines<>Leafs: spine-leaf
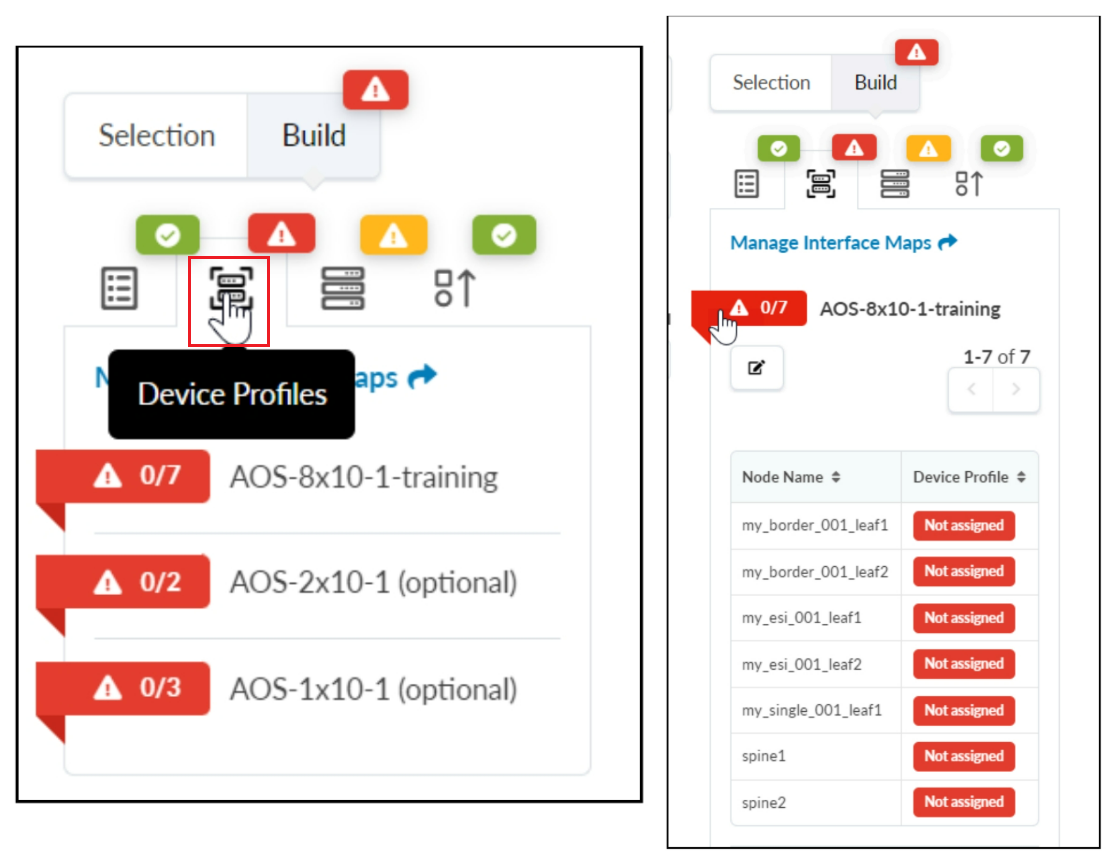
To the right of the Resources tab, select the Devices Profiles tab. Select the red status indicator next to AOS-8x10⁻¹-training and then click the Change interface maps assignment button. The AOS-2x10⁻¹ (optional) and the AOS-1x10⁻¹ (optional) are used for connecting generic devices, which Apstra will not manage.
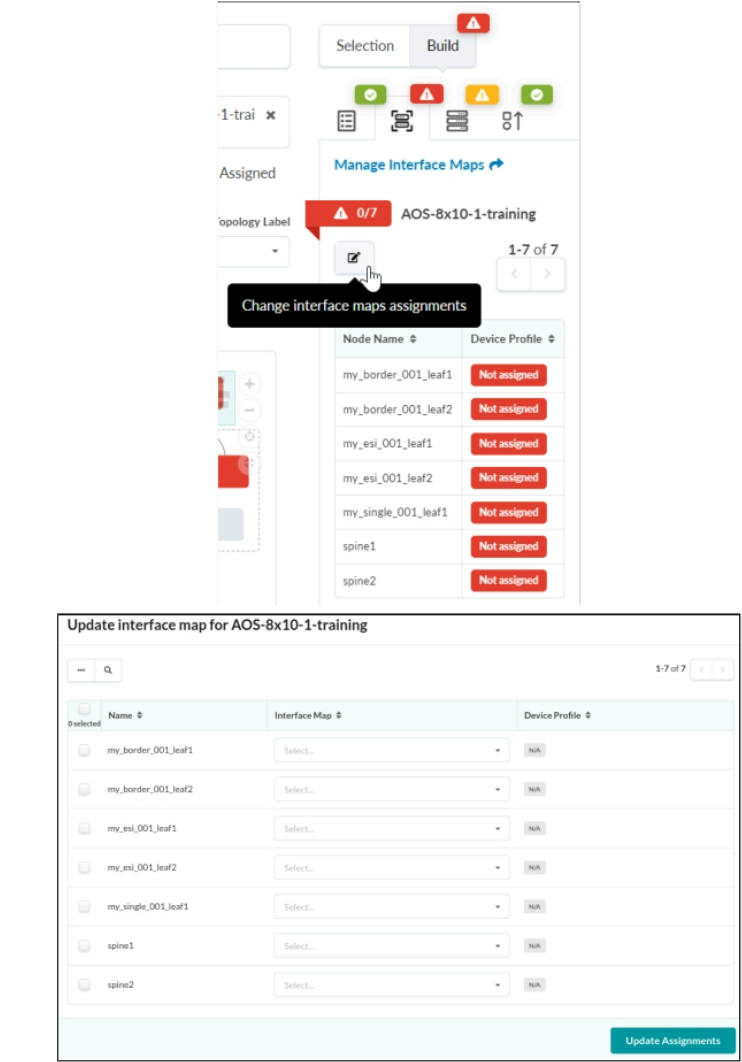
In the Update interface map window, select the Juniper_vEX__AOS-8x10-training interface map for the spine1 , spine2 , my_esi_001_leaf1 , my_esi_001_leaf2 , my_border_001_leaf1, and my_border_001_leaf2 nodes. Also, select the VS_SONiC_BUZZNIK_PLUS__AOS-8x10⁻¹-training interface map for the my_single_001_leaf1 node. Click Update Assignments when finished.
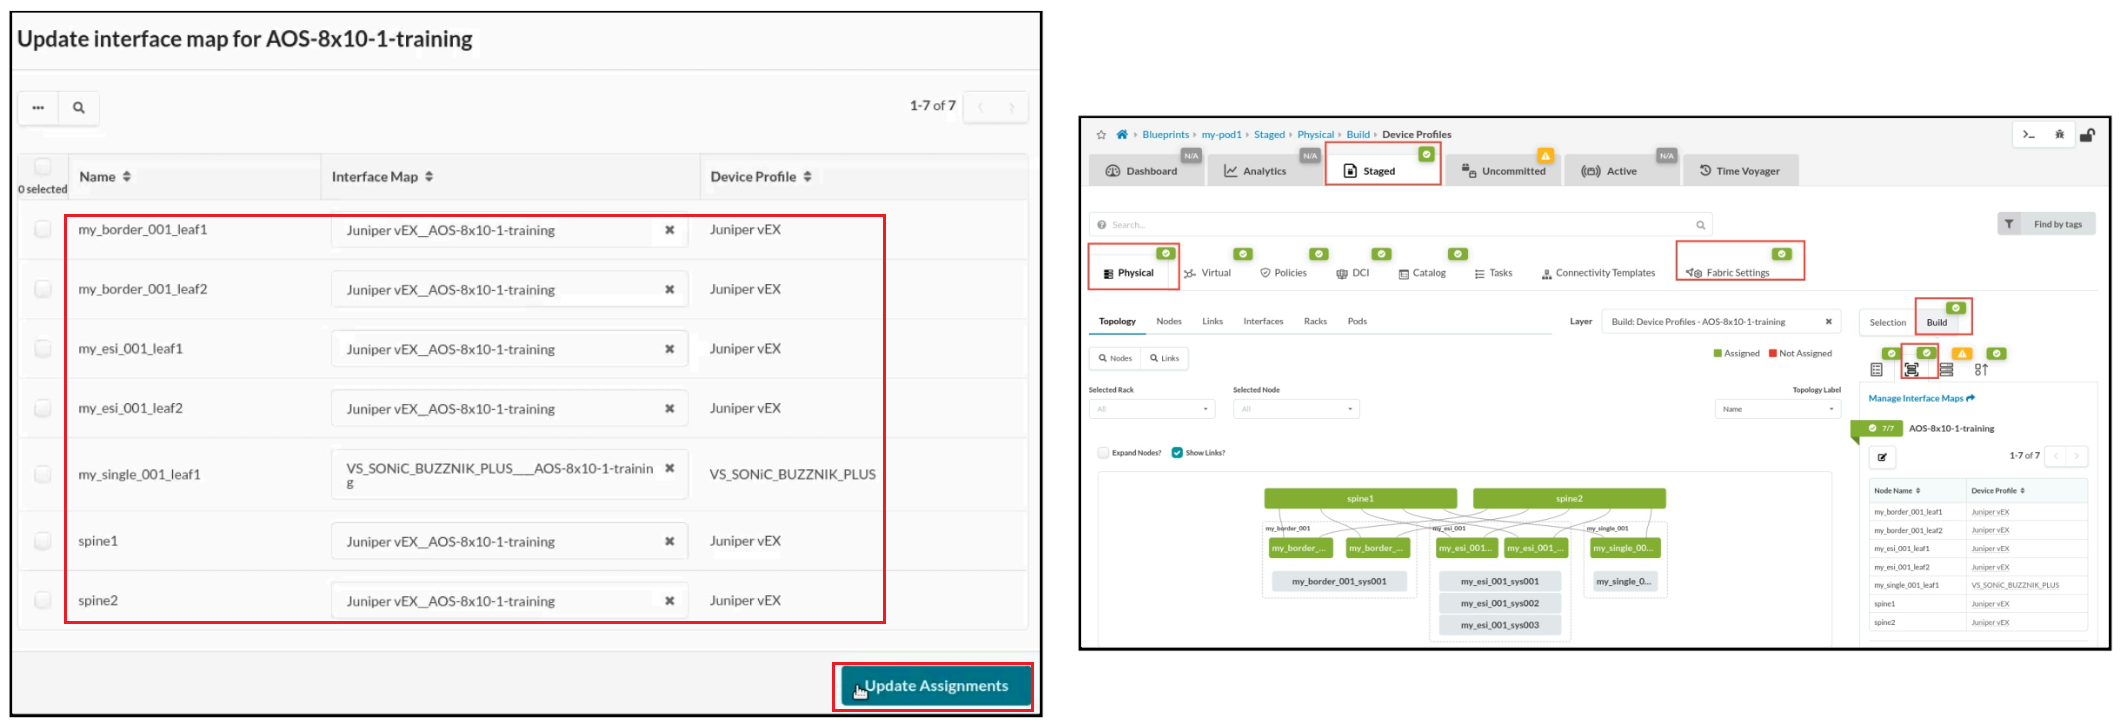
To the right of the Devices Profiles tab, select the Devices tab.Click the yellow indicator next to Assigned System IDs - Managed Nodes. Then, click the Change System IDs assignments button so that you can assign the physical devices to this blueprint.

Comment
TABLE OF CONTENTS
- Navigating Apstra UI
- Configure : Logical Devices, Device Profiles, and Interface Maps
- Managing Devices
- Creating Resources and Tags
- Configuring Racks
- Configuring Templates
- Building and Deploying a Blueprint From a Template
- Working With The Active Blueprint
- Enabling Property Sets & Configlets
- Configuring Connectivity Templates
- Configuring Multitenancy
RECENT POSTS
- Installing Context-Aware Network Access Control using Cisco ISE Policies
- Designing Network Access Control that is Scalable using Cisco ISE Architecture
- Enterprise Network Access Control and Policy Enforcement using Cisco ISE
- Secure Device Administration and Network Access Using AAA Architecture
- Designing Enterprise-Class Hybrid Cloud Connectivity Using AWS Networking Services
- Exploring Core AWS Networking and Messaging Concepts for Modern Cloud Architectures
- Understanding Key AWS Services for Modern Cloud Architectures
- Building a Strong AWS Foundation with Amazon S3, EC2, and Virtual Private Cloud
- Understanding the ENSDWI Course: Advanced Cisco SD-WAN (Viptela) Concepts
- A Complete Guide to the DCACI-A Course: Mastering Advanced Cisco ACI Concepts


LEAVE A COMMENT
Please login here to comment.