EMAIL SUPPORT
dclessons@dclessons.comLOCATION
USConfiguring Multitenancy
Topology
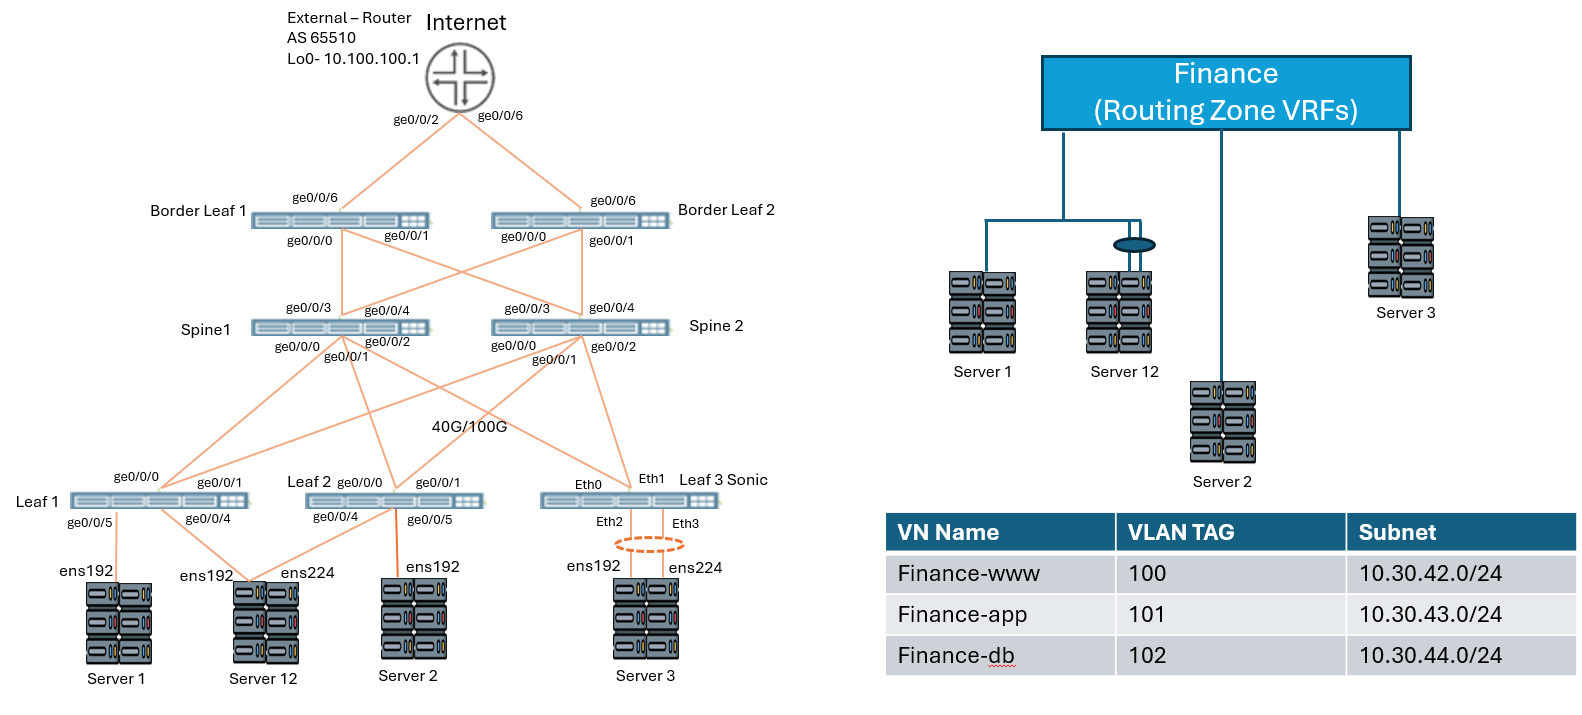
Task
We will be configuring Virtual Network , Routing Zone , Assign host interface in to Virtual network via connectivity templates and check the host conenctivity.
Solution
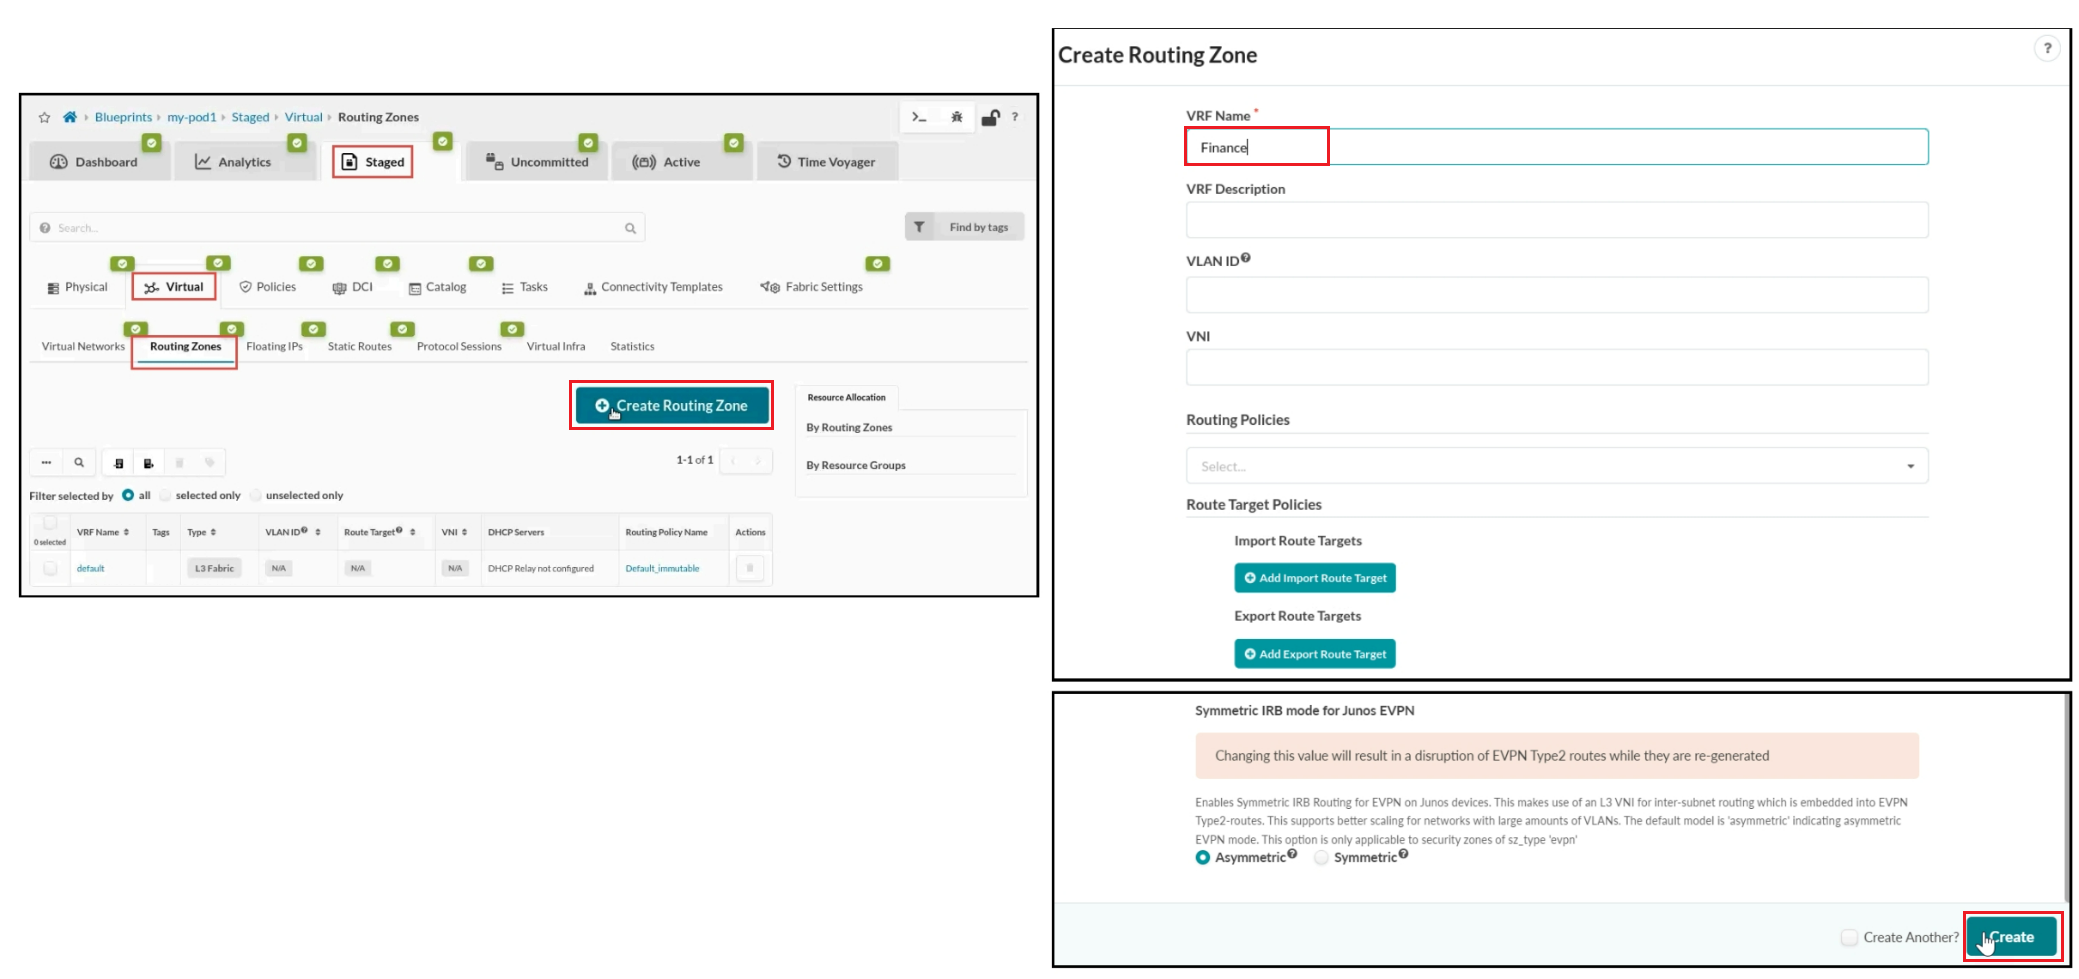
From the blueprint, navigate to Staged > Virtual > Routing Zones and click Create Routing Zone .
In the Create Routing Zone window, name the VRF Finance and leave the remaining fields in their default state, enabling Juniper Apstra to assign the resources and to use the default values. Click Create when finished
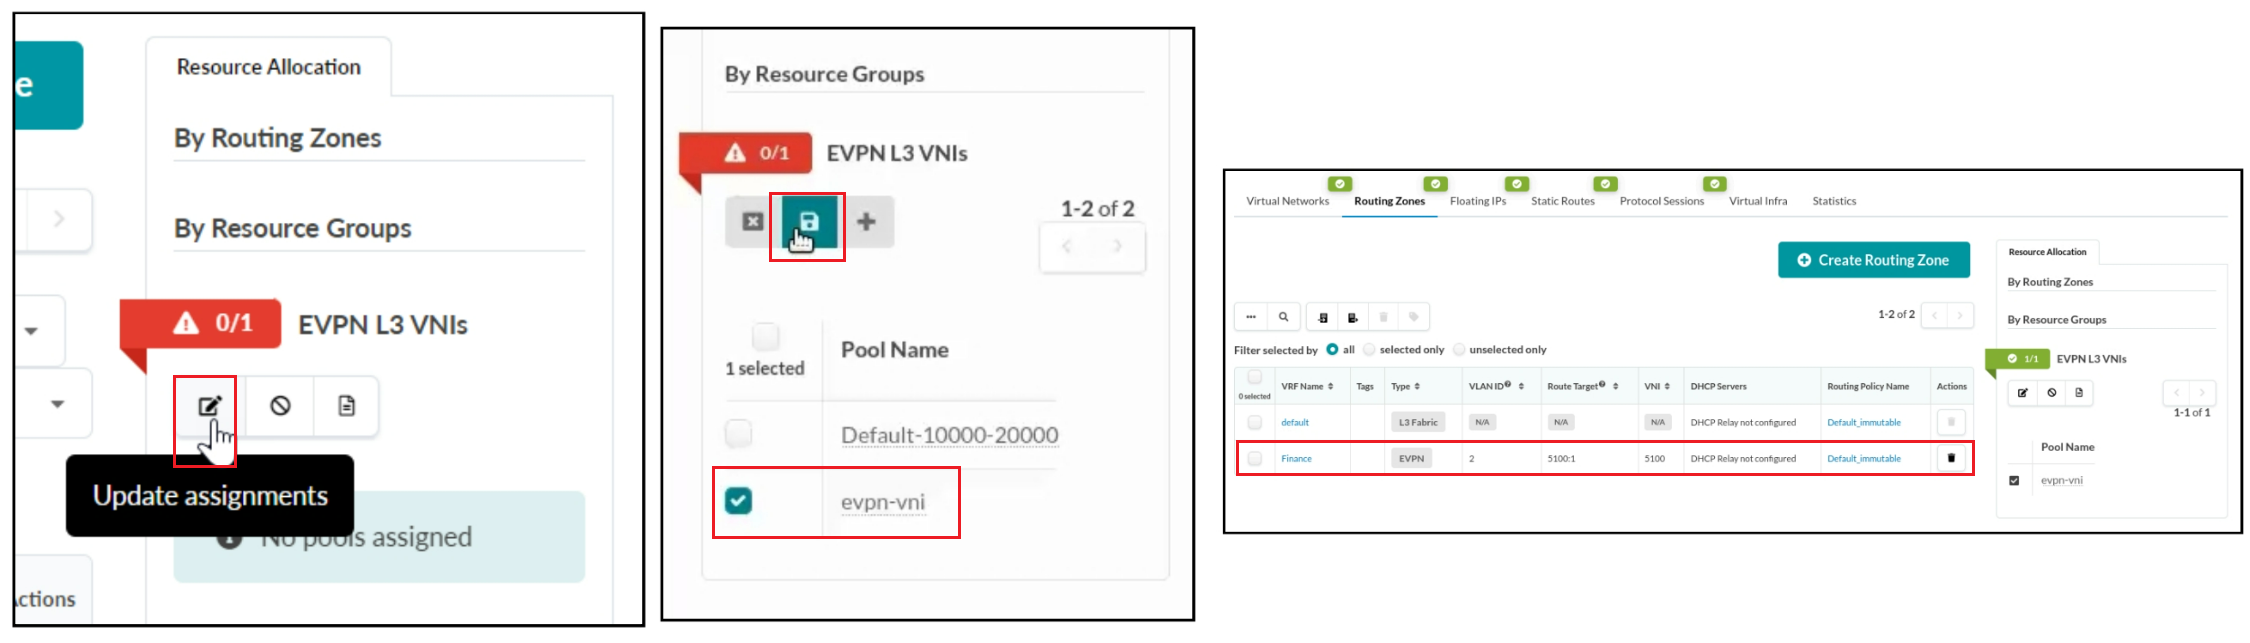
Click the red status indicator next to EVPN L3 VNIs and then click Update assignments . Assign the evpn-vni pool to EVPN L3 VNIs. Click the Save button when you are finished.
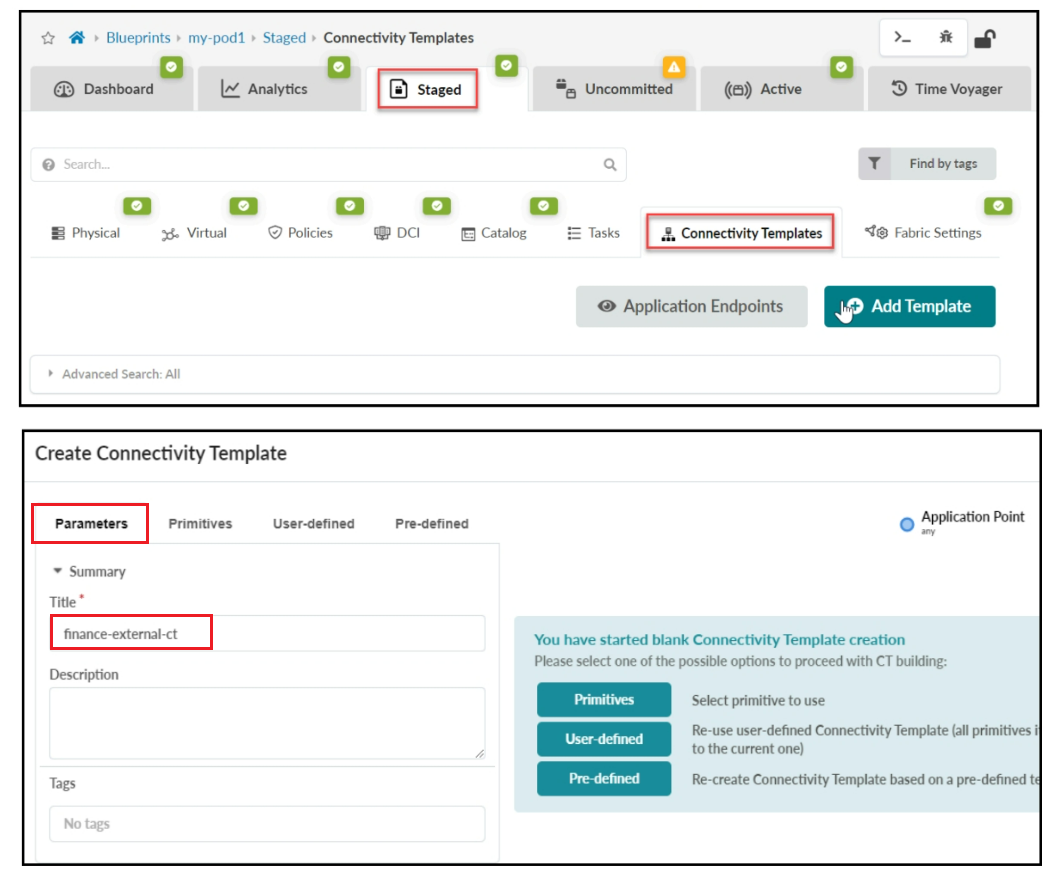
As virtual networks are associated with the routing zone, the VRFs will route traffic between the attached virtual networks. If you would also like to give the same virtual networks access to the outside world, you must create another connectivity template and associate it with the new Routing Zone. In the next few steps, you will enable a connectivity template that will cause Juniper Apstra to configure a subinterface on the border leaf (VLAN 2), associate it with the Finance routing zone, and establish an EBGP session with the external router. Navigate to `Staged > Connectivity Templates and click the Add Template button.
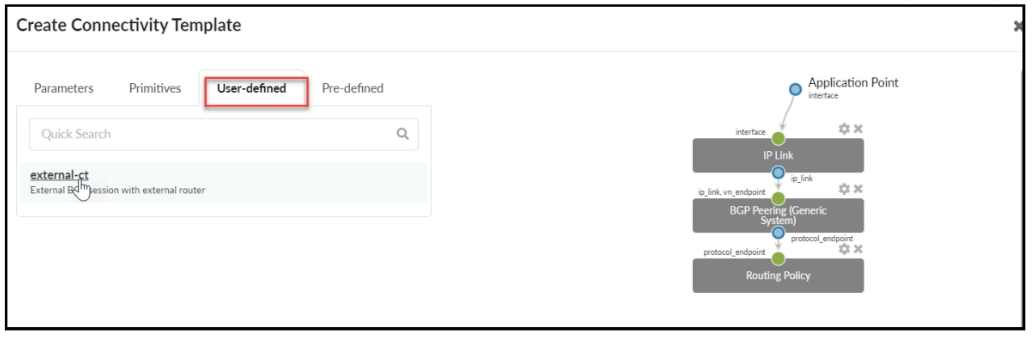
In the Create Connectivity Template window, set the name of the connectivity template to finance-external-ct .
Navigate to the User-defined tab and select the external-ct connectivity template. By doing this, the external-ct connectivity template will initially be used as the basis for this connectivity template. Then, in the next few steps, you will adjust the settings, which will give this connectivity template its own unique new functionality.
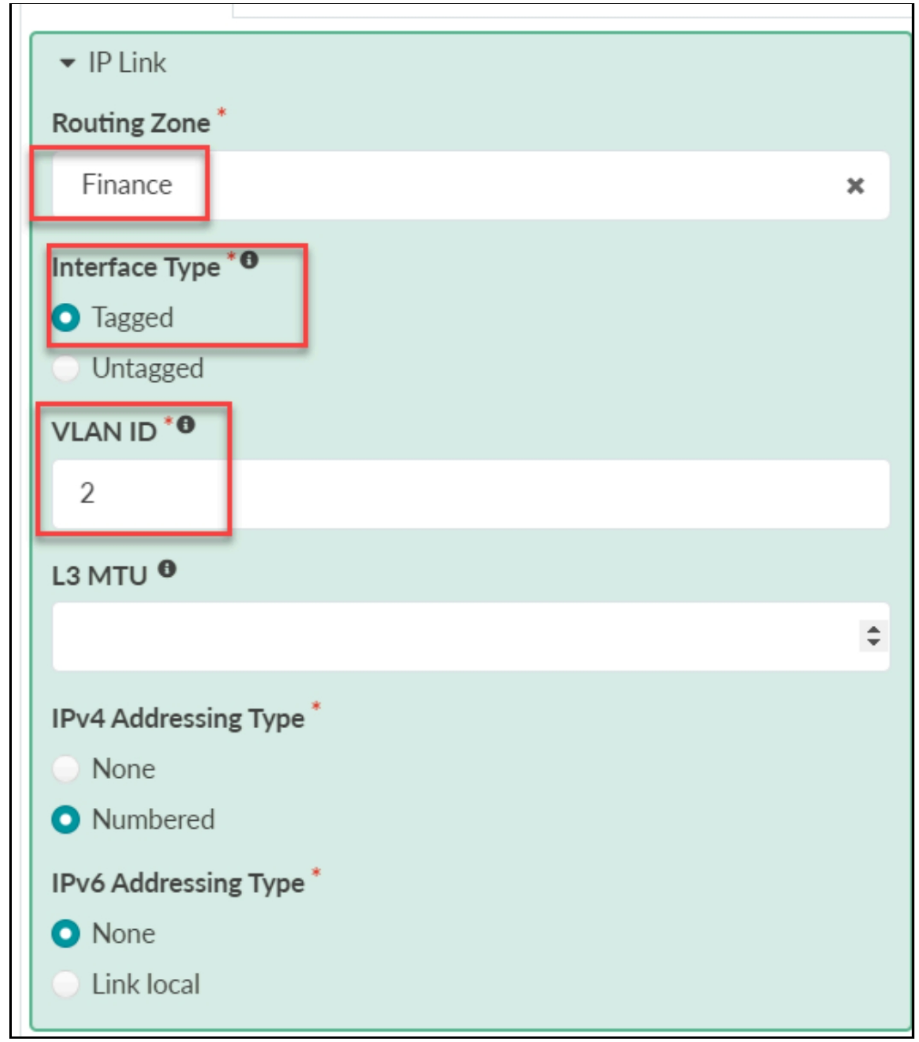
Expand the IP Link section by clicking the down arrow. Set the following settings:
- Routing Zone: Finance
- Interface Type: Tagged
- VLAN ID: 2
Leave everything else under IP Link in its default state.
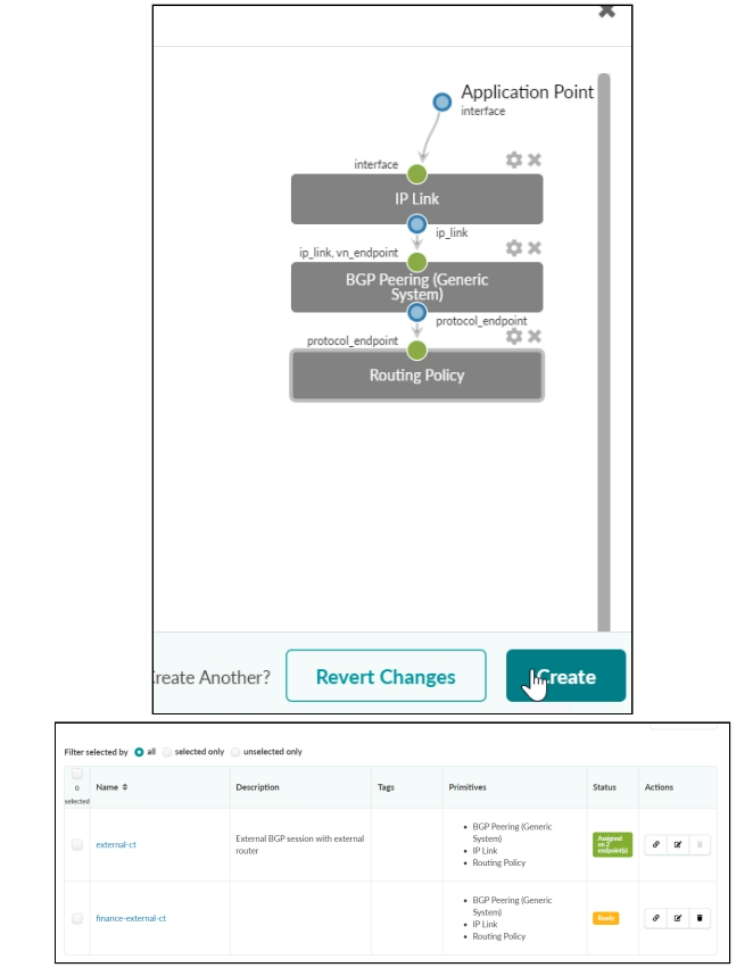
Expand the Routing Policy section by clicking the down arrow.
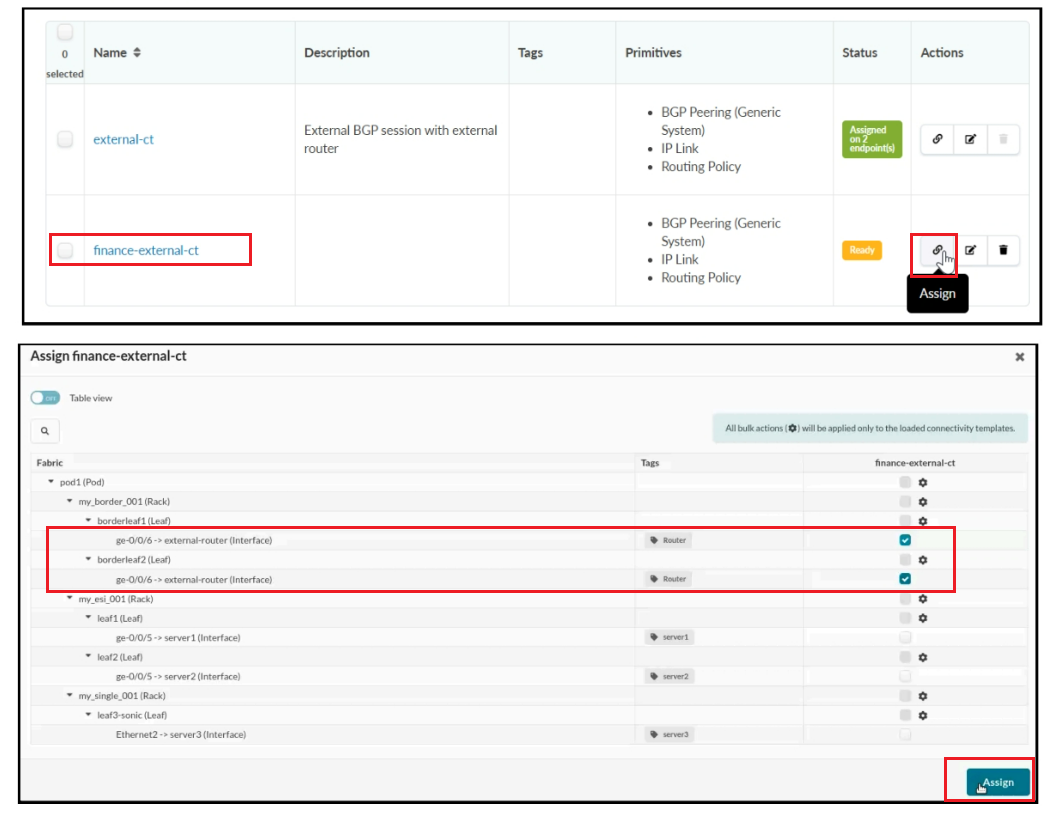
Click the Assign icon next to the finance-external-ct connectivity template.Click the Assign icon next to the finance-external-ct connectivity template.
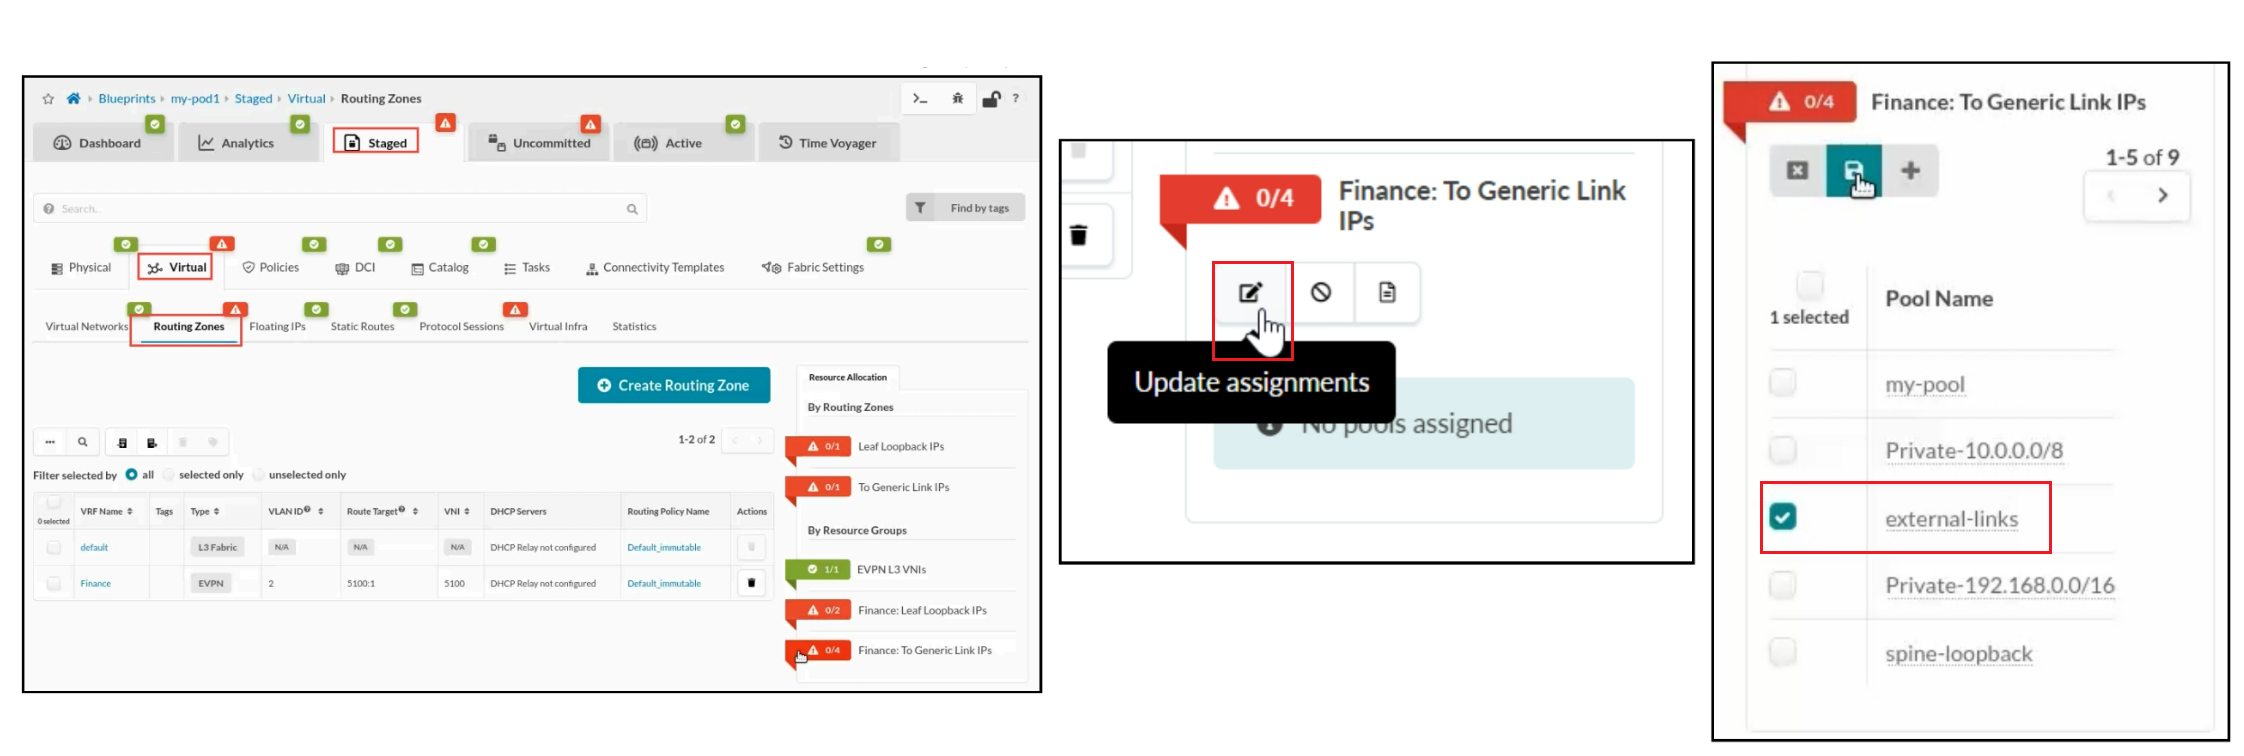
Navigate to Staged > Virtual > Routing Zones. Select the red status indicator next to Finance: To Generic Link IPs and then click the Update Assignments button. Set the resource to the external-links IP pool and click the Save button.
Like Wise. Select the red status indicator next to Finance: Leaf Loopback IPs and then click the Update Assignments button. Set the resource to the leaf-loopback IP pool and click the Save button.
Now you will create each of the virtual networks. Navigate to Staged > Virtual > Virtual Networks and click Create Virtual Network .

Comment
TABLE OF CONTENTS
- Navigating Apstra UI
- Configure : Logical Devices, Device Profiles, and Interface Maps
- Managing Devices
- Creating Resources and Tags
- Configuring Racks
- Configuring Templates
- Building and Deploying a Blueprint From a Template
- Working With The Active Blueprint
- Enabling Property Sets & Configlets
- Configuring Connectivity Templates
- Configuring Multitenancy
RECENT POSTS
- Installing Context-Aware Network Access Control using Cisco ISE Policies
- Designing Network Access Control that is Scalable using Cisco ISE Architecture
- Enterprise Network Access Control and Policy Enforcement using Cisco ISE
- Secure Device Administration and Network Access Using AAA Architecture
- Designing Enterprise-Class Hybrid Cloud Connectivity Using AWS Networking Services
- Exploring Core AWS Networking and Messaging Concepts for Modern Cloud Architectures
- Understanding Key AWS Services for Modern Cloud Architectures
- Building a Strong AWS Foundation with Amazon S3, EC2, and Virtual Private Cloud
- Understanding the ENSDWI Course: Advanced Cisco SD-WAN (Viptela) Concepts
- A Complete Guide to the DCACI-A Course: Mastering Advanced Cisco ACI Concepts


LEAVE A COMMENT
Please login here to comment.