EMAIL SUPPORT
dclessons@dclessons.comLOCATION
USDeploying Cisco SD-Access—Provision Workflow
Once network policies are configured in Cisco DNA Center, the next step is provisioning devices. This stage involves onboarding devices and deploying policies across them to ensure consistent configuration and operation.
Provisioning Workflow
Provisioning devices includes:
- Onboarding devices with Cisco Plug and Play (PnP), which adds them to the inventory
- Deploying required settings and policies to devices in the inventory
- Assigning devices to sites
- Creating fabric domains and adding devices into the fabric
The Provision application serves as the central point where all design and policy configurations come together. It is used to build fabrics and provision the network.
Main Components of the Provision Application
- Devices – Onboard devices with PnP and manage the device inventory
- Fabric – Create and manage fabric domains and transit sites
- Services – Enable and manage additional services such as Cisco Stealthwatch Security Analytics and App Hosting
Identity-Based Networking Services (IBNS) 2.0 Support
Cisco DNA Center provisioning supports only Cisco IBNS 2.0, which introduces changes to AAA configurations:
- Converts authentication commands into Class-Based Policy Language (CPL) equivalents
- Disables CLI authentication display during CPL conversion
Best Practices:
- Back up your current configuration before provisioning
- Plan change management windows to accommodate AAA configuration updates aligned with IBNS 2.0
Provision—PnP Onboarding
PnP provisioning provides a way to automatically and remotely provision and onboard new network devices with minimal involvement from network administrators and field personnel.
By using PnP provisioning, you can do the following:
- Provision devices by assigning a site, deploying site settings, installing a device software image, and applying a custom onboarding configuration.
- Plan devices before their installation by entering device information and choosing provisioning operations. When the device comes online, it contacts the Cisco DNA Center, and Cisco PnP provisions and onboards the device automatically.
- Provision unclaimed network devices, which are new devices that appear on the network, without prior planning.
- Synchronize the device inventory from the Cisco PnP Connect cloud portal in a Cisco Smart Account to PnP, so that all the devices appear in the Cisco DNA Center.
- Display the detailed onboarding status of network devices.
Before using Cisco PnP provisioning, perform the following prerequisites:
- Set your Cisco credentials in the main Cisco DNA Center settings by using System Settings > Settings > Cisco Credentials.
- Accept the End-User License Agreement (EULA) in the main Cisco DNA Center settings by using System Settings > Settings > Device EULA Acceptance.
PnP provides a mechanism to automatically and remotely onboard and provision new network devices.
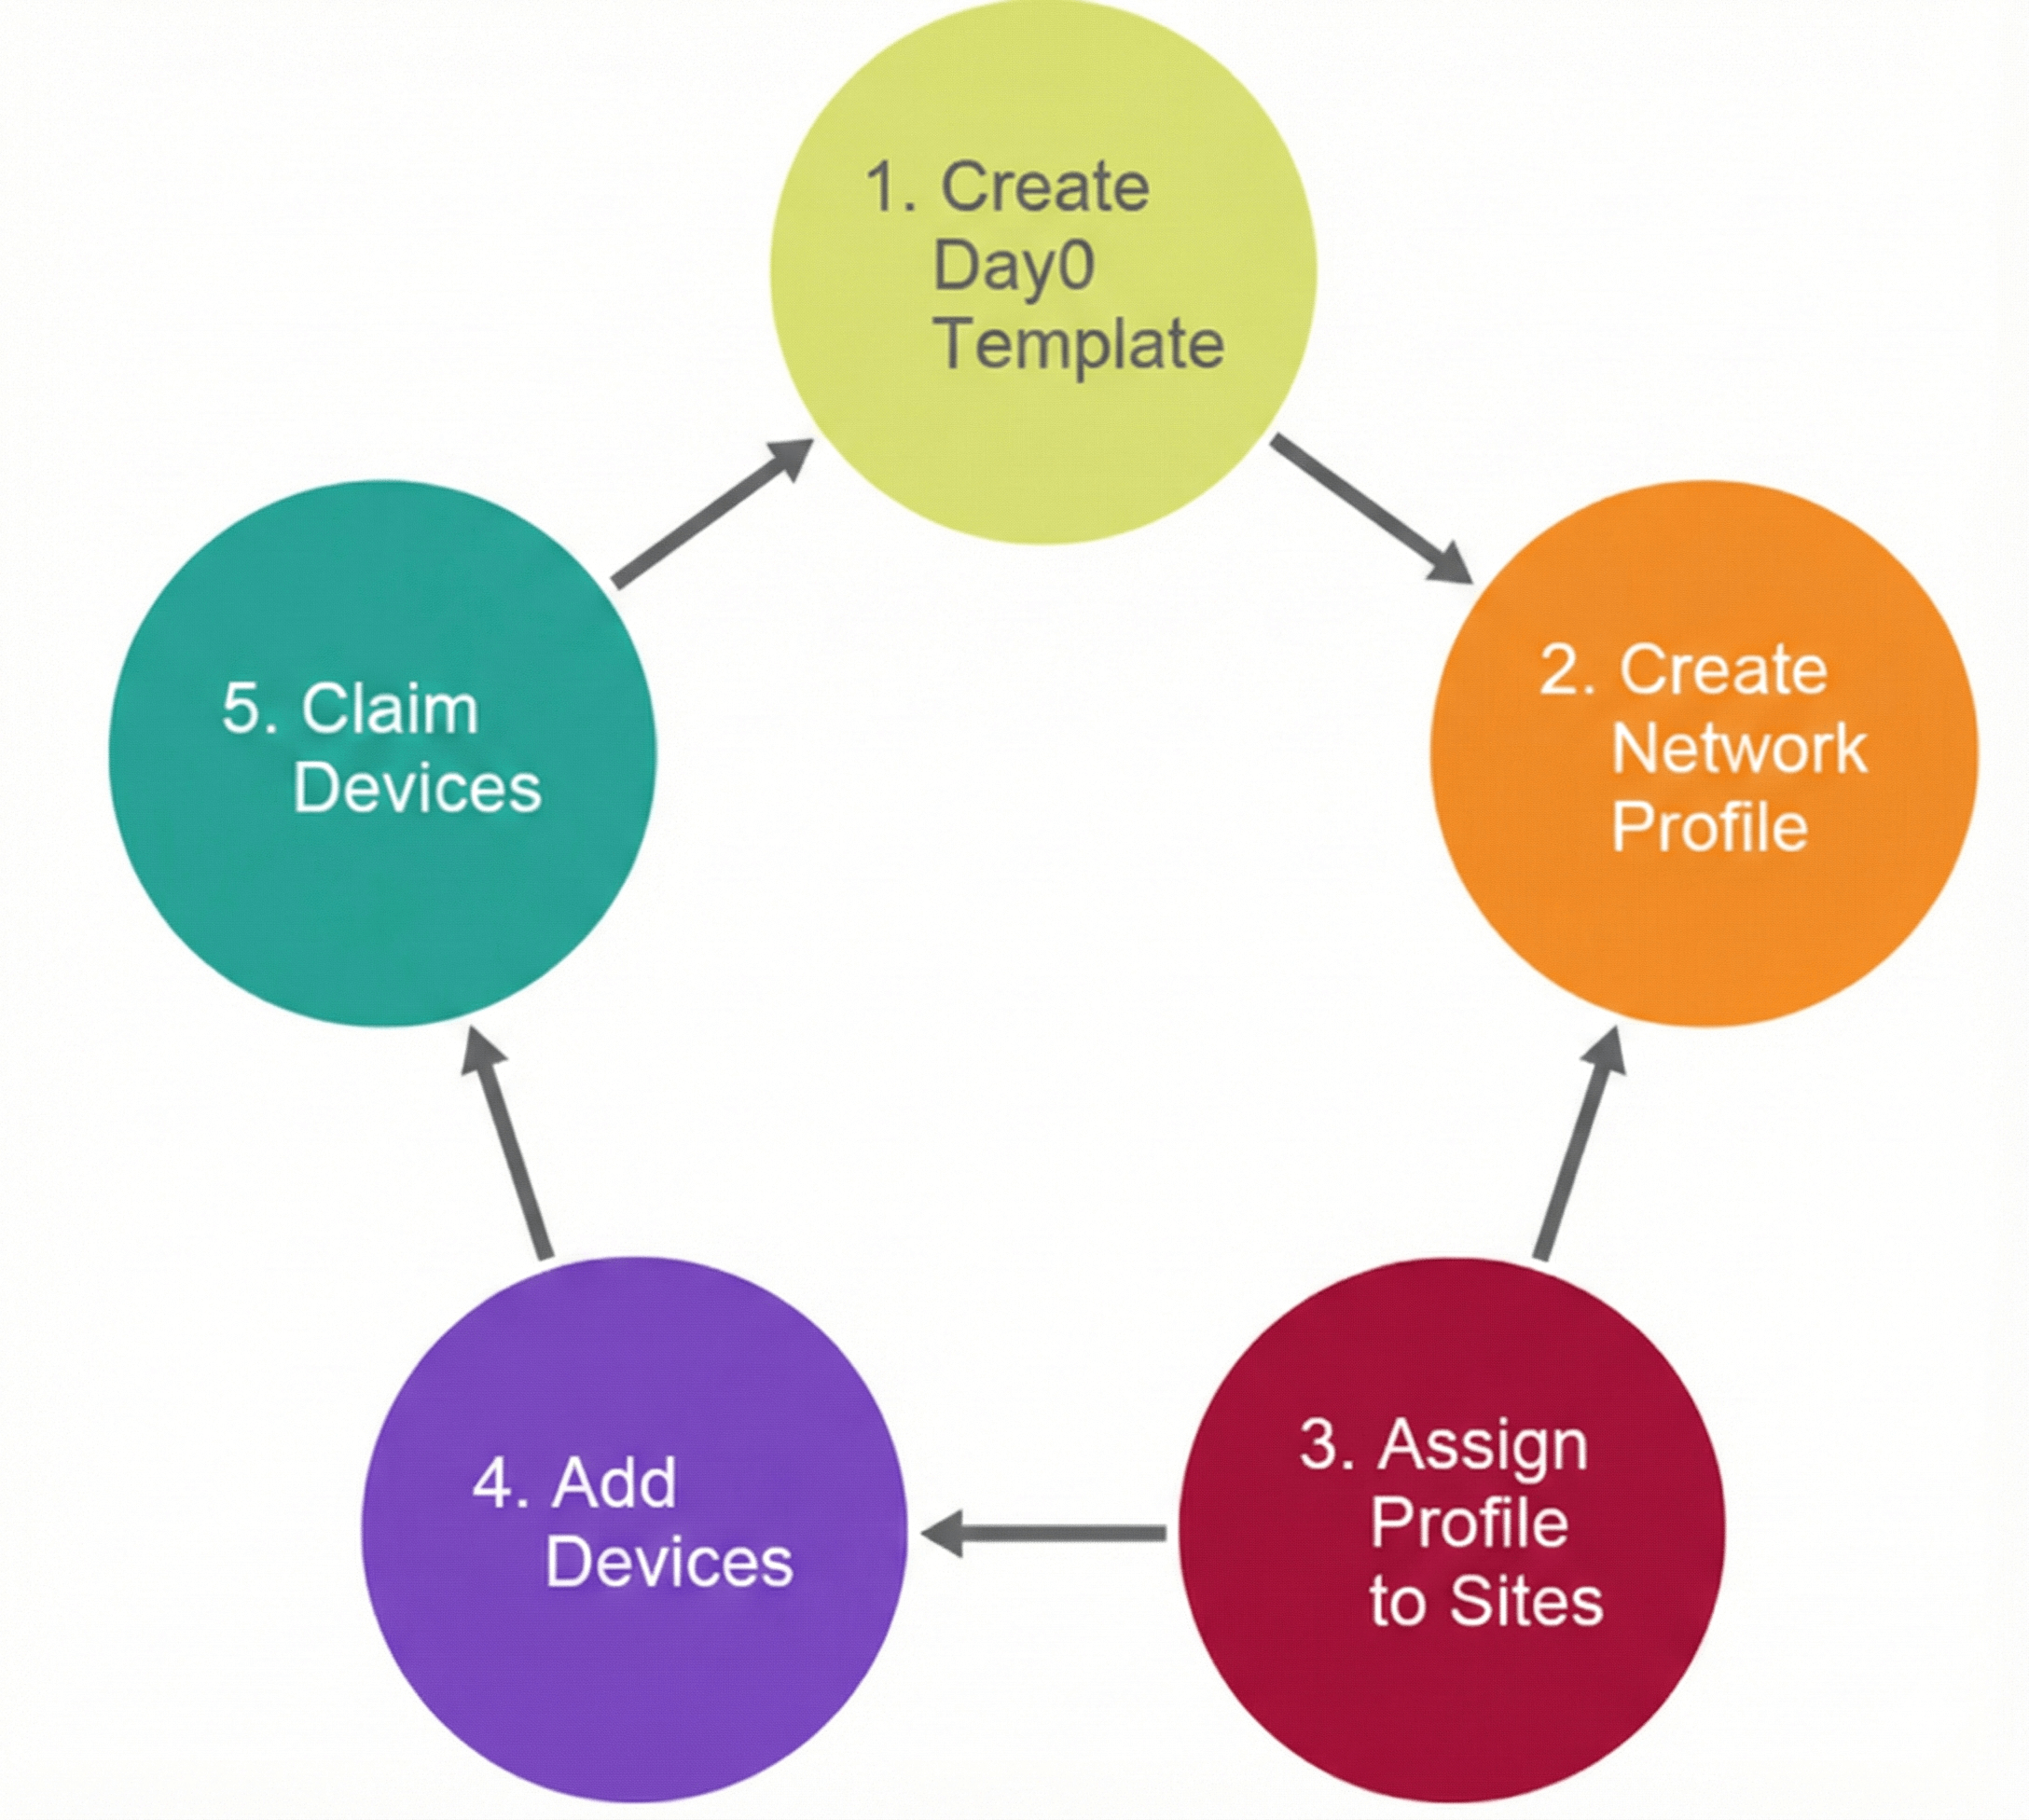
Option 1: Planned Provisioning
An administrator can plan the provisioning of a new site or other group of network devices.
Planned provisioning is carried out with the following steps:
- Define the site within the network hierarchy.
- Define network profiles for the types of devices you are deploying.
- Optionally, ensure that software images for the devices to be provisioned are uploaded and marked as golden in the image repository.
- Optionally, define onboarding configuration templates to be applied to devices. Such templates contain basic network configuration commands to onboard a device so that it can be managed on the network. Usually, such templates are not necessary unless you need to customize the day-zero configuration.
- Add details about planned devices one at a time or in bulk with a .csv file.
- Devices boot up and are provisioned automatically.
Option 2: Unclaimed Provisioning
If a new network device is added to the network before it can be planned, it is labeled as an unclaimed device. An unclaimed device can be added manually by an administrator or automatically through one of the discovery methods.
An administrator can provision the device as follows:
- Find the device on the devices list by filtering unclaimed devices or searching for it by name.
- Claim the device by assigning a site, image, configuration template, or profile.
Option 3: Cisco Smart Account Synchronization and Provisioning
Network devices can be automatically registered through a Cisco Smart Account with the Cisco PnP Connect cloud service. An administrator can synchronize the device inventory from Cisco PnP Connect to Cisco DNA Center PnP, so that all the devices appear in Cisco DNA Center.

Comment
TABLE OF CONTENTS
RECENT POSTS
- Installing Context-Aware Network Access Control using Cisco ISE Policies
- Designing Network Access Control that is Scalable using Cisco ISE Architecture
- Enterprise Network Access Control and Policy Enforcement using Cisco ISE
- Secure Device Administration and Network Access Using AAA Architecture
- Designing Enterprise-Class Hybrid Cloud Connectivity Using AWS Networking Services
- Exploring Core AWS Networking and Messaging Concepts for Modern Cloud Architectures
- Understanding Key AWS Services for Modern Cloud Architectures
- Building a Strong AWS Foundation with Amazon S3, EC2, and Virtual Private Cloud
- Understanding the ENSDWI Course: Advanced Cisco SD-WAN (Viptela) Concepts
- A Complete Guide to the DCACI-A Course: Mastering Advanced Cisco ACI Concepts


LEAVE A COMMENT
Please login here to comment.