EMAIL SUPPORT
dclessons@dclessons.comLOCATION
USLAB: Configure Transit Gateway for VPC Communications.
Configure transit Gateway so that all three Prod , test and Shared VPC can talk to each other initially and then Implement Segmentation in such that Shared VPC can able to talk to PROD and Test , but Prod VPC should not to Test.
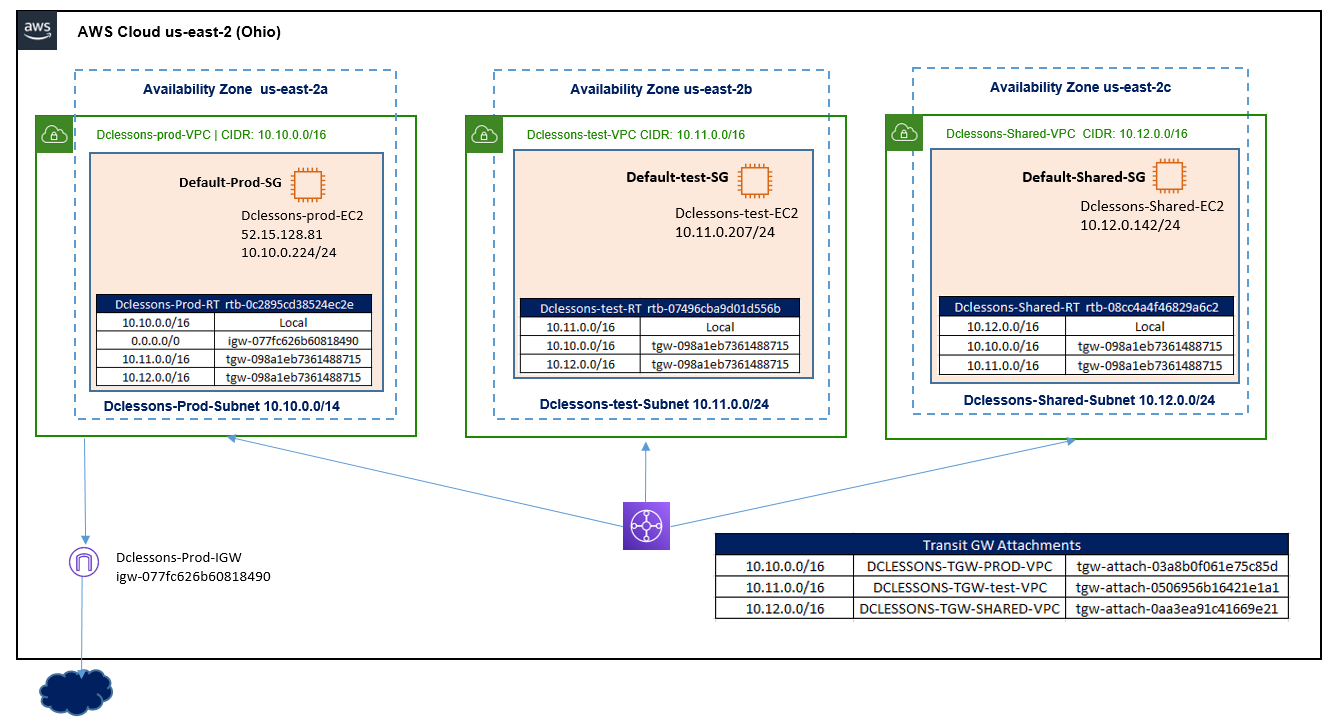
Topology:
Refer below figure to implement the Transit gateway functions in AWS.
Task:
- Create Three VPC Dclessons-prod-VPC, Dclessons-test-VPC and Dclessons-Shared-VPC in three AZ.
- Create subnet Dclessons-prod-Subnet (10.10.0.0/24), Dclessons-test-Subnet (10.11.0.0/24) , Dclessons-Shared-Subnet(10.12.0.0/24).
- Launch EC2 instance in each Subnet in Each VPC and associated the Default SG on to it.
- Create Internet Gateway and attach to Dclessons-prod-VPC, with 0.0.0.0/0 route towards IGW.
- Attach a transit gateway & its associated attachments to all three VPC and Configure Routing so that each VPC can talk to other VPC.
- Test the connectivity between VPC.
- To implement Segmentation, Configure the RT, so that Shared VPC can be able to talk to PROD and Test, but Prod VPC should not to Test.
Solution:
Create VPC
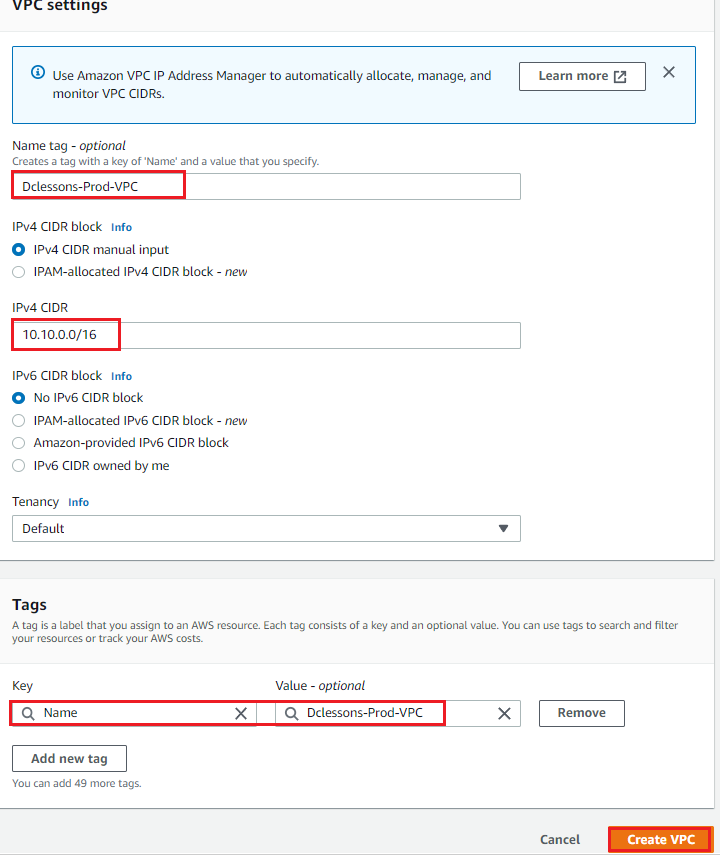
Go to AWS Services | VPC | Click to create VPC. In VPC Setting Name: Dclessons-Prod-VPC with CIDR 10.10.0.0/16 and tenancy Default | Click Create VPC.
Like Wise Create other two VPC in respective AZ as per topology, refer below figure to implement


Now you can see all three VPC has been created in each AZ and has its own Route table associated it. We have Modified the name of each default RT with name Prod, test, Shared.

Create Subnet
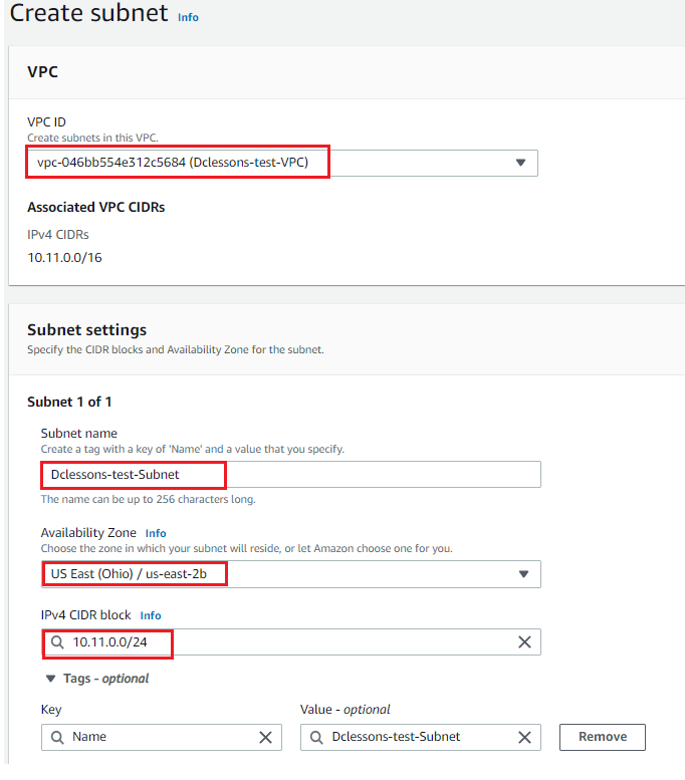
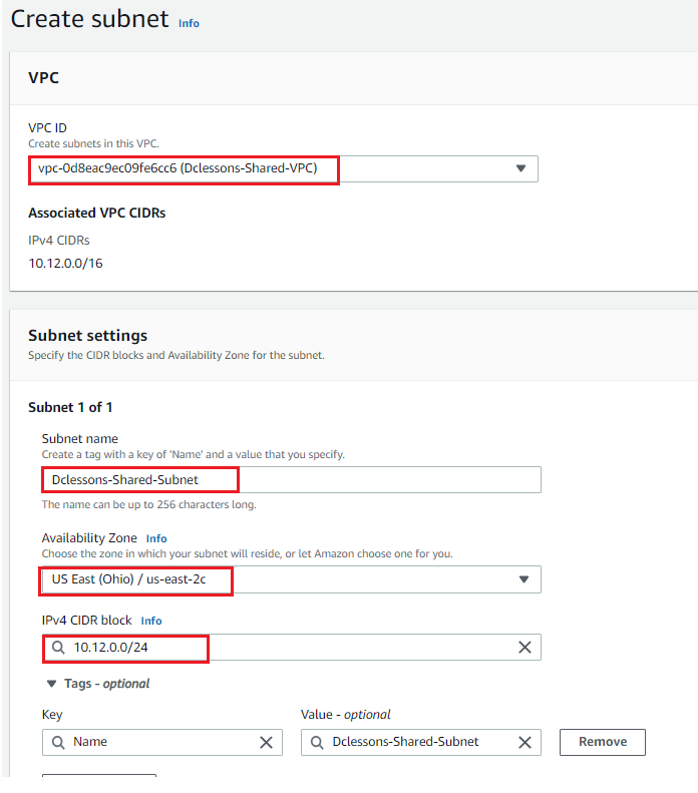
No Select Subnet in left panel of VPC and Create Subnet. In Subnet Setting Select the VPC ID Dclessons-Prod-VPC with subnet name: Dclessons-Prod-Subnet | AZ: us-east-2a | IPv4 Block: 10.10.0.0/24 | Click Create Subnet

Refer below figure to configure subnet for test and shared VPC
Now you can see all three subnets has been configured in each respective VPC.

IN Left panel of VPC, Select Internet Gateway | Click Create Internet gateway | In IGW Setting Name: Dclessons-Prod-IGW | Click Create Internet Gateway
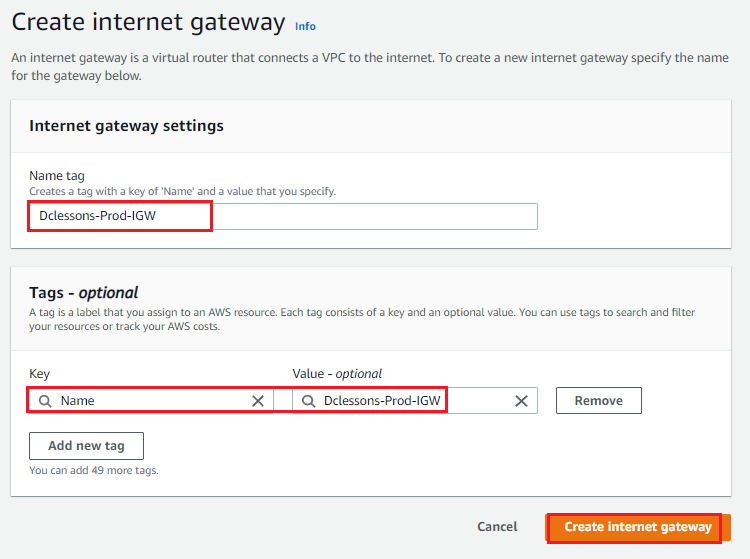
Now Once IGW is created, attach it with Dclessons-prod-VPC

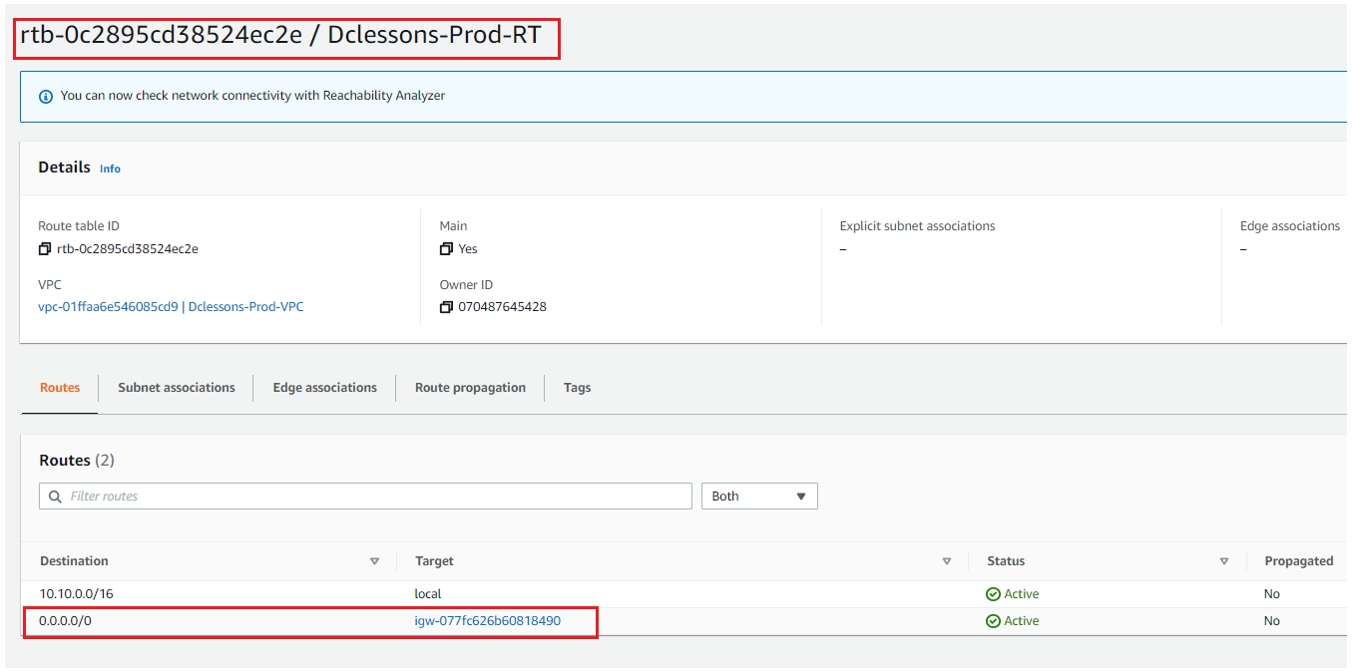
Now In Left Panel of VPC, Select Route Table | Select Dclessons-Prod-RT | Edit Routes to add default routes, with target to IGW.
Configure EC2 instance
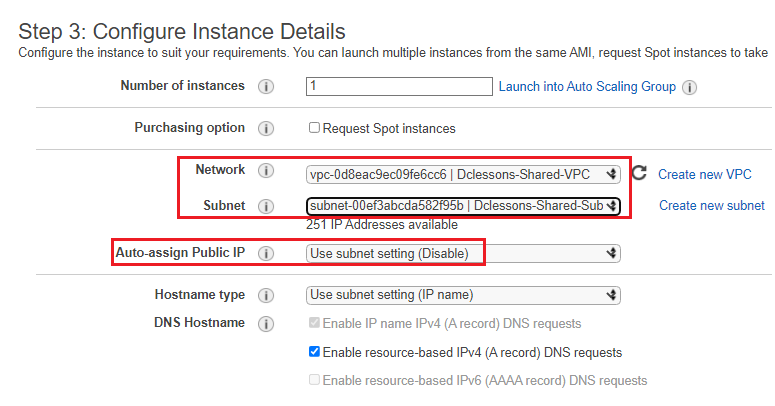
Now We will configure Amazon Linux AMI Instance in each VPC, how Ever EC2 instance in Dclessons-prod-VPC will have Auto-assign public IP – enable , Select Default Storage and Default SG to allow all traffic .
Refer below figure to configure EC2 instance


Now you can see all three EC2 instances are running in its respective VPC.

For Security Groups, we have used default Security Groups in Each VPC and have renamed it as per VPC name.

Create Transit Gateway & Attachments
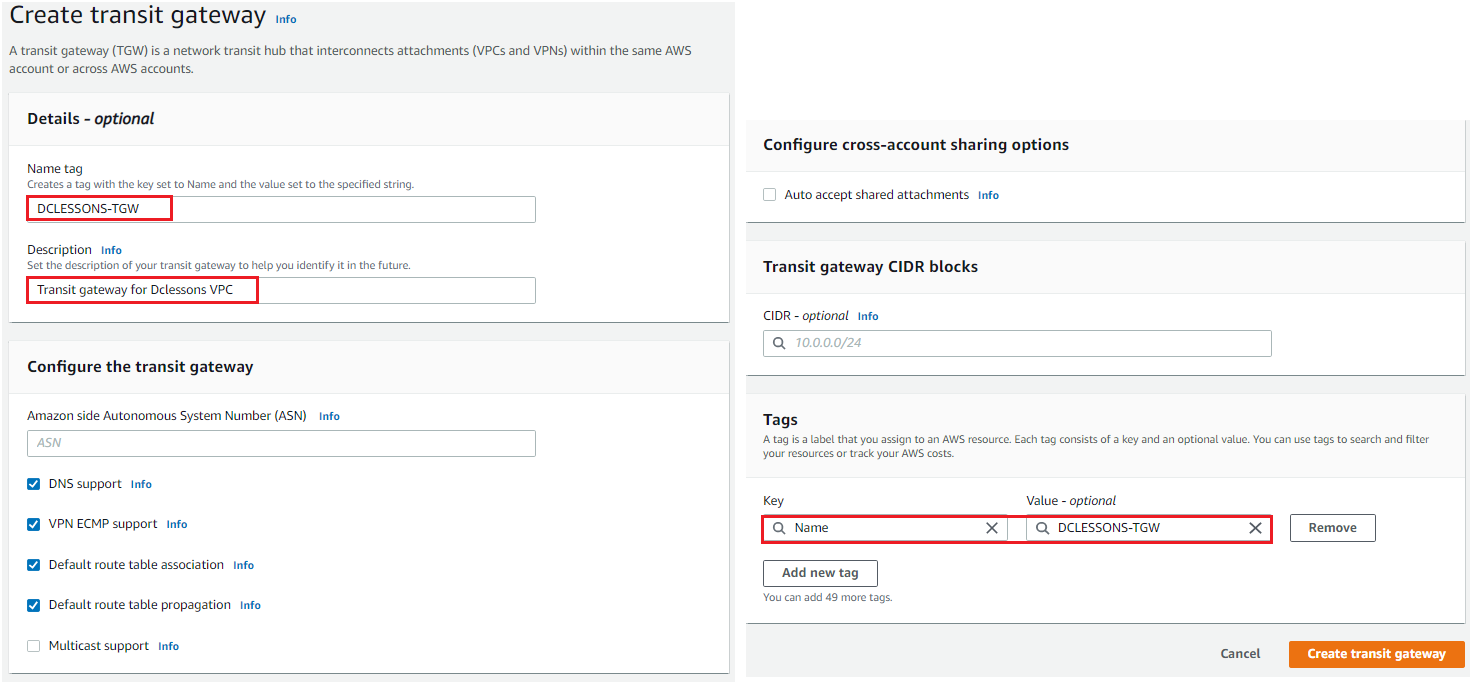
In VPC Left panel, Select Transit Gateway under Transit Gateway | Click Create Transit gateway
Under Create Transit Gateway | Name: DCLESSONS-TGW | leave all default | Click Create Transit Gateway
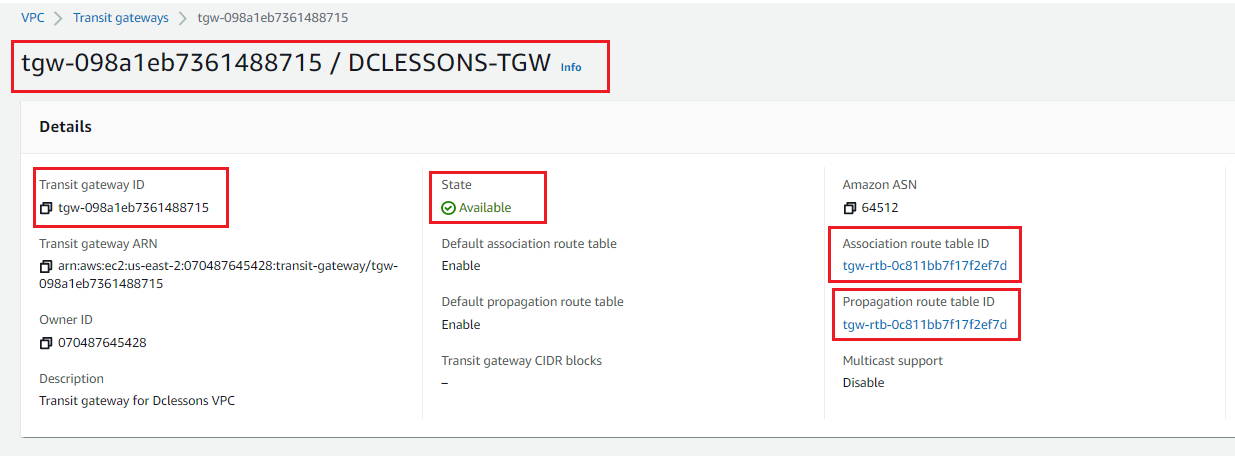
Once Transit Gateway is created, its setting can be seeing in detail, It has already associated Route Table and status is Active.
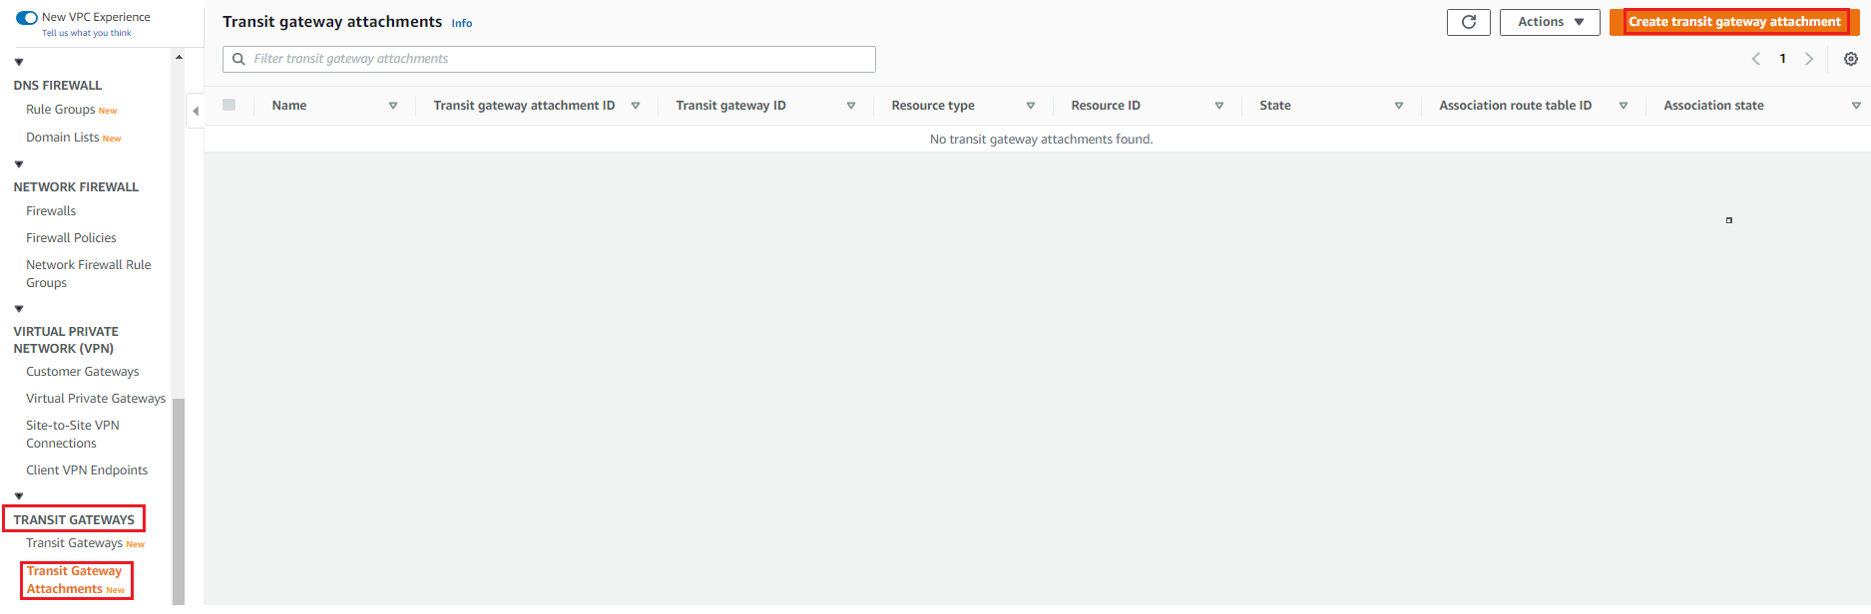
Now In Left panel of VPC, Click Transit Gateway attachments under Transit Gateway | Click Create Transit Gateway Attachments.
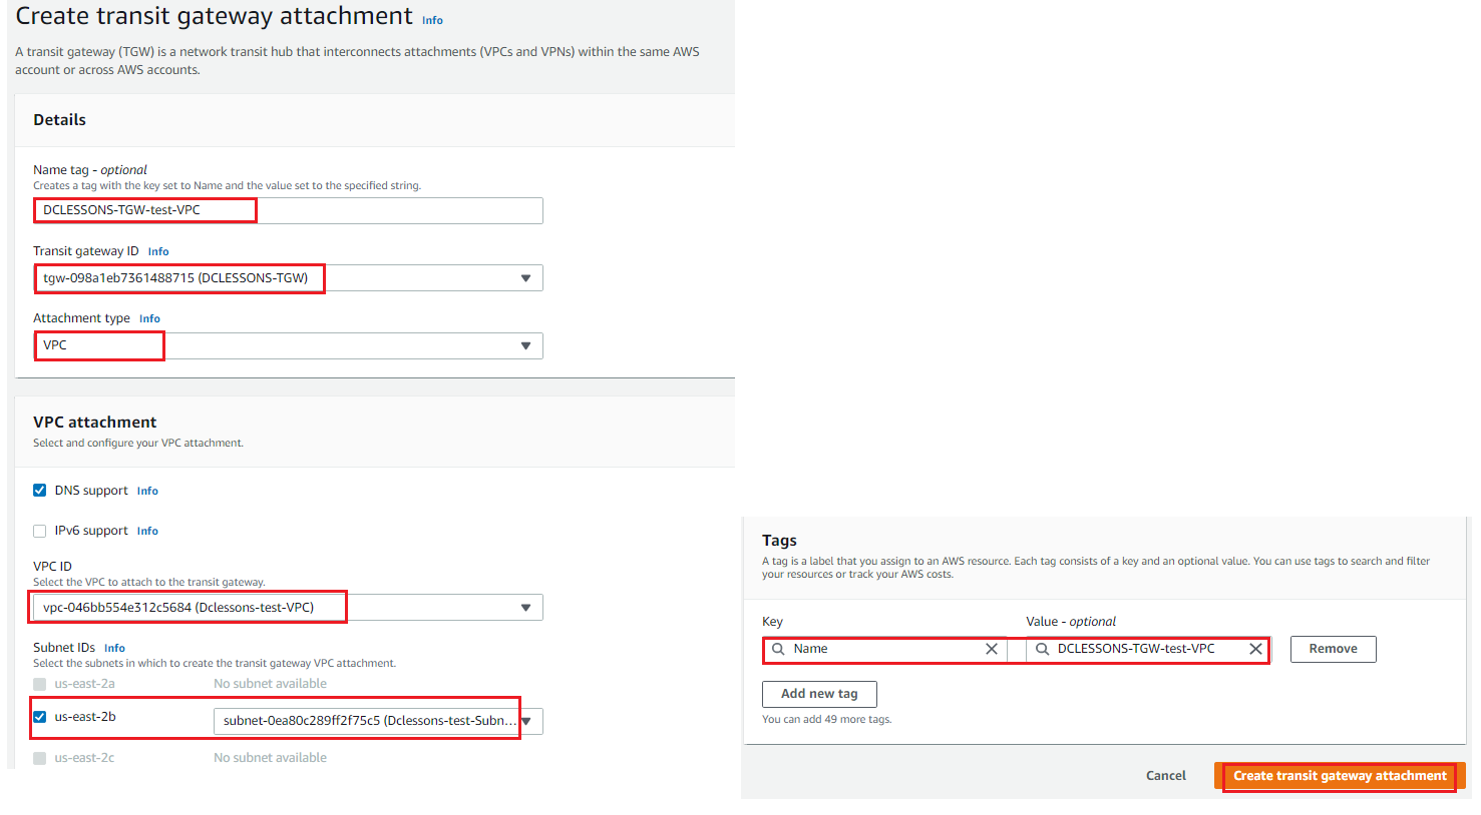
Under Transit Gateway Attachments section | Name: DCLESSONS-TGW-PROD-VPC | Select Transit Gateway: DCLESSONS-TGW | Attachments Type: VPC | VPC ID: Dclessons-Prod-VPC and Subnet in that VPC | Click Create Transit Gateway Attachments

Like Wise Create Other Two Transit Gateway attachments for test and Shared VPC as shown in below figure.
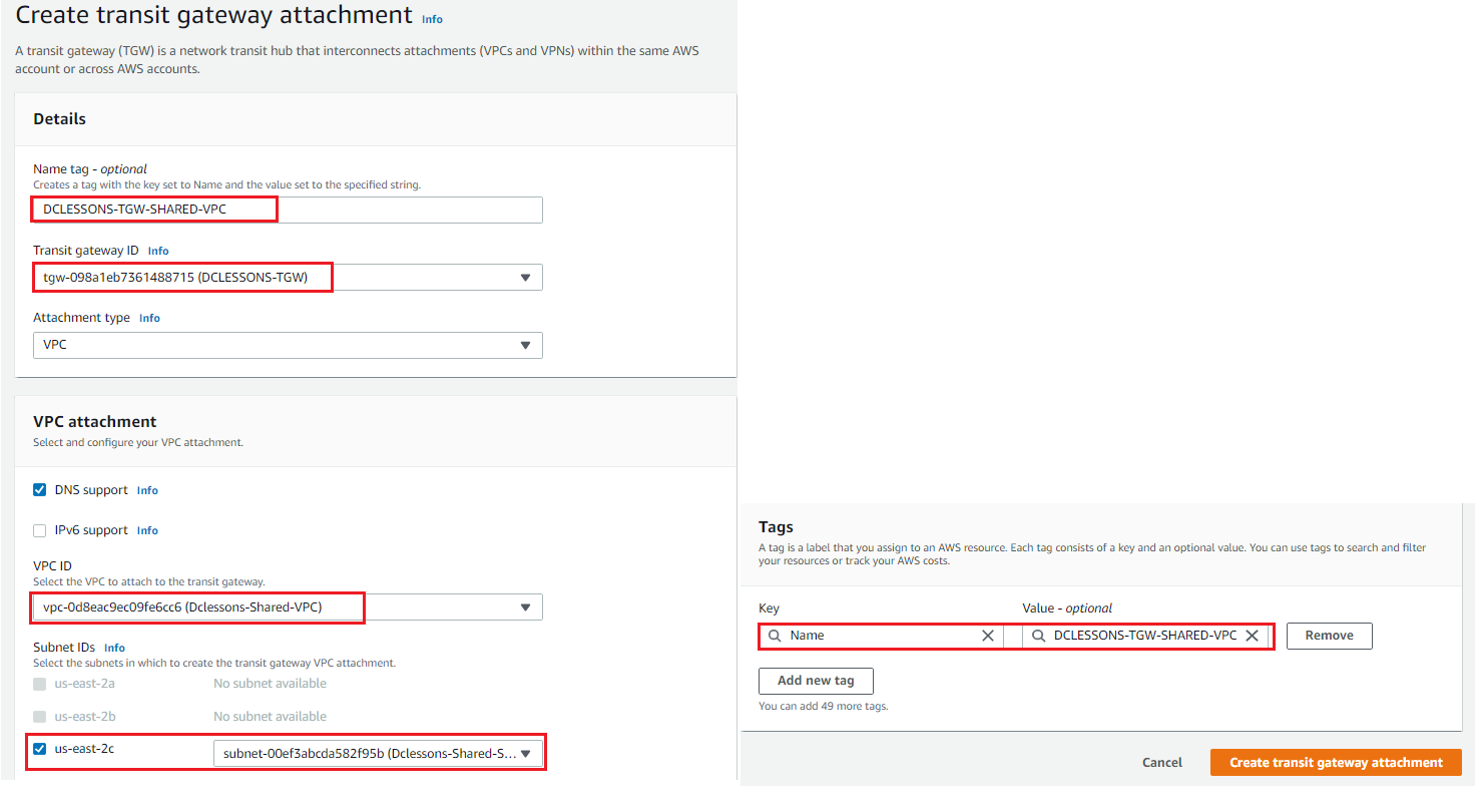
Now You can see that Transit gateway has been properly attached to all 3 respective VOC via transit gateway Attachments.

Configure Transit Gateway Route tables
Select Transit Gateway Route Tables under Transit Gateway section in VPC left Panel | You will see Default TGW Route Table | We have renamed it to DCLESSONS-TGW-RT.

Comment
TABLE OF CONTENTS
- LAB: Create a Custom VPC & test reachability between EC2 via Internet GW and NAT GW.
- LAB: Configure EC2 as VPN Server for Open VPN Connection
- LAB: Configure AWS Site to Site VPN Connection
- LAB: Configure Network Loadbalancer
- LAB : Configure Transit Gateway with Segmentation
- LAB :Configure Transit Gateway Peering between Two VPC
- LAB: Configure VPC Peering between Two VPC
- LAB : Configure VPC Endpoint to access S3
- LAB: Configure End to End VPC Endpoint Service
- LAB : Create VPC Flow Logs and Generate Traffic
- LAB : Configure WAF to block Web traffic
RECENT POSTS
- Installing Context-Aware Network Access Control using Cisco ISE Policies
- Designing Network Access Control that is Scalable using Cisco ISE Architecture
- Enterprise Network Access Control and Policy Enforcement using Cisco ISE
- Secure Device Administration and Network Access Using AAA Architecture
- Designing Enterprise-Class Hybrid Cloud Connectivity Using AWS Networking Services
- Exploring Core AWS Networking and Messaging Concepts for Modern Cloud Architectures
- Understanding Key AWS Services for Modern Cloud Architectures
- Building a Strong AWS Foundation with Amazon S3, EC2, and Virtual Private Cloud
- Understanding the ENSDWI Course: Advanced Cisco SD-WAN (Viptela) Concepts
- A Complete Guide to the DCACI-A Course: Mastering Advanced Cisco ACI Concepts


LEAVE A COMMENT
Please login here to comment.