EMAIL SUPPORT
dclessons@dclessons.comLOCATION
USLAB Configure Policies with Nexus Dashboard Orchestrator
Task
- Define Site and Import Tenant
- Provision Tenant Using a Schema
- Configure Fabric Connectivity Infra
Solution
Login to Nexus Dashboard. You will configure a site through the navigation pane.
Go to Admin Console.
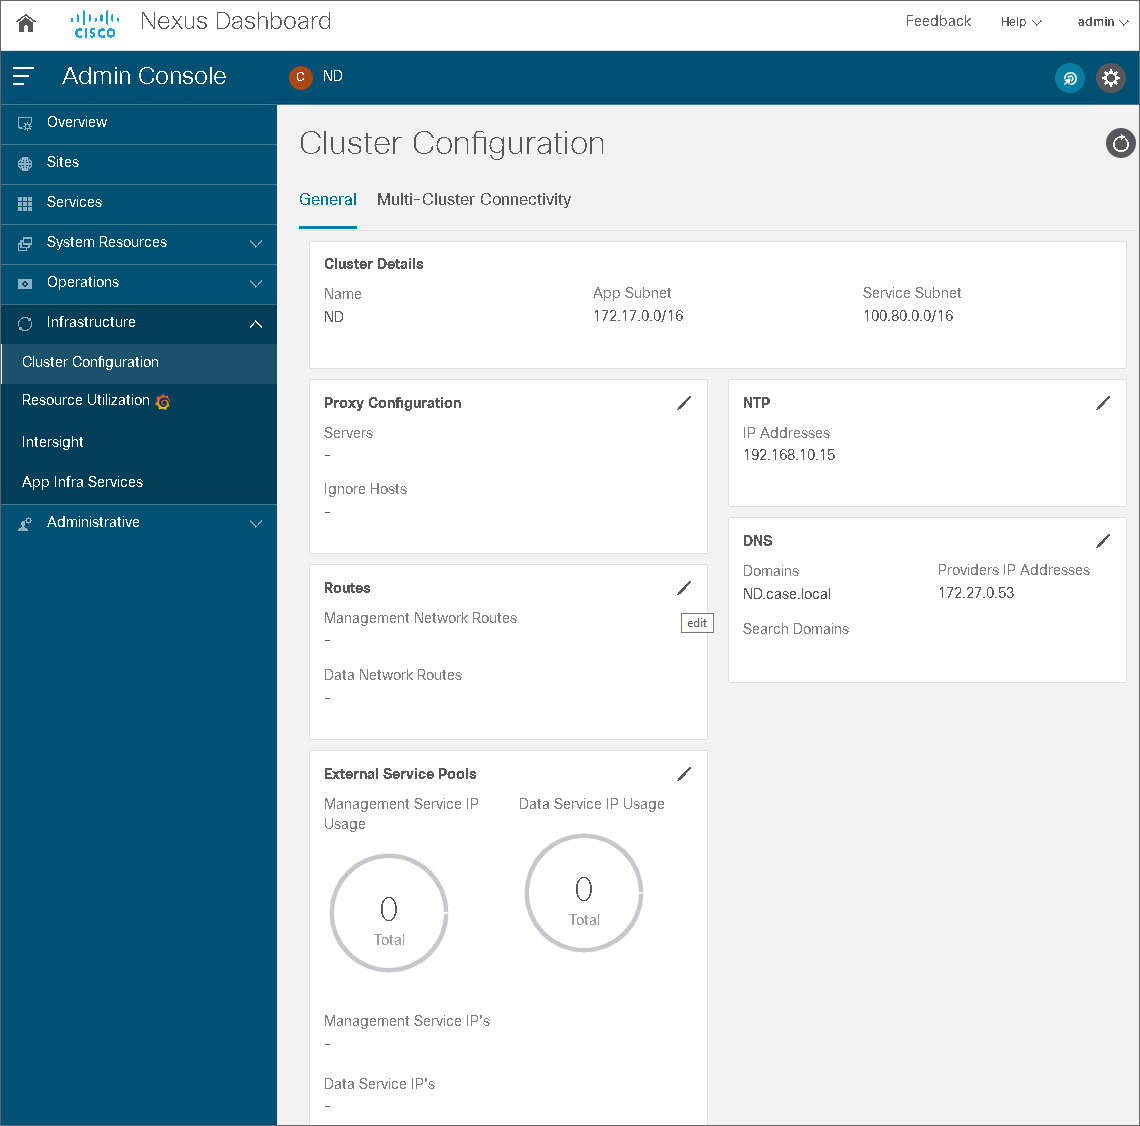
Go to Infrastructure >Cluster Configuration. In the Routes area, click Edit (the pencil symbol), choose Add Management Network Routes, enter 192.168.11.0/24, confirm it, and click Save.
Select Add Management Network Routes:
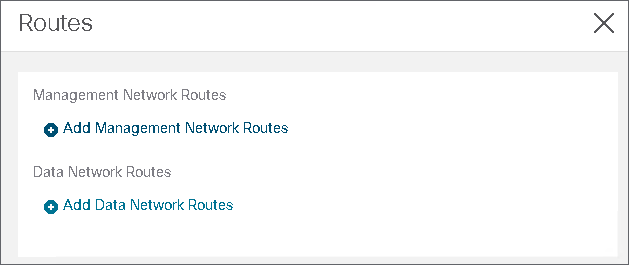
Configure a route for 192.168.11.0/24 as shown below. This route will point via the default gateway 192.168.10.254, which has been set during deployment. Click on the green check mark to confirm the route and save it:
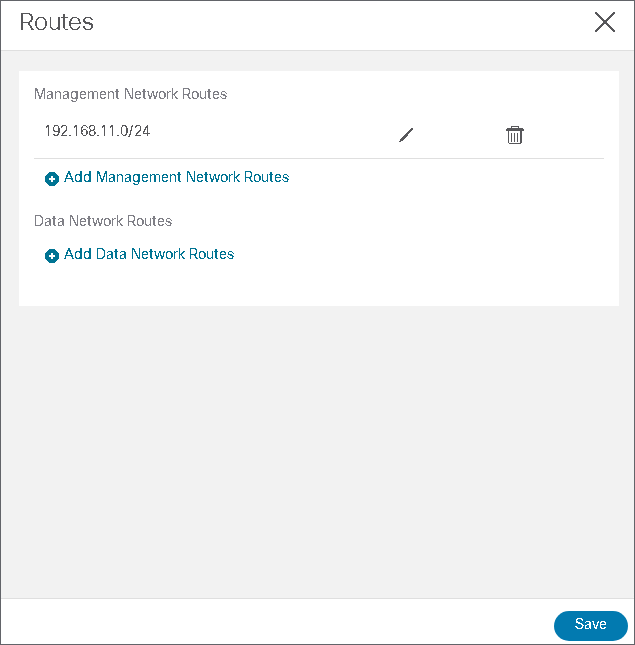
The route should appear in the cluster configuration settings:
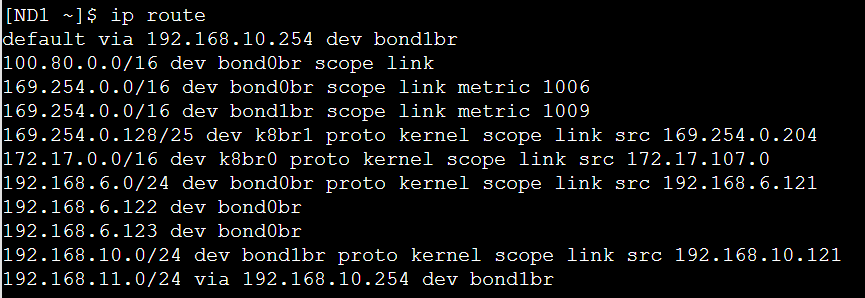
You could open PuTTY to connect to the Nexus Dashboard CLI and verify the routing table using the ip route command. The route for 192.168.11.0/24 should point via 192.168.10.254
Go to Sites, click Add Site and configure a site with the following settings. Drop pin for your location and click Save.
-
Site Type: ACI
-
Site Name: HQ
-
Host Name / IP Address: 192.168.11.1
-
Username: admin
-
Password: XXXXX
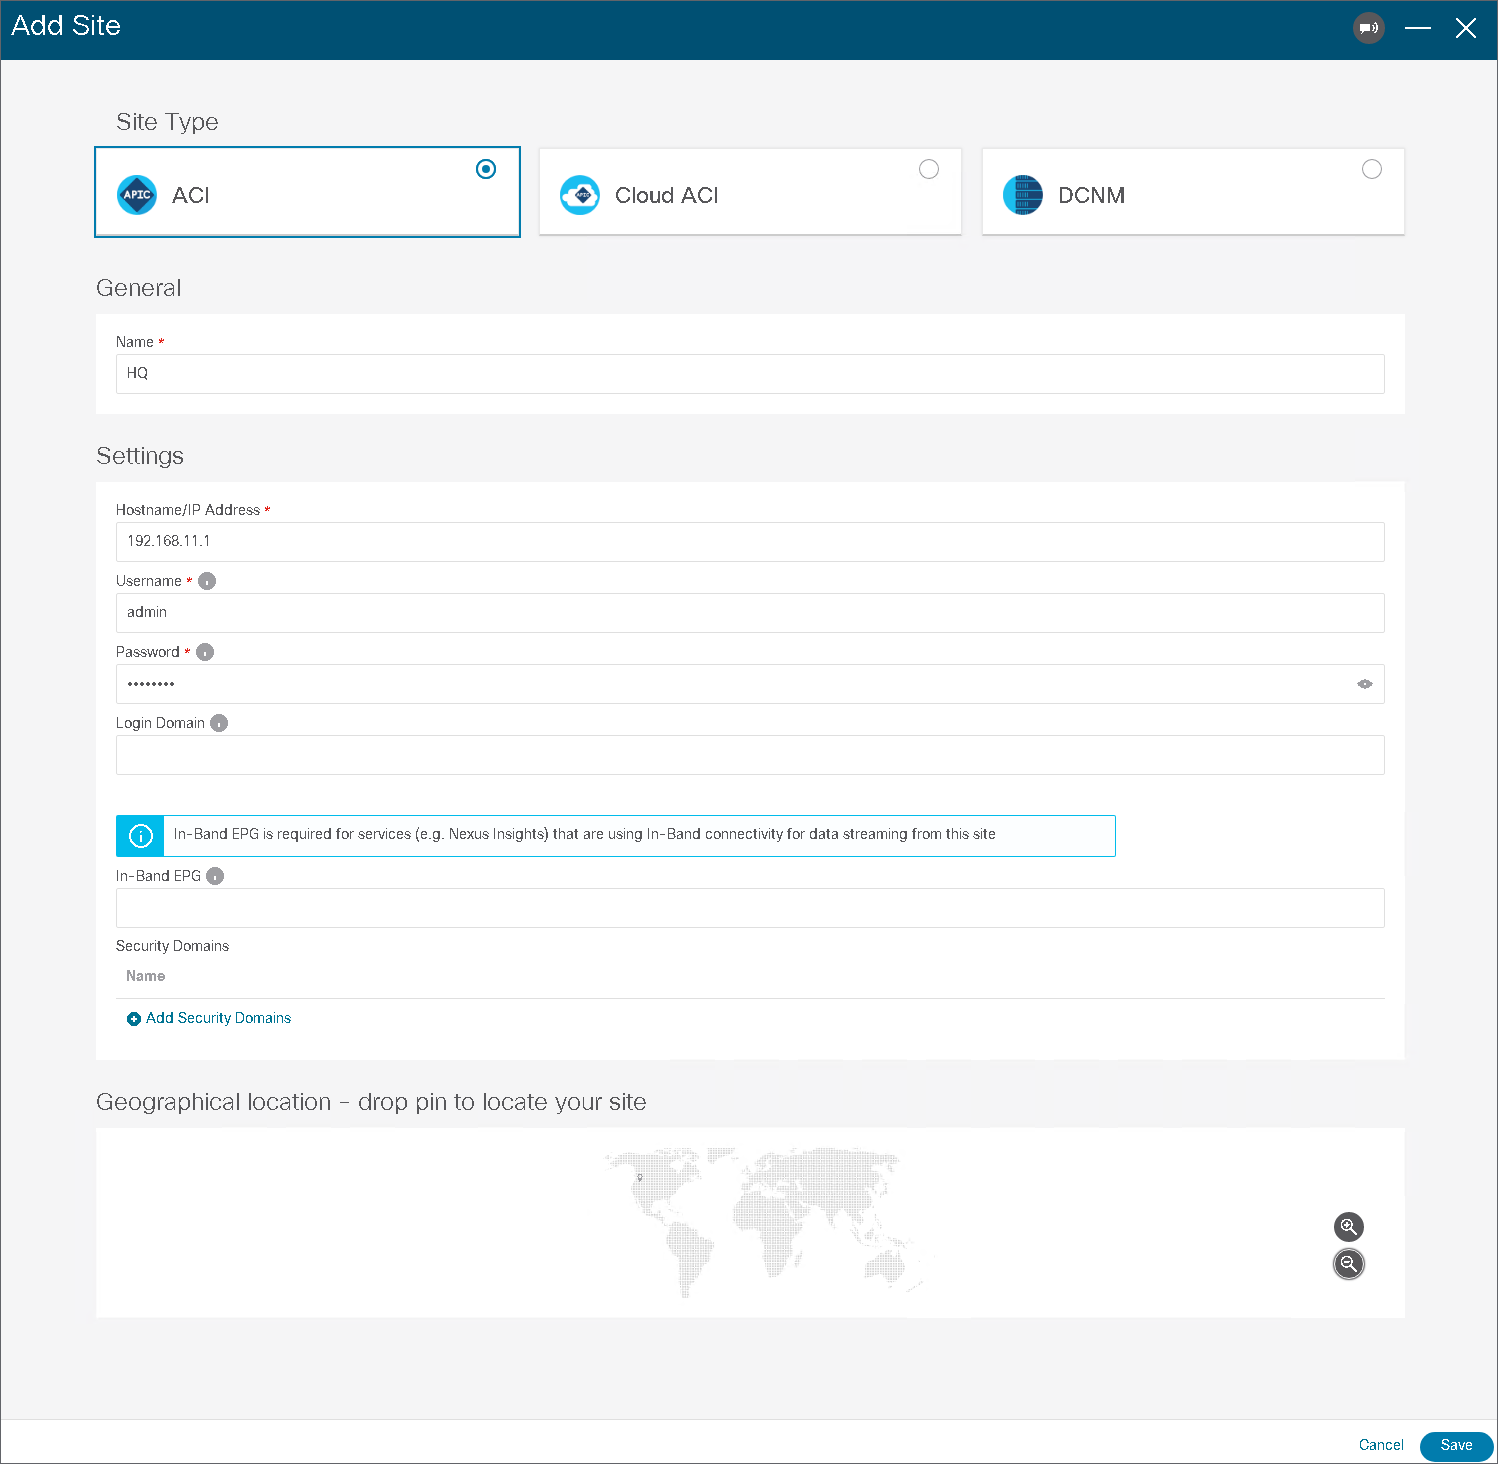
Wait several seconds and verify that the site connectivity status turns to Up.
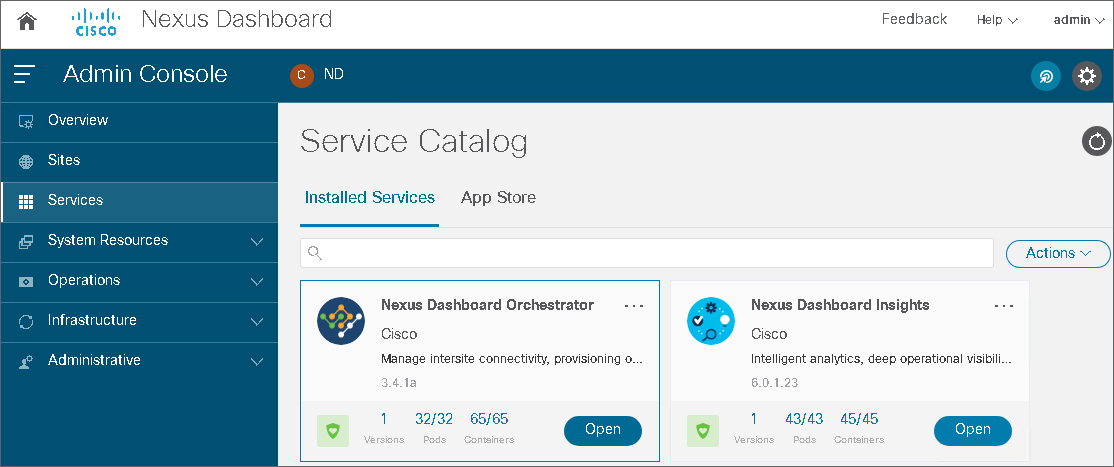
Go to Services and open the Nexus Dashboard Orchestrator.
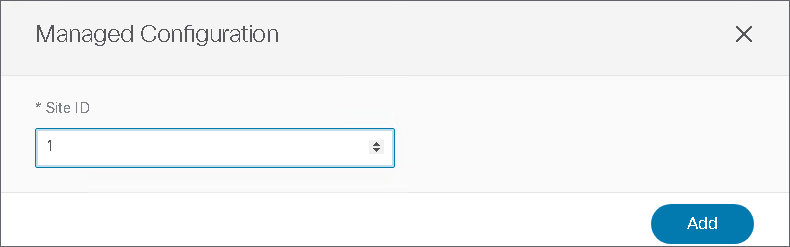
In the Orchestrator, go to Infrastructure > Sites. Set the state of the HQ site to Managed. Configure the Site ID 1 and click Add.
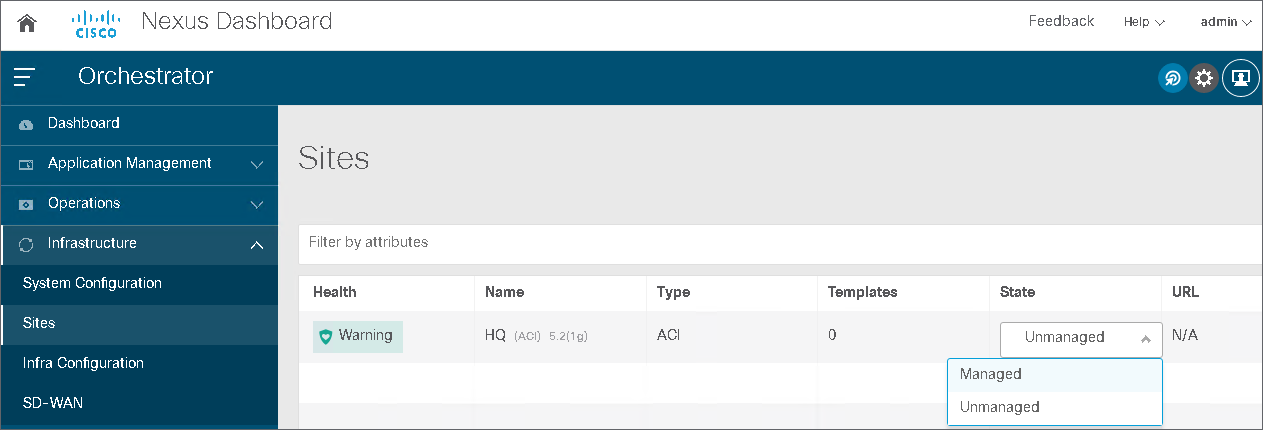
Set the Site ID to 1 and click Add:
After about a minute, the site state should appear as Managed. The Orchestrator allows you to configure new tenant definitions or import a tenant from an existing site. You will use both options, starting with the import.

Comment
TABLE OF CONTENTS
RECENT POSTS
- Installing Context-Aware Network Access Control using Cisco ISE Policies
- Designing Network Access Control that is Scalable using Cisco ISE Architecture
- Enterprise Network Access Control and Policy Enforcement using Cisco ISE
- Secure Device Administration and Network Access Using AAA Architecture
- Designing Enterprise-Class Hybrid Cloud Connectivity Using AWS Networking Services
- Exploring Core AWS Networking and Messaging Concepts for Modern Cloud Architectures
- Understanding Key AWS Services for Modern Cloud Architectures
- Building a Strong AWS Foundation with Amazon S3, EC2, and Virtual Private Cloud
- Understanding the ENSDWI Course: Advanced Cisco SD-WAN (Viptela) Concepts
- A Complete Guide to the DCACI-A Course: Mastering Advanced Cisco ACI Concepts


LEAVE A COMMENT
Please login here to comment.