EMAIL SUPPORT
dclessons@dclessons.comLOCATION
USNSX Configuring L2VPN
Task :
- Deploy an NSX Edge L2VPN Server on the RegionA01-MGMT01
- Deploy NSX Edge L2VPN Client on the RegionA01-COMP01 cluster
- Test the tunnel status to verify a successful configuration.
Solution:
Open the Google Chrome web browser from the desktop
- Click Home icon.
- Click Networking & Security.
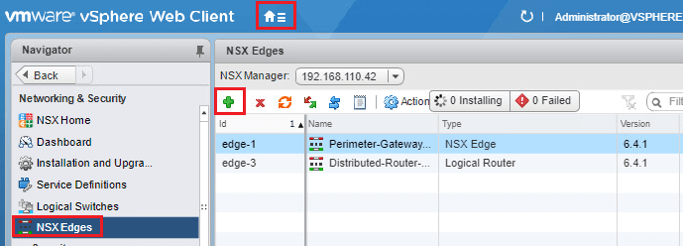
To create the L2VPN Server service, we must first deploy an NSX Edge Gateway for the service to run on.
- Click on NSX Edges.
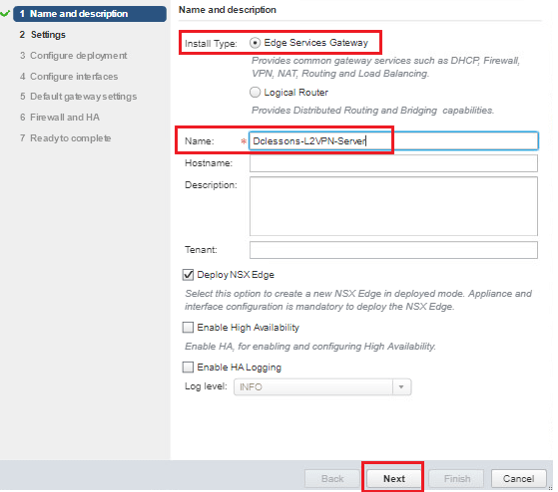
- Click on Green Plus icon.
- Enter DClessons-L2VPN-Server for Name.
- Click Next.
- Enter XXXXXXXXXX for Password.
- Enter XXXXXXXXXX for Confirm password.
- Check Enable SSH access.
- Click Next.
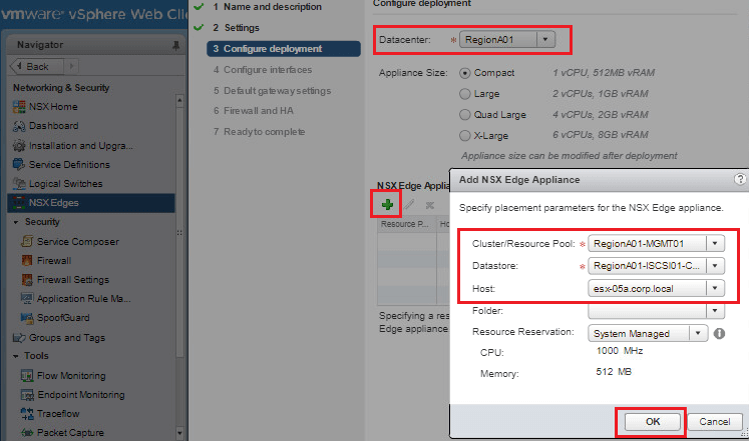
- Click the Green Plus icon.
- Select RegionA01-MGMT01 for Cluster/Resource Pool.
- Select RegionA01-ISCSI01-COMP01 for Datastore.
- Select esx-05a.corp.local for Host.
- Click OK. | Click Next
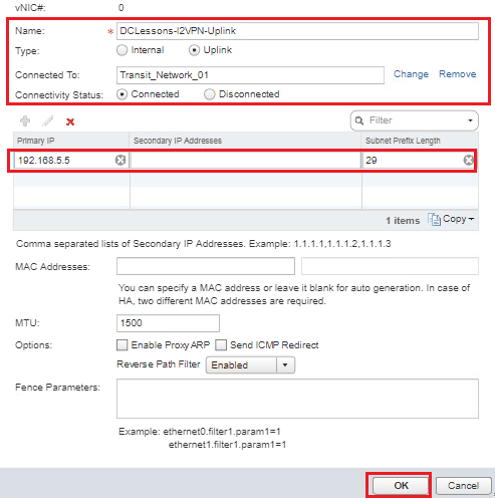
- Click Green Plus icon.
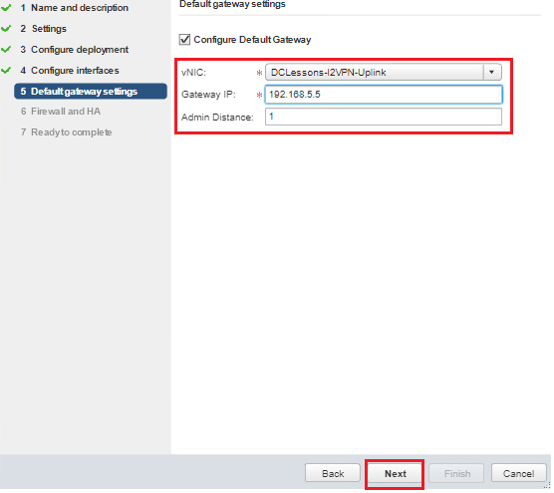
- Enter DClessons-L2VPN-Uplink for Name.
- Select Uplink for Type.
- Click the Green Plus icon.
- Enter 192.168.5.5 for Primary IP Address.
- Enter 29 for Subnet Prefix Length.
- Click the Select link to the right of Connected To. Click the radio button to the left of Transit_Network_01 (5005) to select it.
- Click OK | Click OK.
- Click Next.
- Enter 192.168.5.1 for the Gateway IP.
- Click Next.
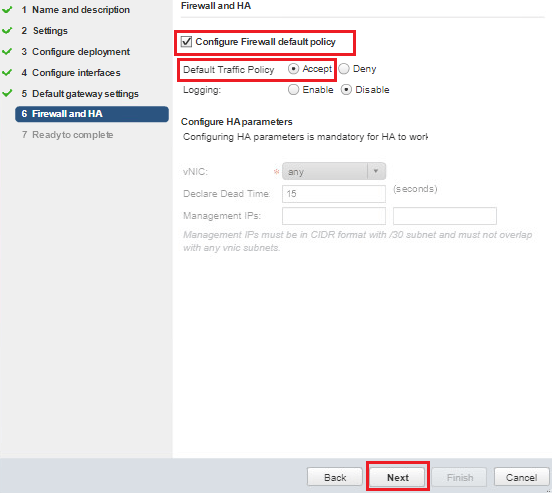
- Check Configure Firewall default policy.
- Select Accept for Default Traffic Policy.
- Click Next.
Click Finish
Preparing DClessons-L2VPN-Server NSX Edge for L2VPN Connections
Before we configure the newly deployed NSX Edge for L2VPN connections, we need to complete the following steps:

Comment
You are will be the first.
TABLE OF CONTENTS
- LAB NSX Manager Installation
- LAB NSX Logical Switching Configuration
- LAB NSX Logical Router Configuration
- LAB NSX EDGE SERVICES GATEWAY
- Gateway
- LAB NSX Edge Service Gateway as DHCP Relay
- LAB NSX Configuring L2VPN
- LAB NSX DFW Configuration
- LAB NSX Dynamic Security Group Configuration
- LAB NSX Micro-Segmentation
RECENT POSTS
- Installing Context-Aware Network Access Control using Cisco ISE Policies
- Designing Network Access Control that is Scalable using Cisco ISE Architecture
- Enterprise Network Access Control and Policy Enforcement using Cisco ISE
- Secure Device Administration and Network Access Using AAA Architecture
- Designing Enterprise-Class Hybrid Cloud Connectivity Using AWS Networking Services
- Exploring Core AWS Networking and Messaging Concepts for Modern Cloud Architectures
- Understanding Key AWS Services for Modern Cloud Architectures
- Building a Strong AWS Foundation with Amazon S3, EC2, and Virtual Private Cloud
- Understanding the ENSDWI Course: Advanced Cisco SD-WAN (Viptela) Concepts
- A Complete Guide to the DCACI-A Course: Mastering Advanced Cisco ACI Concepts


LEAVE A COMMENT
Please login here to comment.