EMAIL SUPPORT
dclessons@dclessons.comLOCATION
USConfigure Layer 2 Connectivity in Same EPG
Task:
- Create tenant : Sales
- Create a VRF Presales_VRF
- bridge domain name Presales_BD
- bridge domain L3 Configurations, disable unicast routing
- application profile name eCommerce_AP
- EPG name Web_EPG, assign it to your bridge domain Presales_BD,
- EPG Web_EPG, right-click Domains (VMs and Bare Metals), and choose Add Physical Domain Association.
- Deploy Static EPG on PC, VPC, or Interface.
- Add Static Path to External SVI Endpoint and Test Endpoint Connectivity
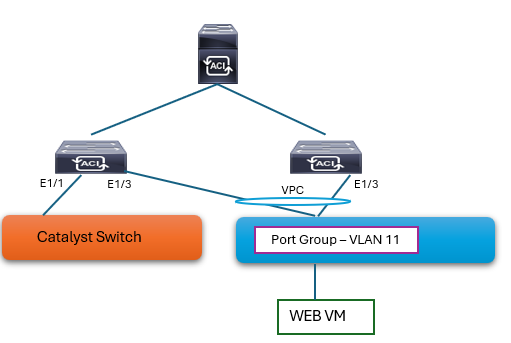
Topology:
Solution
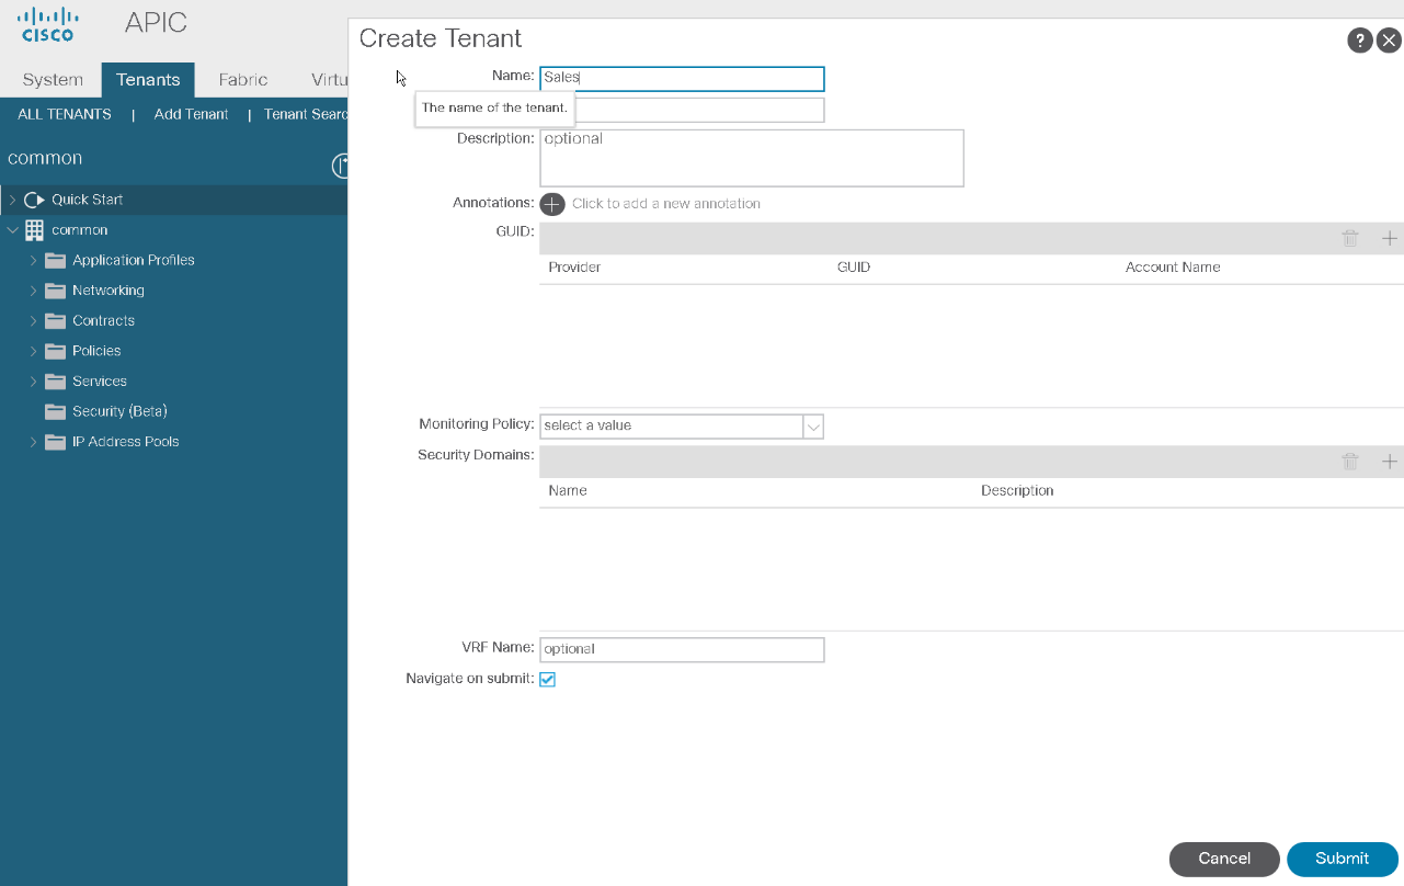
Choose Tenants > Add Tenant. Enter the tenant name Sales and click Submit without providing any other parameters.
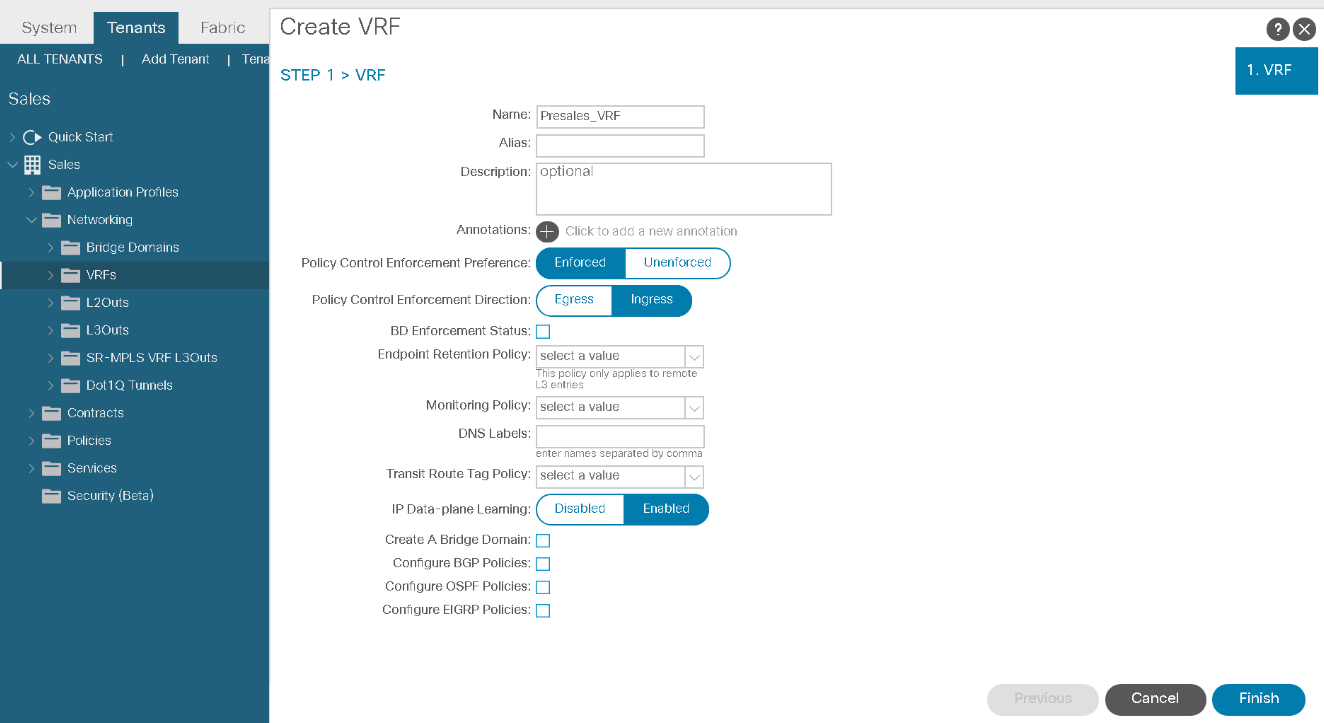
In the Networking menu of the tenant Sales, right-click VRFs, and choose Create VRF.
Create a VRF Presales_VRF and clear the Create A Bridge Domain check box. Leave other settings at their default values and click Finish.
In Networking, right-click Bridge Domains and choose Create Bridge Domain.
Enter the bridge domain name Presales_BD, choose the VRF Presales_VRF, and click Next.

In the bridge domain L3 Configurations, disable unicast routing by clearing its check box. Click Next.

View the Advanced/Troubleshooting settings and click Finish.
Configure Application Profile and EPG with Static Path (vPC)
Within your tenant Sales, right-click Application Profiles, and choose Create Application Profile.

Comment
TABLE OF CONTENTS
- LAB 1 How to Validate Fabric Discovery
- LAB 2 Configure NTP
- LAB 3 Create & Configure Access Policies & vPC
- LAB 4 Configure Layer 2 Connectivity in Same EPG
- LAB 5 Configure Inter EPG layer 2 Connectivity
- LAB 6 Configure Inter-EPG Layer3 Connectivity
- LAB 7 Traffic Forwarding Method in BD
- LAB 8 Configure External Layer 2 Connection
- LAB 9 Configure External Layer 3 (L3Out) Connection
- LAB 10 Integrate APIC with vCenter using VMware VDS
RECENT POSTS
- Installing Context-Aware Network Access Control using Cisco ISE Policies
- Designing Network Access Control that is Scalable using Cisco ISE Architecture
- Enterprise Network Access Control and Policy Enforcement using Cisco ISE
- Secure Device Administration and Network Access Using AAA Architecture
- Designing Enterprise-Class Hybrid Cloud Connectivity Using AWS Networking Services
- Exploring Core AWS Networking and Messaging Concepts for Modern Cloud Architectures
- Understanding Key AWS Services for Modern Cloud Architectures
- Building a Strong AWS Foundation with Amazon S3, EC2, and Virtual Private Cloud
- Understanding the ENSDWI Course: Advanced Cisco SD-WAN (Viptela) Concepts
- A Complete Guide to the DCACI-A Course: Mastering Advanced Cisco ACI Concepts


LEAVE A COMMENT
Please login here to comment.